Excel for Mac: Power Query – From Table/Range
9 February 2024
This week in our series about Microsoft Excel for Mac, we show an easy way to give more power to Power Query in Excel for Mac. As of November 2023, Power Query on Mac does not have a button on the Data tab to let you start a query from a table or range in the current workbook. No problem! Keep reading to find out how to create such queries without the button.
If you use Excel for Mac, and you’ve been watching the gradual introduction of Power Query features over the last few years, you know that it doesn’t have all the capabilities that it has on Windows. The Excel team has been adding more and more capability to Mac, but it’s still missing some key features. One in particular is the ‘From Table/Range’ button:
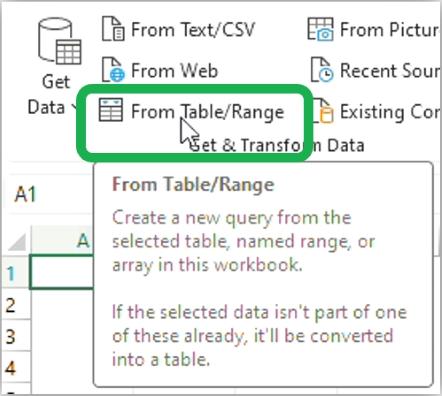
Fortunately, this shouldn’t hold you back if you want to pull data from the current workbook into Power Query on Mac. Just follow the simple steps below:
- Go
to Data the Data tab of the Ribbon and press ‘Get Data’ (Power Query)
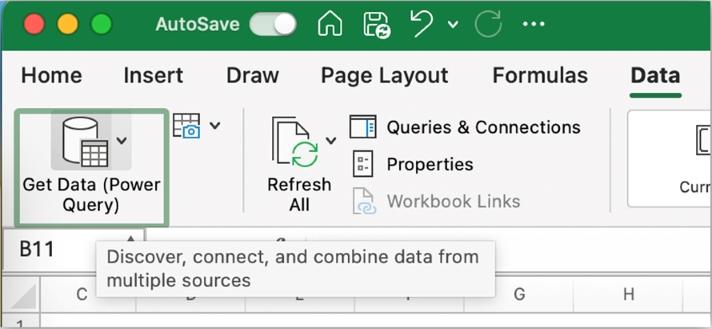
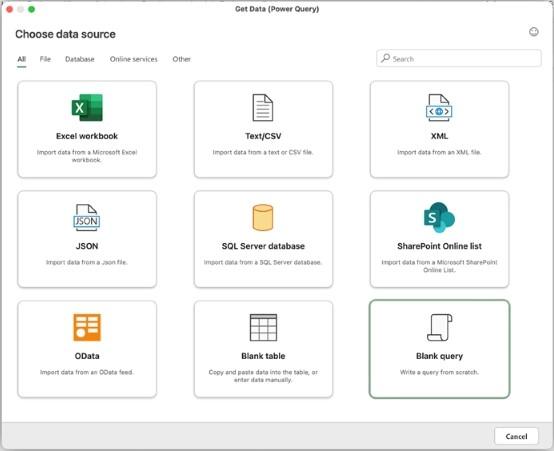
- In the window that opens, press the 'Blank Query' button.
- Where you see two [2] double quotes in the line that says Source = "", replace the "" with Excel.CurrentWorkbook() as shown in the screen shot below:
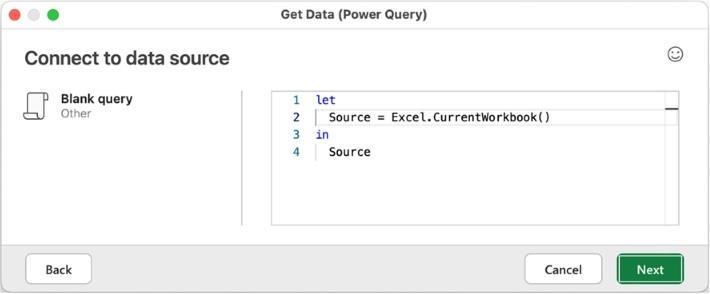
- The
code should be as follows (take care, it’s case-sensitive):
let
Source = Excel.CurrentWorkbook()
in
Source
TIP
Power Query is case-sensitive, so make sure you type Excel.CurrentWorkbook() exactly as shown above.
If you see an error like the following, it may be that you’ve typed it slightly differently [Ed. i.e. you typed it in wrongly!].
In the example below, there’s a lower-case W where it should be upper-case in “CurrentWorkbook”

- Press Next. The Power Query Editor window will appear as shown below. There will be two columns in the preview pane, Content and Name. The Content column will just say [Table], which means that each row represents a table or range of data coming from the workbook. The Name column shows the name of each table or range. In this example, there’s a table called SalesDataTable and a range called ProductsList
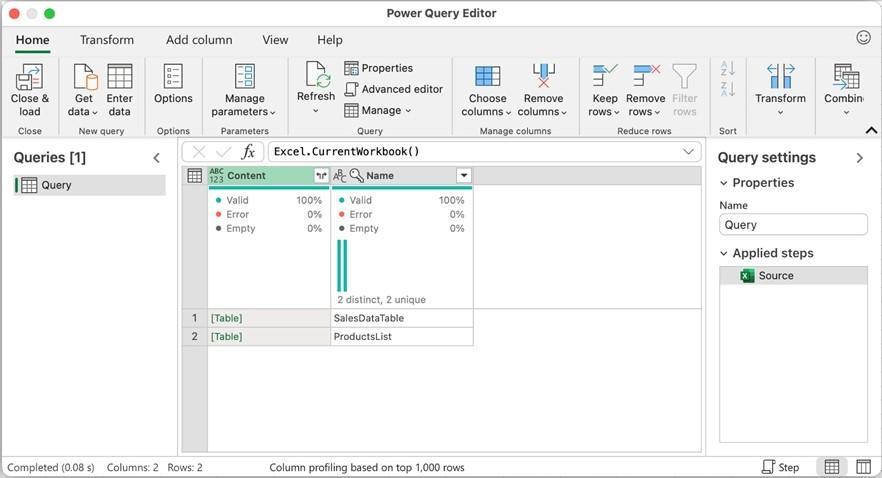
- To get the data from one of the tables or ranges, just press where it says “[Table]” in the row for the table or range you want to get data from. In the example shown here, clicking on [Table] in the row for the SalesDataTable adds steps to the query and shows the data that is being imported from that table into the Power Query Editor.

Now you can use
all the other features of Power Query to transform your data!
We hope you find this week’s topic helpful. Check back for more details about Excel for Mac and how it’s different to Excel for Windows.

