
Power BI Blog: Text Slicer
6 February 2025
Welcome back to this week’s edition of the Power BI blog series. This week, we consider the text slicer.
You might not be aware of the recently-added text slicer, available in Microsoft’s core visuals gallery. You can enable the new text slicer by navigating to Options and settings -> Options -> Preview features -> text slicer visual to ensure its selected and then restart Power BI.
The text slicer works by allowing users to input specific text that acts as a filter, targeting a designated data field. By entering the desired text in the slicer’s input box, the slicer effectively narrows down the dataset to display only the relevant information that contains the entered text. This functionality is particularly useful for handling large datasets, where quick and precise filtering is essential for efficient data analysis and presentation.
To create a text slicer visual, select the text slicer icon from the visual gallery on the Build visual tab in the Visualizations pane. This adds a visual placeholder to the report canvas.

To filter a dataset, add a text field from the data model to the ‘Field’ well to establish the text slicer’s functionality, allowing it to filter the dataset based on user input. Simply add text to the slicer’s input box, select the apply icon, or press ENTER and the slicer immediately filters the dataset, displaying results on the visual.
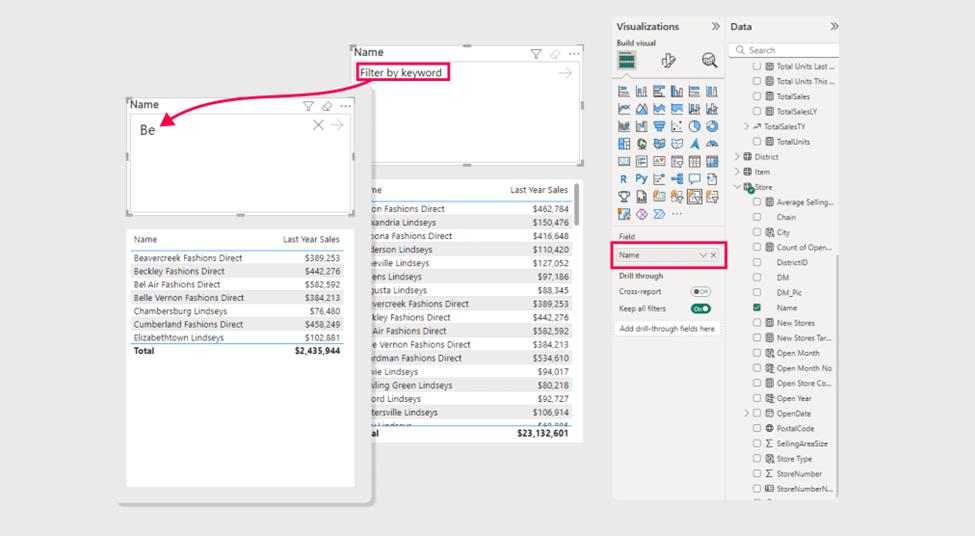
As shown here, this new text slicer is a powerful and customisable filtering tool for Power BI.
In the meantime, please remember we offer training in Power BI which you can find out more about here. If you wish to catch up on past articles, you can find all of our past Power BI blogs here.