Power Query: Flexible Appending – Part 4
23 November 2022
Welcome to our Power Query blog. This week, I explain how to change data types dynamically.
Yet again, I have three [3] Excel workbooks, each with accounting data. The first file looks like this:

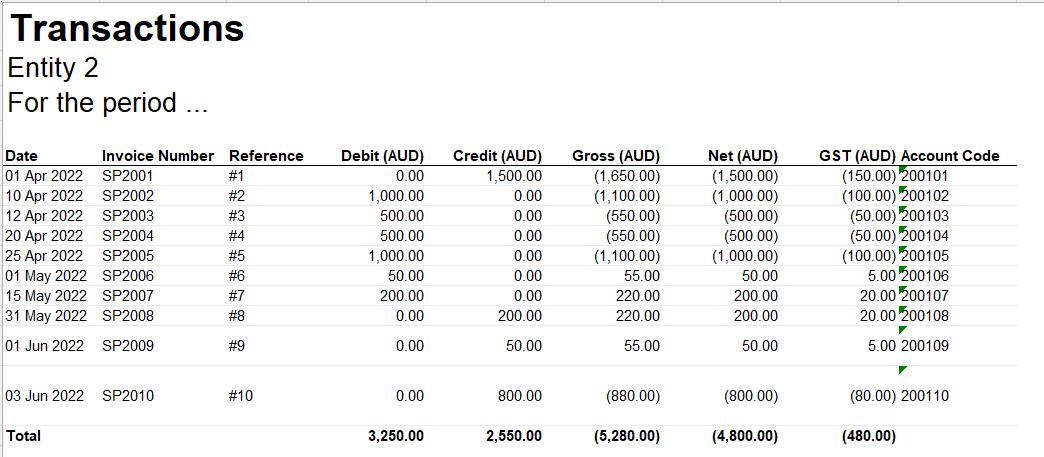
The second file looks like this:
The final file looks like this:
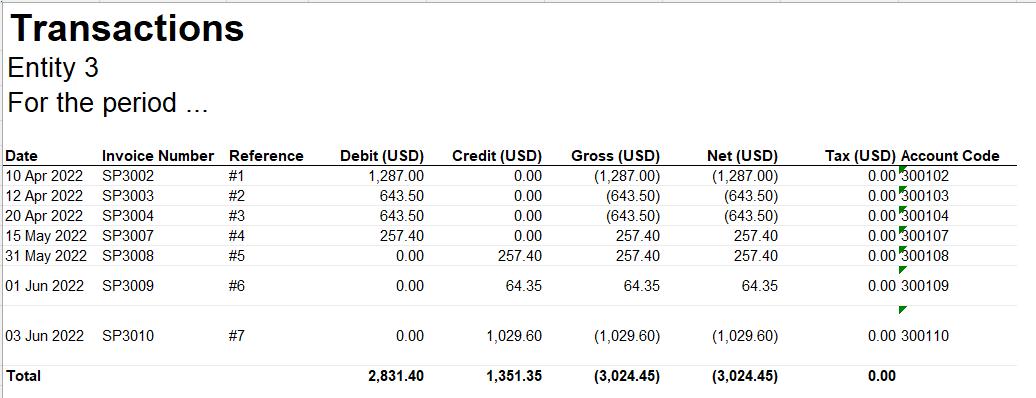
There are clearly some differences between the files. The column headings vary by country, and the first file has an extra column.
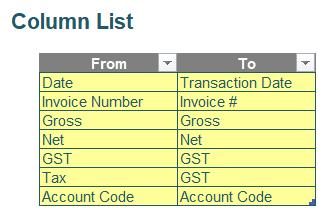
My goal is to get this data into the same table. For the purposes of this example, I am not required to convert the figures to the same currency. However, I do need to allow for more files appearing from other countries. The files are held in one folder. I have a translation table Column List in a separate Excel workbook (shown below) to help me determine the column names in the final table. No other columns are required apart from the ‘entity’ name (e.g. ‘Entity 1’).
Last week, I completed the process of dynamically removing and renaming columns without depending on their names to get the combined table as follows:
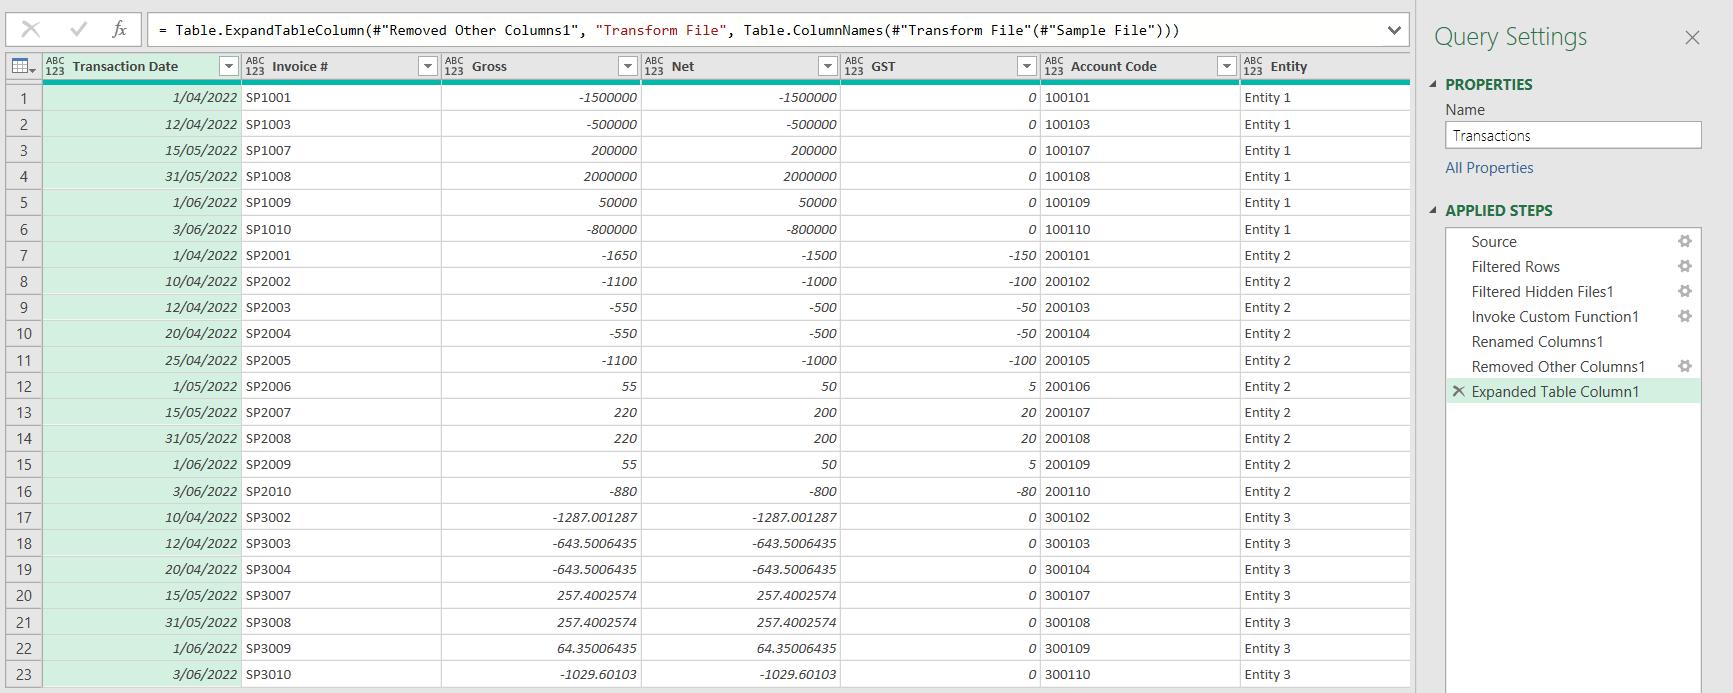
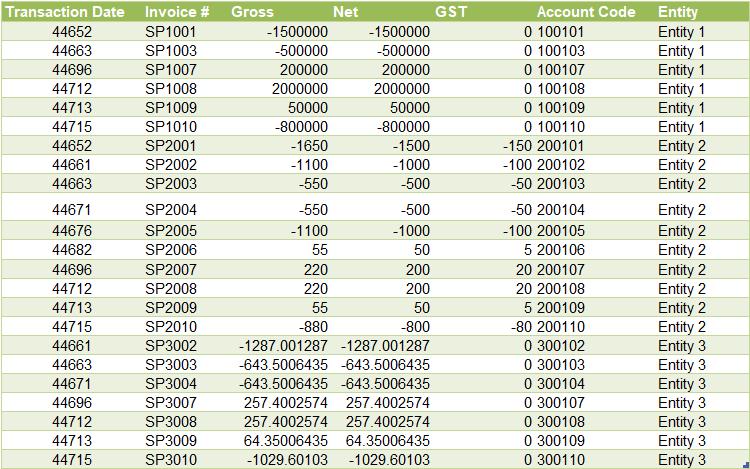
Before loading this table to the workbook, I changed the data types manually. This is a key step when cleaning data. As you can see, without this step, the data loaded to the workbook will look like the table below. For instance, the ‘Transaction Date’ column will have a number format, which is clearly wrong.
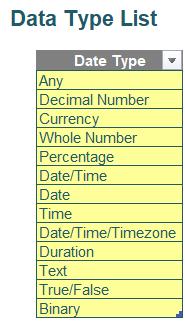
I am going change the data types dynamically. I start by building a lookup list called DataType in the workbook. It includes available data types from the Power Query User Interface (UI) as follows:
Next, I add a new column, Type, to the ColumnList table and apply a Data Validation list with the source from the DataType table above.
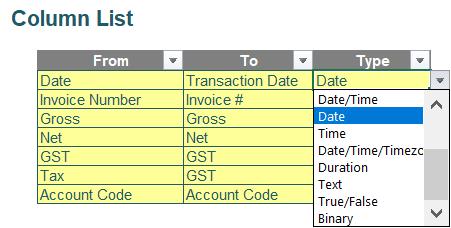
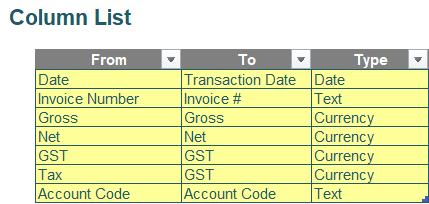
I then select an appropriate data type for each column as below.
Now, let’s come back into the Power Query Editor by creating a blank query named DataTypes with the following M code:
let
Source = #table(
{"Data Type", "PQ Type"},
{
{"Any", Any.Type},
{"Decimal Number", type number},
{"Currency", Currency.Type},
{"Whole Number", Int64.Type},
{"Percentage", Percentage.Type},
{"Date/Time", type datetime},
{"Date", type date},
{"Time", type time},
{"Date/Time/Timezone", type datetimezone},
{"Duration", type duration},
{"Text", type text},
{"True/False", type logical},
{"Binary", type binary}
})
in
Source
This table includes data type names and their corresponding types in Power Query syntax.
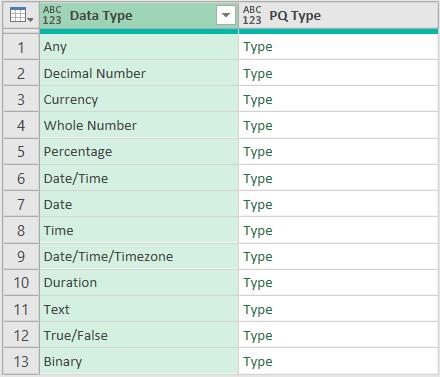
I create a reference query from ColumnList which I call ChangedTypes. I merge ChangedTypes with the DataTypes query.
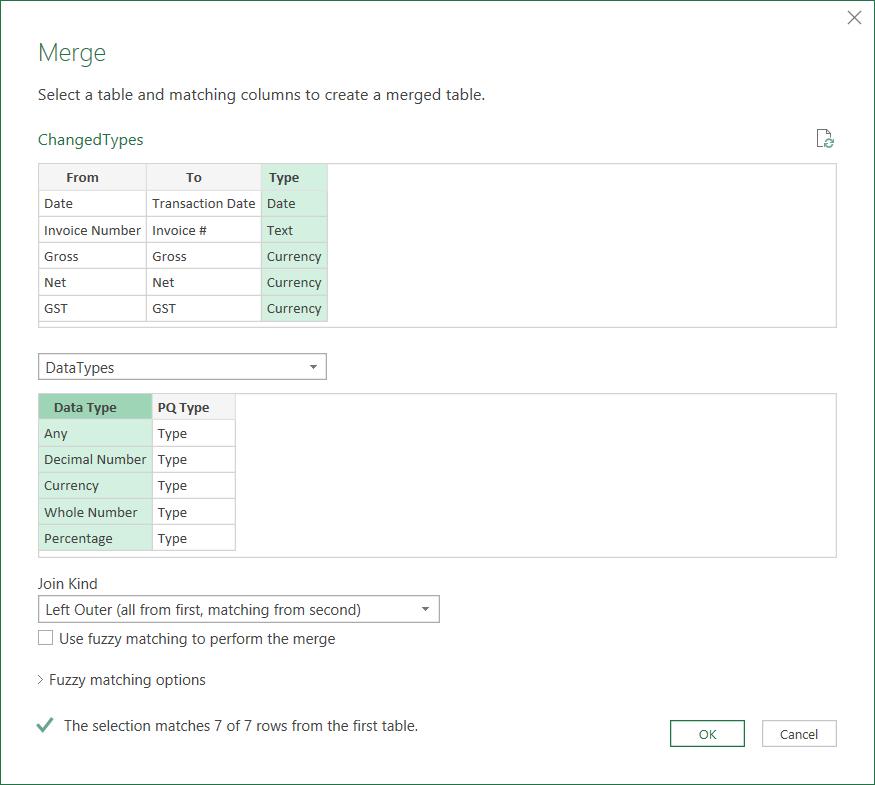
Then, I expand the PQ Type column from the DataTypes column to get the Power Query types.

Next, I want to keep only columns To and PQ Type by selecting the two columns, right-clicking and applying ‘Remove Other Columns’. I also ‘Remove Duplicates’ from column To, which is also available in the right-click menu.

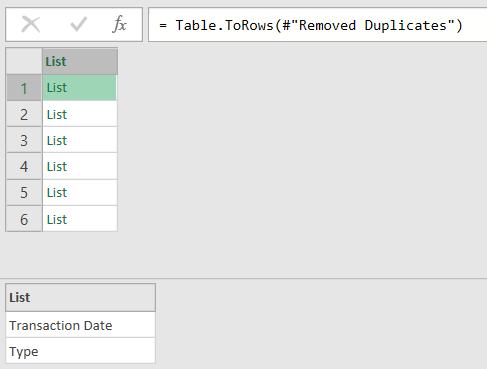
Then, I add a blank step using the Table.ToRows function. I also used this function last week to get a list of lists. This time, I need a list of lists to use in the ‘Changed Type’ step later. I need to transform this step so that each individual list includes a column name and its type. The M code is:
= Table.ToRows(#"Removed Duplicates")
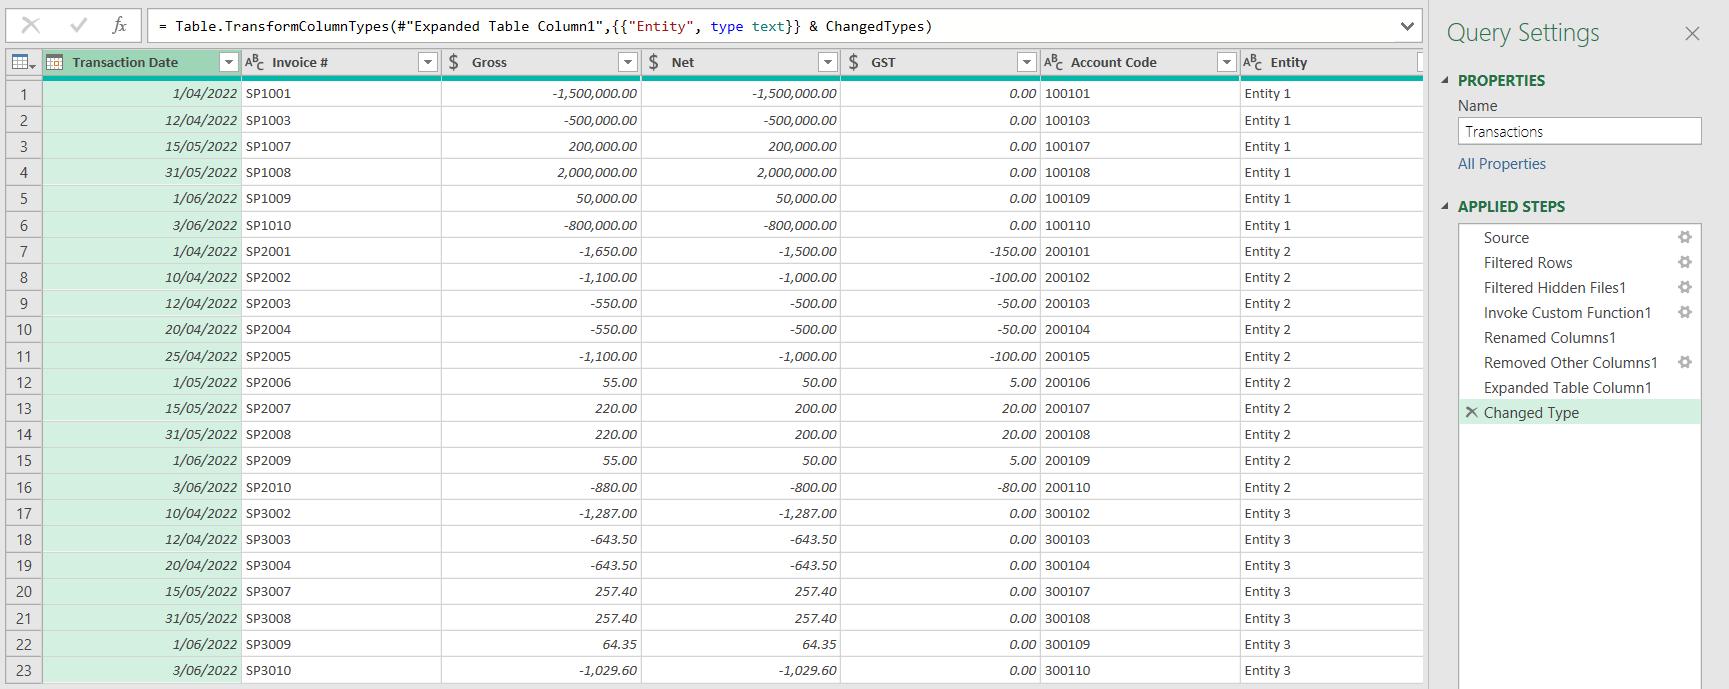
Finally, I return to the main Transactions query and change the type of column Entity to ‘text’.
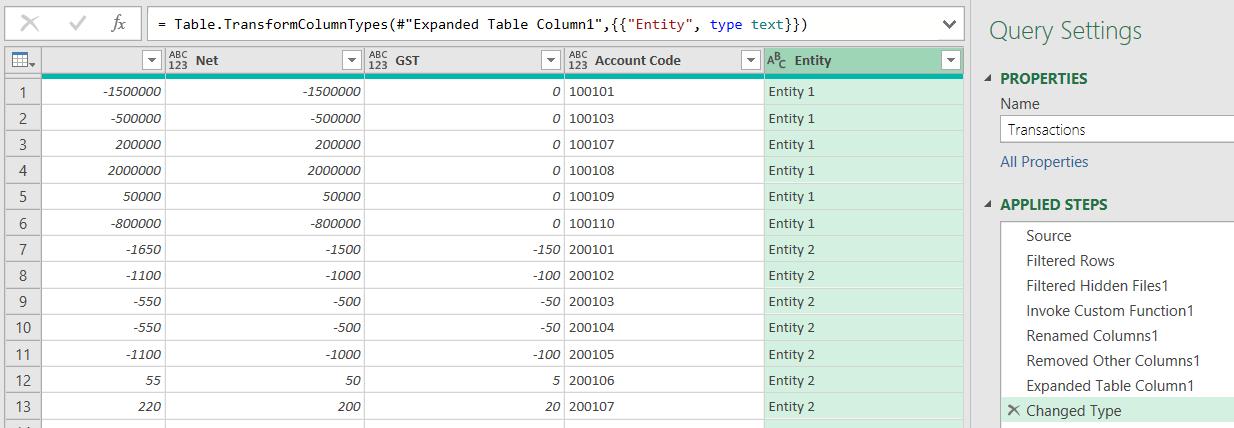
I fix the generated M code by adding the ChangedTypes list at the end as follows:
= Table.TransformColumnTypes(#"Expanded Table Column1",{{"Entity", type text}} & ChangedTypes)
The ampersand symbol (&) allows me to combine the current hardcoded list generated by M code with the ChangedTypes list. At this point, it is ready to ‘Close & Load’.
Come back next time for more ways to use Power Query!

