Power Query: I Just Want a Trim
12 July 2017
Welcome to our Power Query blog. Today I look at how the Trim function in Power Query works, and how to make it better
I have a table of data which includes employees’ full names, but a few spaces have been added along the way so that they are no longer nicely aligned:
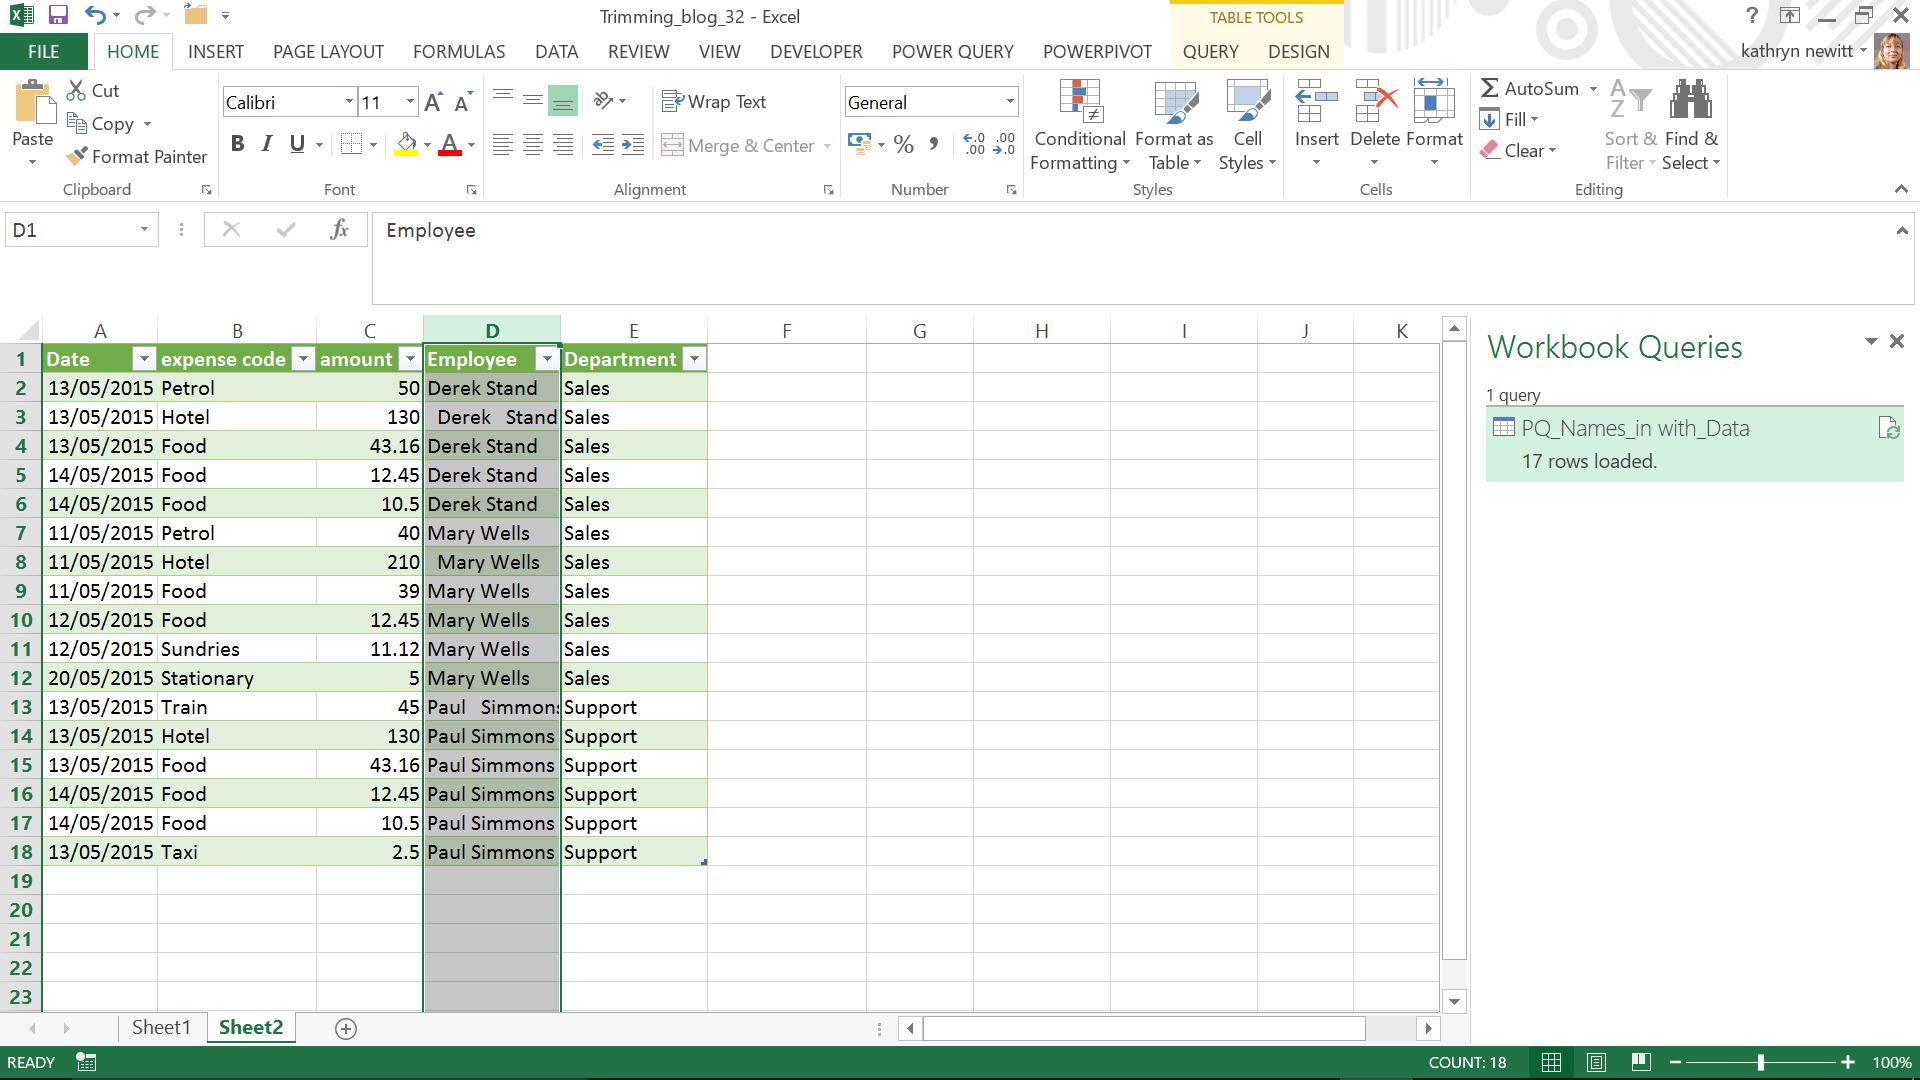
If I load my data to Power Query using the ‘From Excel Range/Table’ option then I can clean up my names. I select my column and right click to see the options:
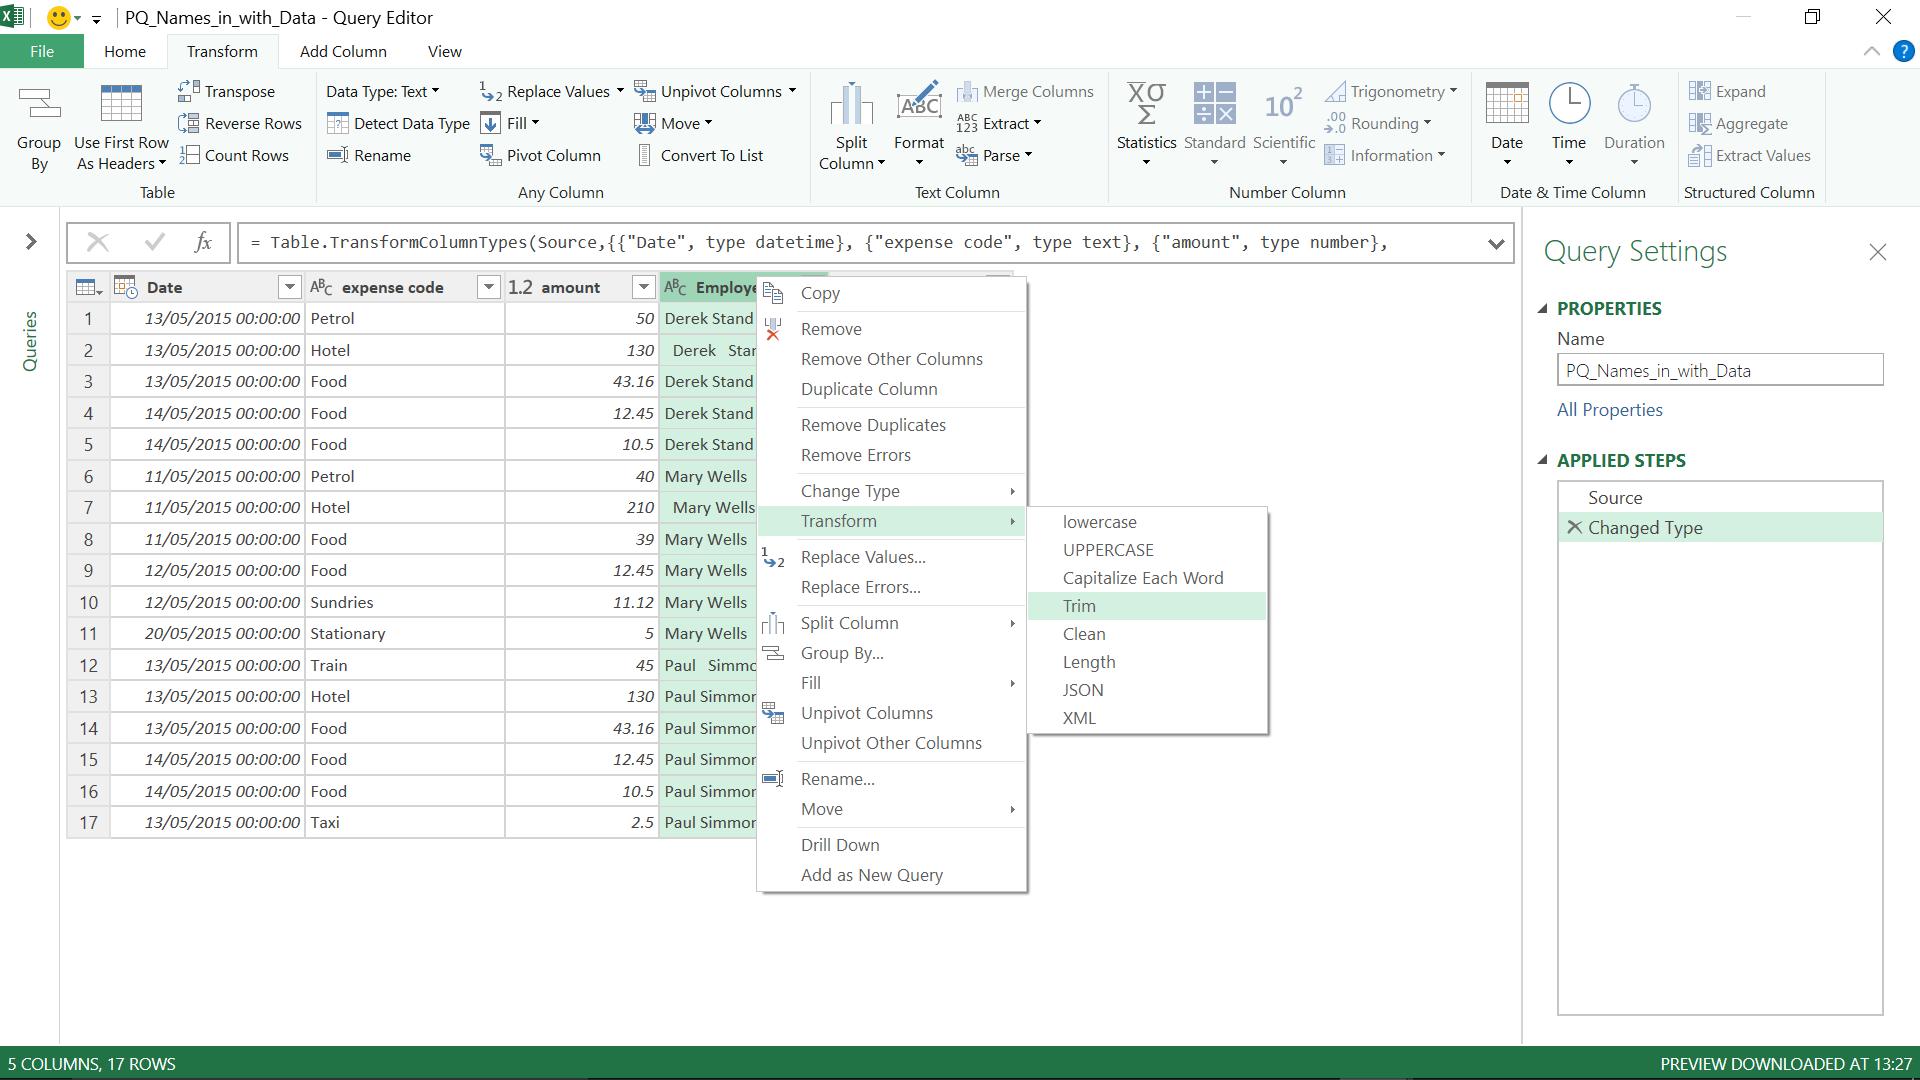
Under the ‘Transform’ heading, I have the option to ‘Trim’, so I choose this.
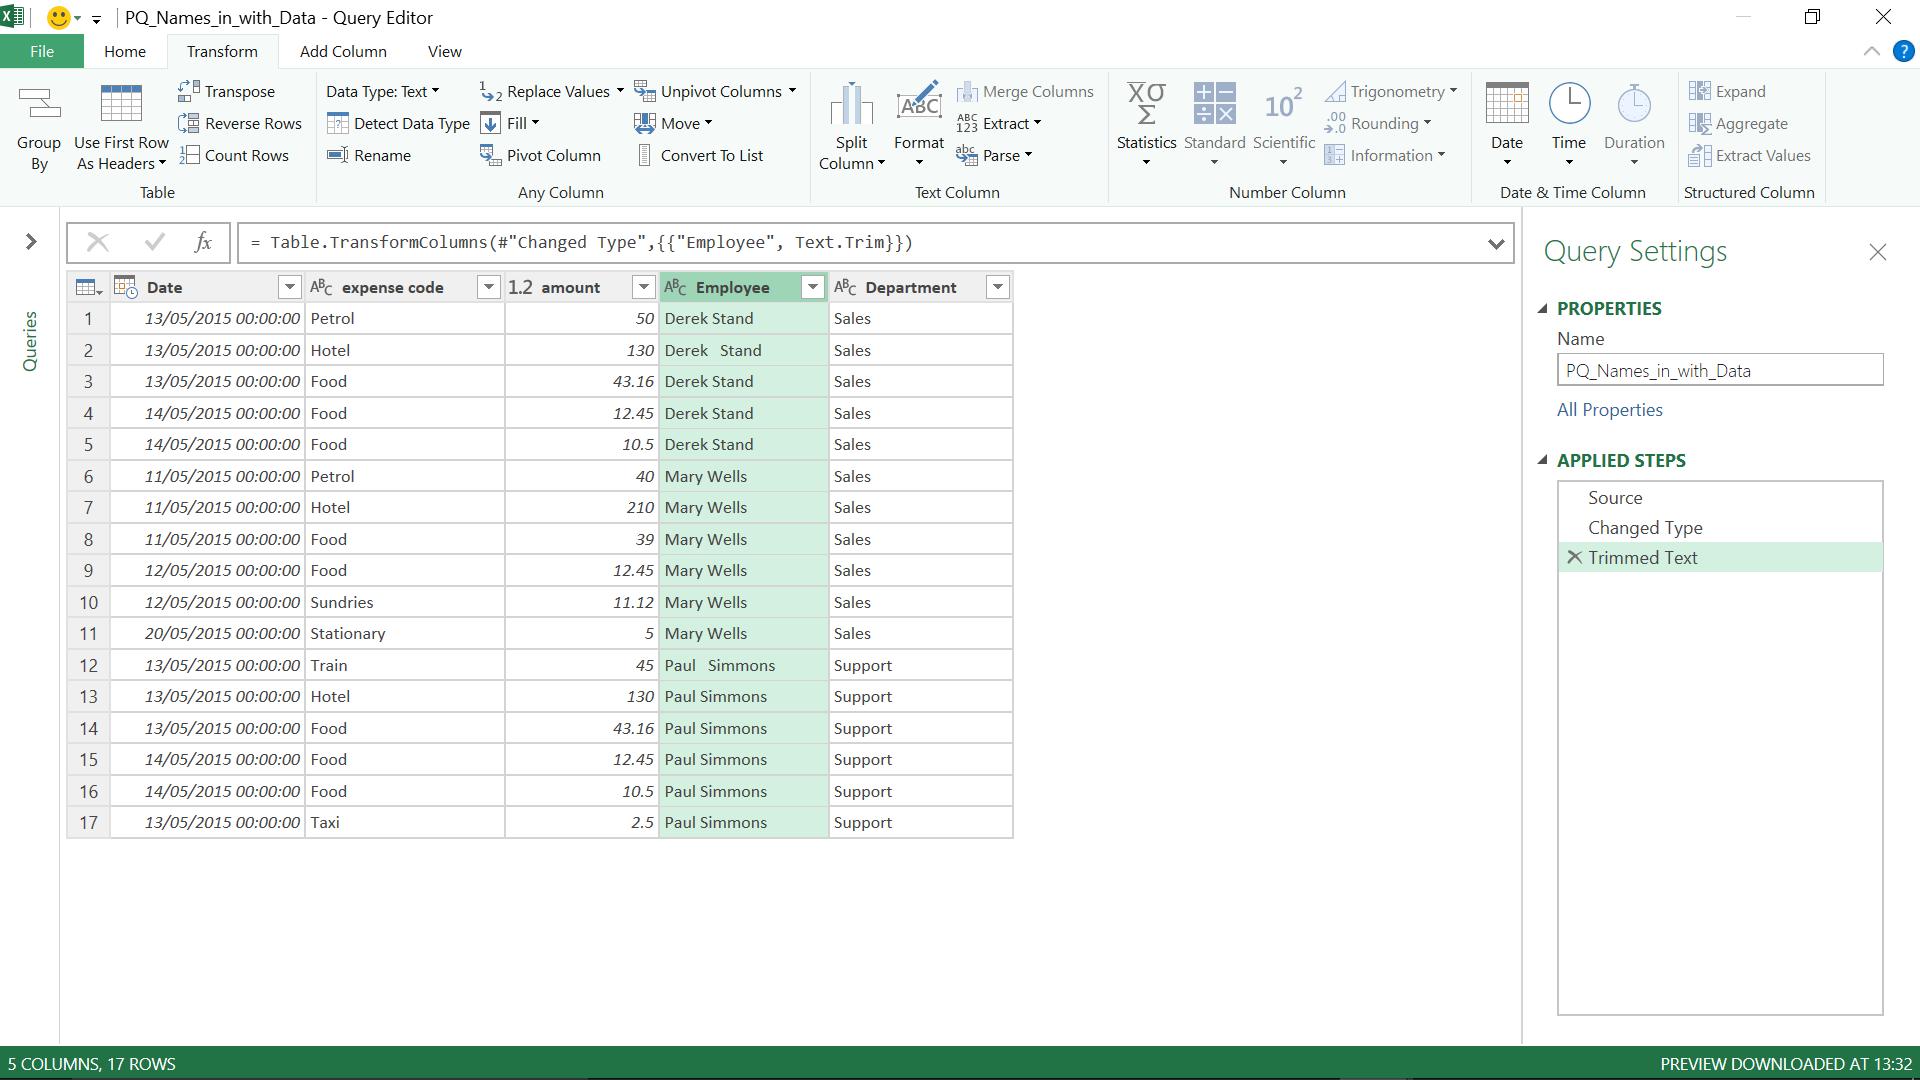
It has cleared the spaces to the left of my data, but has failed to remove the spaces in the middle of the names. Now I could replace my double space with a single space until I am happy with the layout but this doesn’t seem very satisfying – I want it to work like Excel and remove my extra spaces for me with one trim command. In the function bar, I can see that the function being used is Text.Trim, and Microsoft have provided remarks for this function in Power Query:
Text.Trim(text as nullable text, optional trimChars as any) as nullable text
- Characters are removed from the beginning and end of the text value
- If trimChars is not specified, then whitespace characters are trimmed. Whitespace characters are defined by the Power Query formula language specification document. The argument trimChars is either a character value or a list of character values.
Therefore, only the spaces at the beginning and the end will be removed. I am not the only person who finds this annoying. Ken Puls does too. He has actually written a function to make trimming work the way I’d like it to (thanks Ken). Enter PowerTrim!
The M code looks like this:
(text as text, optional char_to_trim as text) =>
let
char = if char_to_trim = null then " " else char_to_trim,
split = Text.Split(text, char),
removeblanks = List.Select(split, each _ <> ""),
result=Text.Combine(removeblanks, char)
in
result
Hence, I can create this as a function in my workbook before I can use it. I start by creating a new blank query:
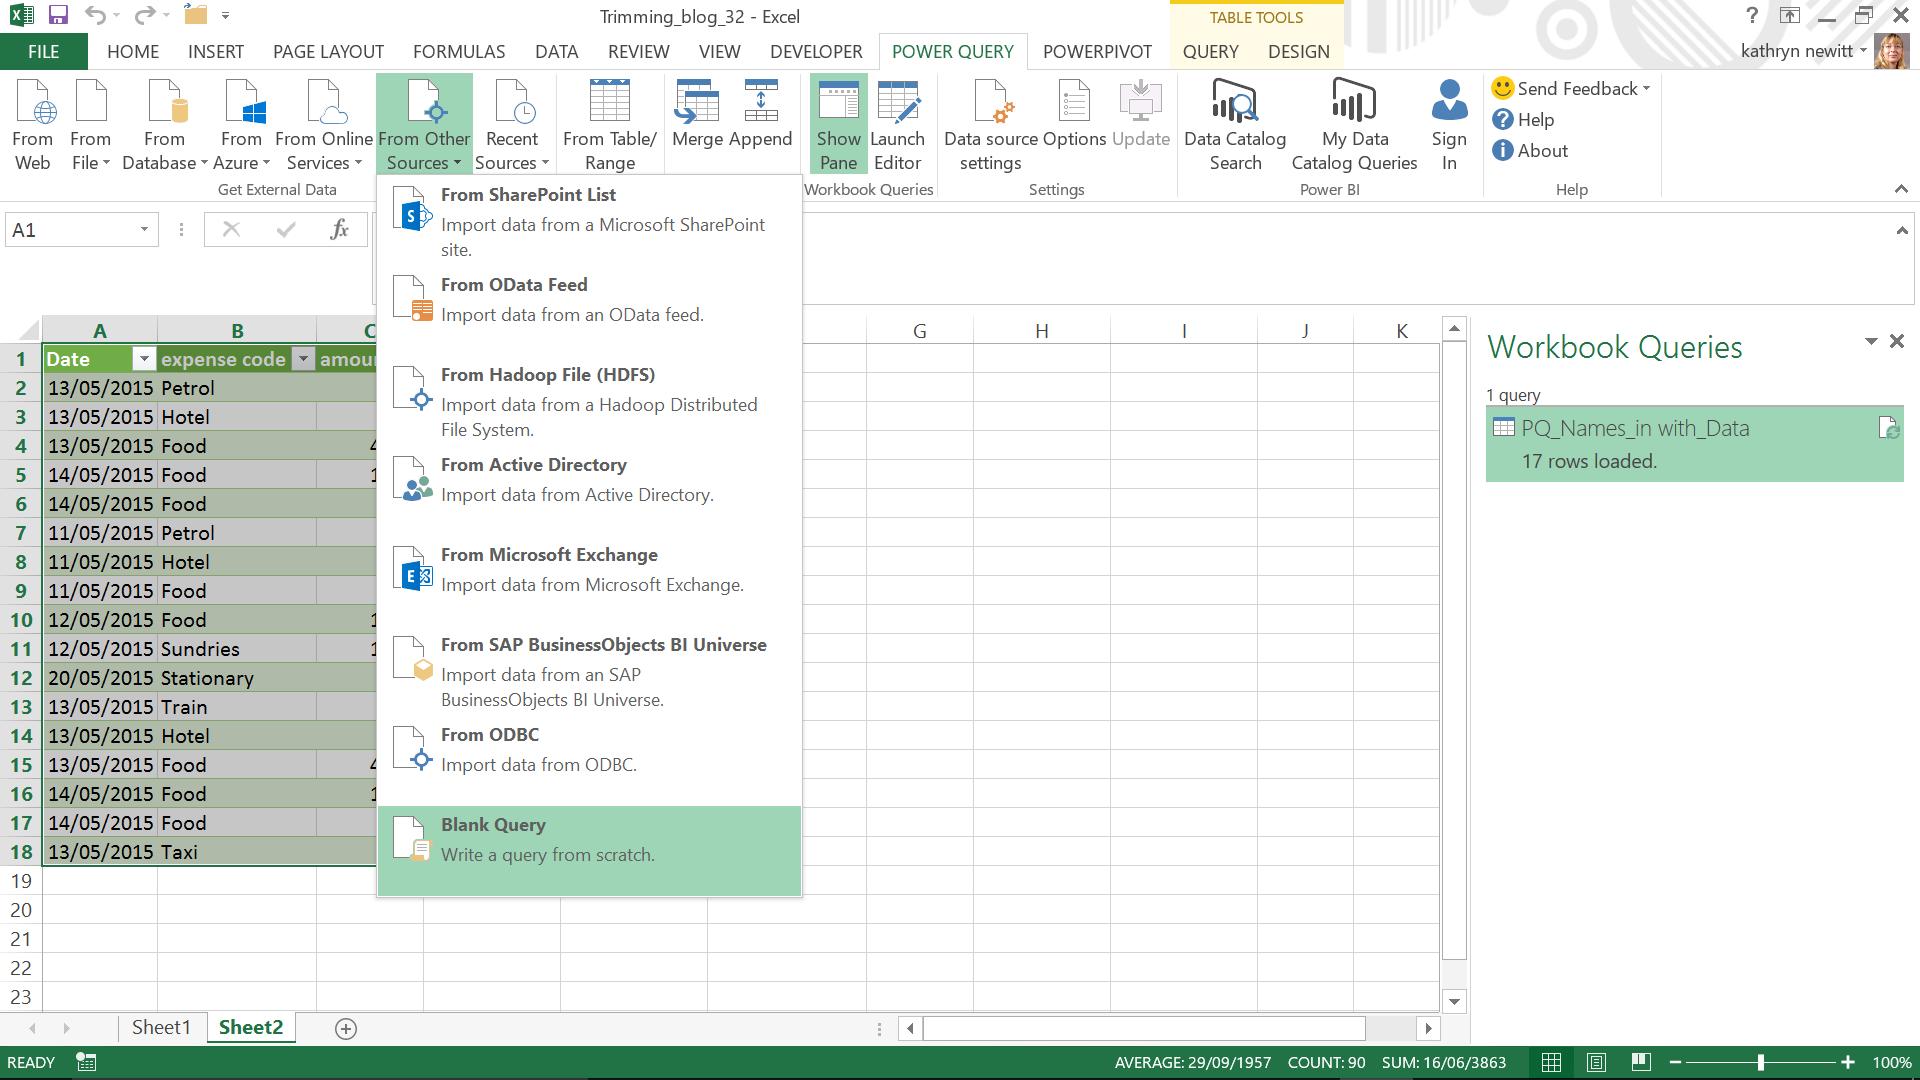
As I am using Ken’s code, I will keep the name he chose for this function by changing my query name to PowerTrim. I can then go into the ‘Advanced Editor’ and enter the M code.
When I ‘Close and Load’ my query, it is automatically created as a ‘Connection Only’ query.
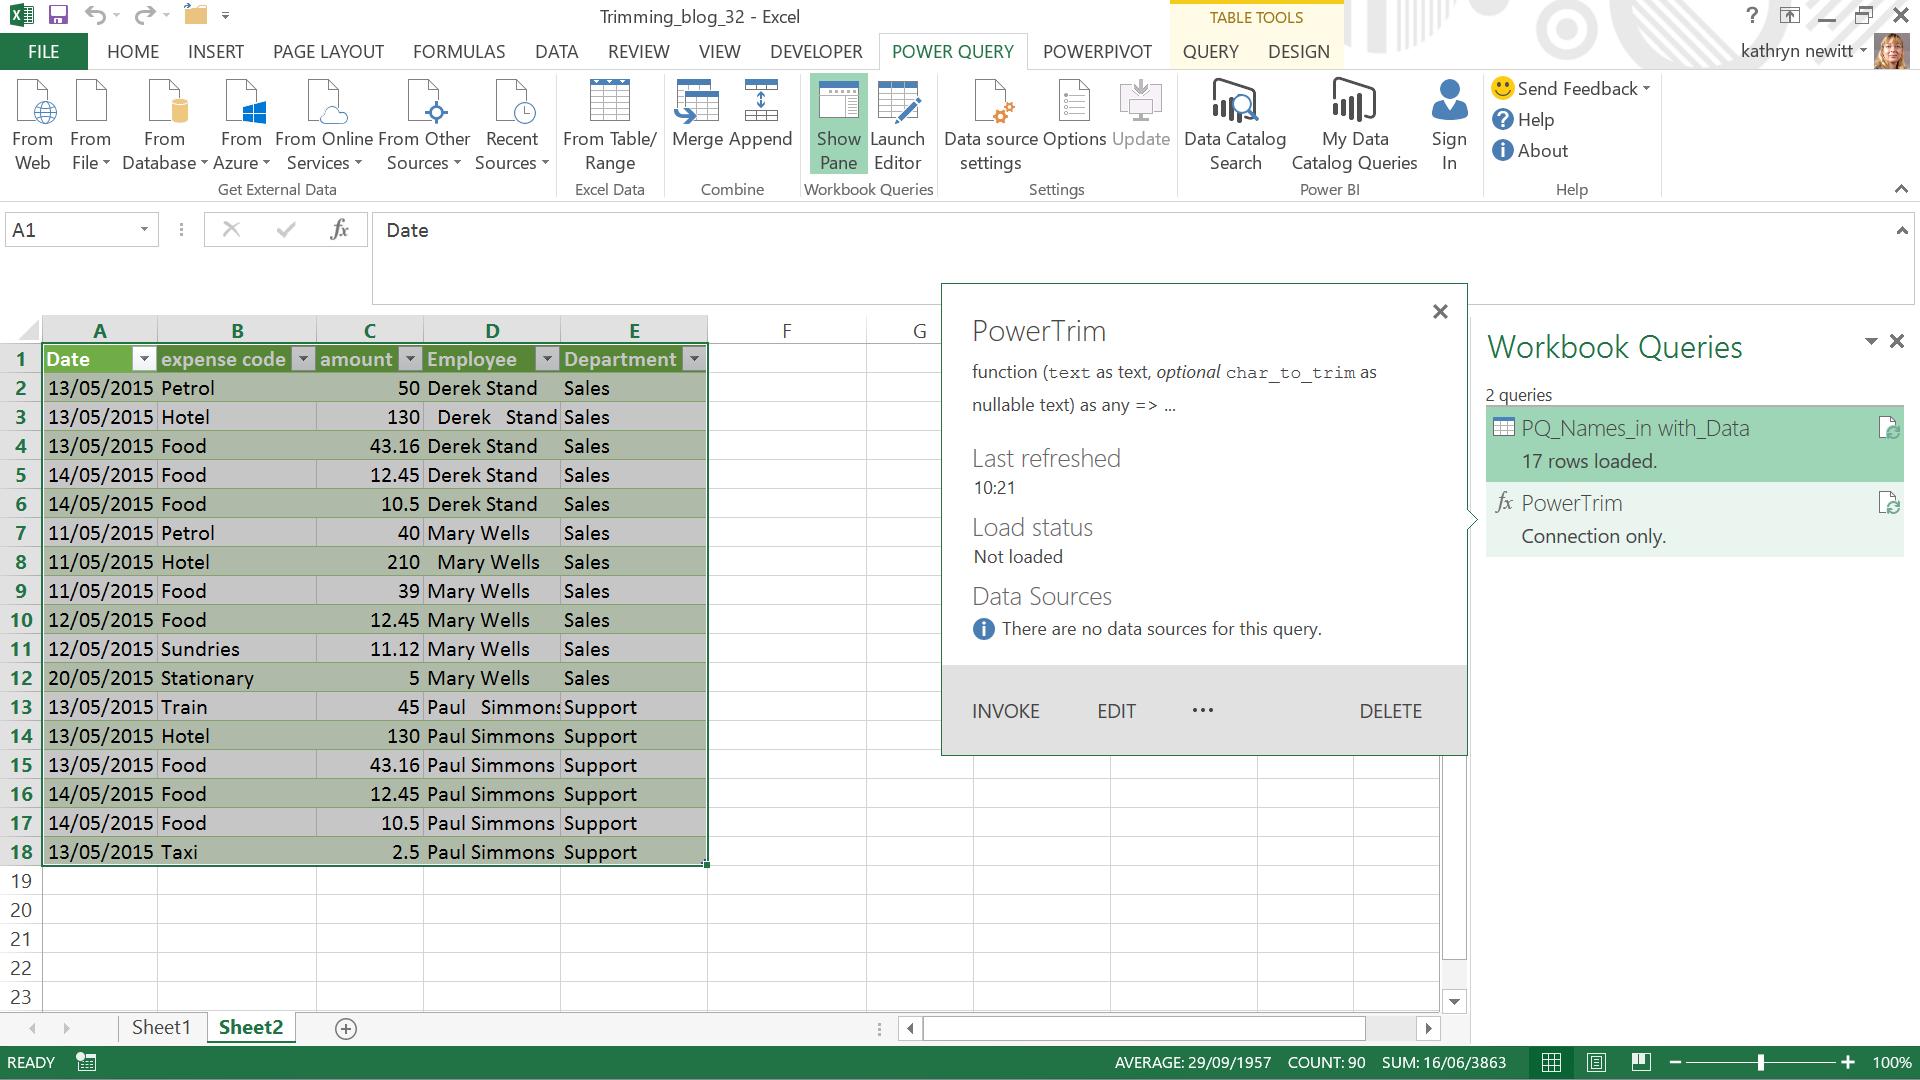
Now I go back to the data that I want to trim. I can add a custom column which uses the new formula.
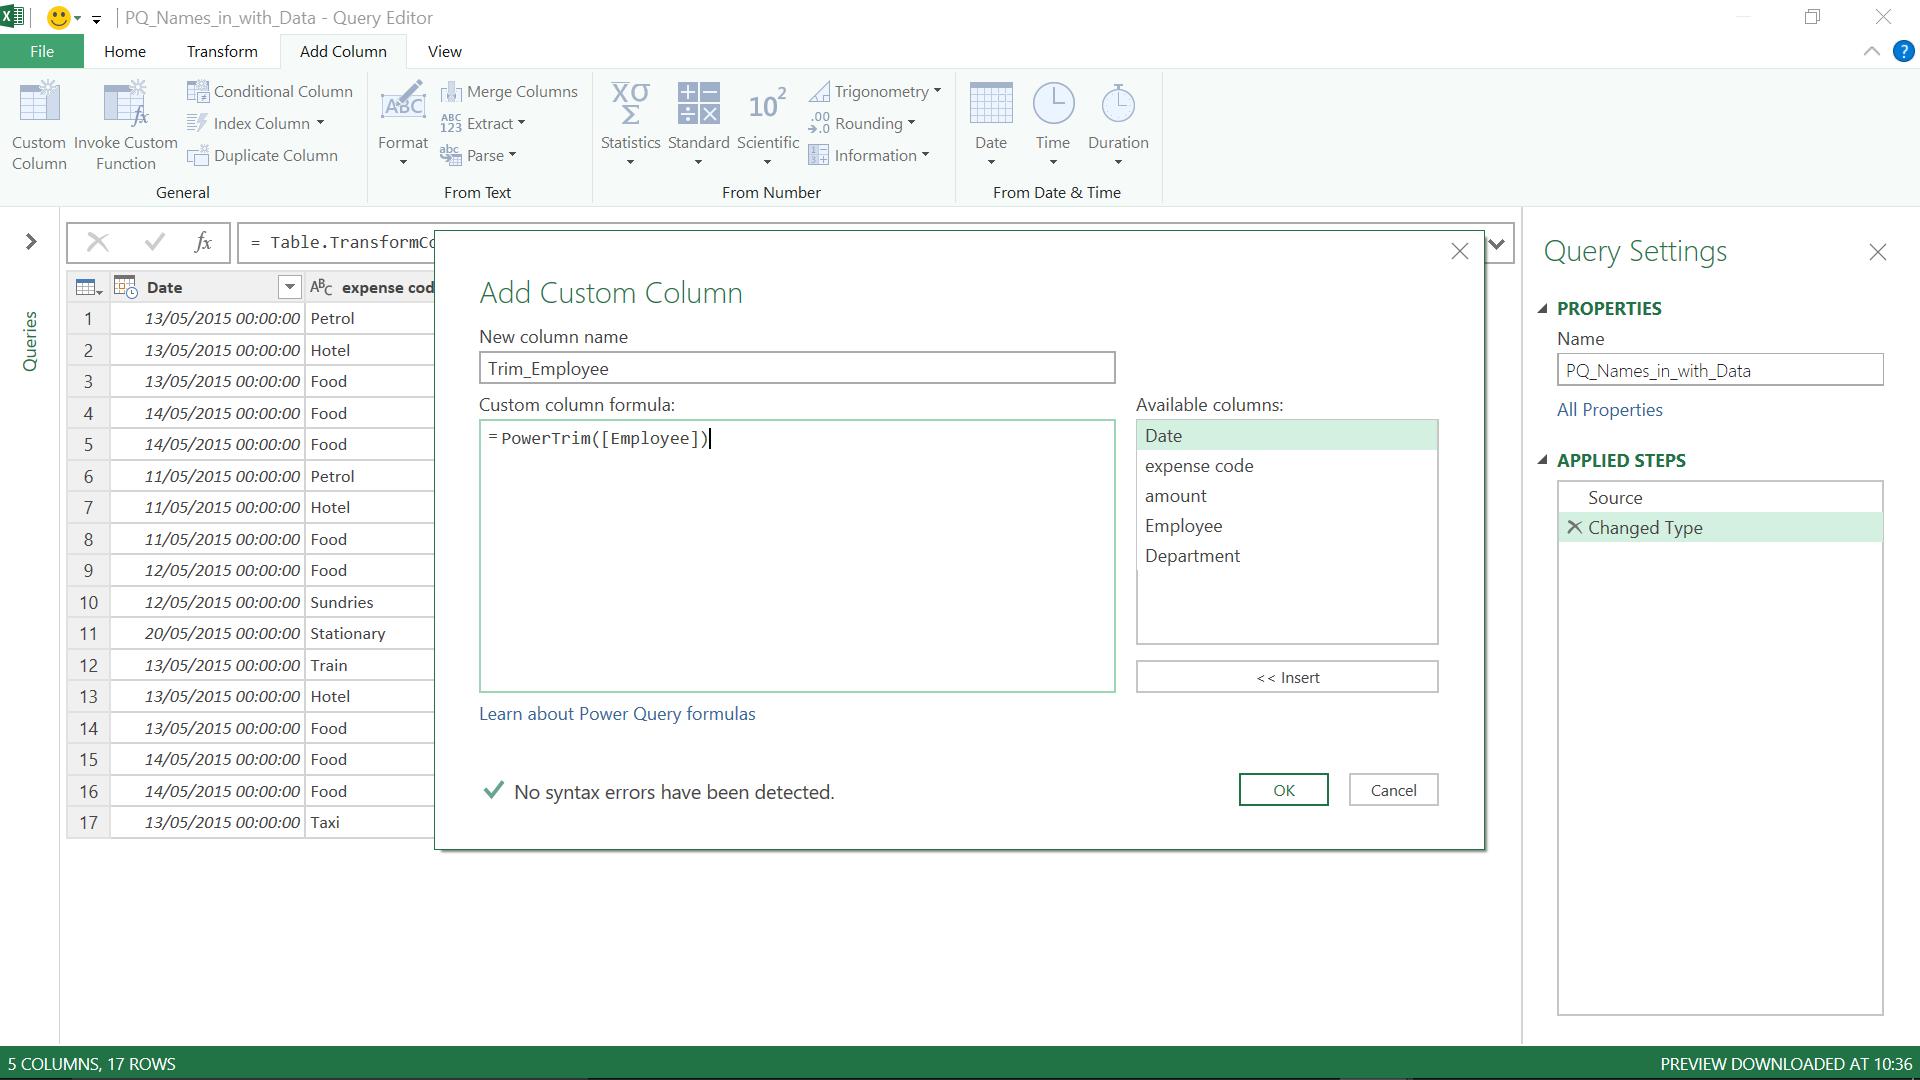
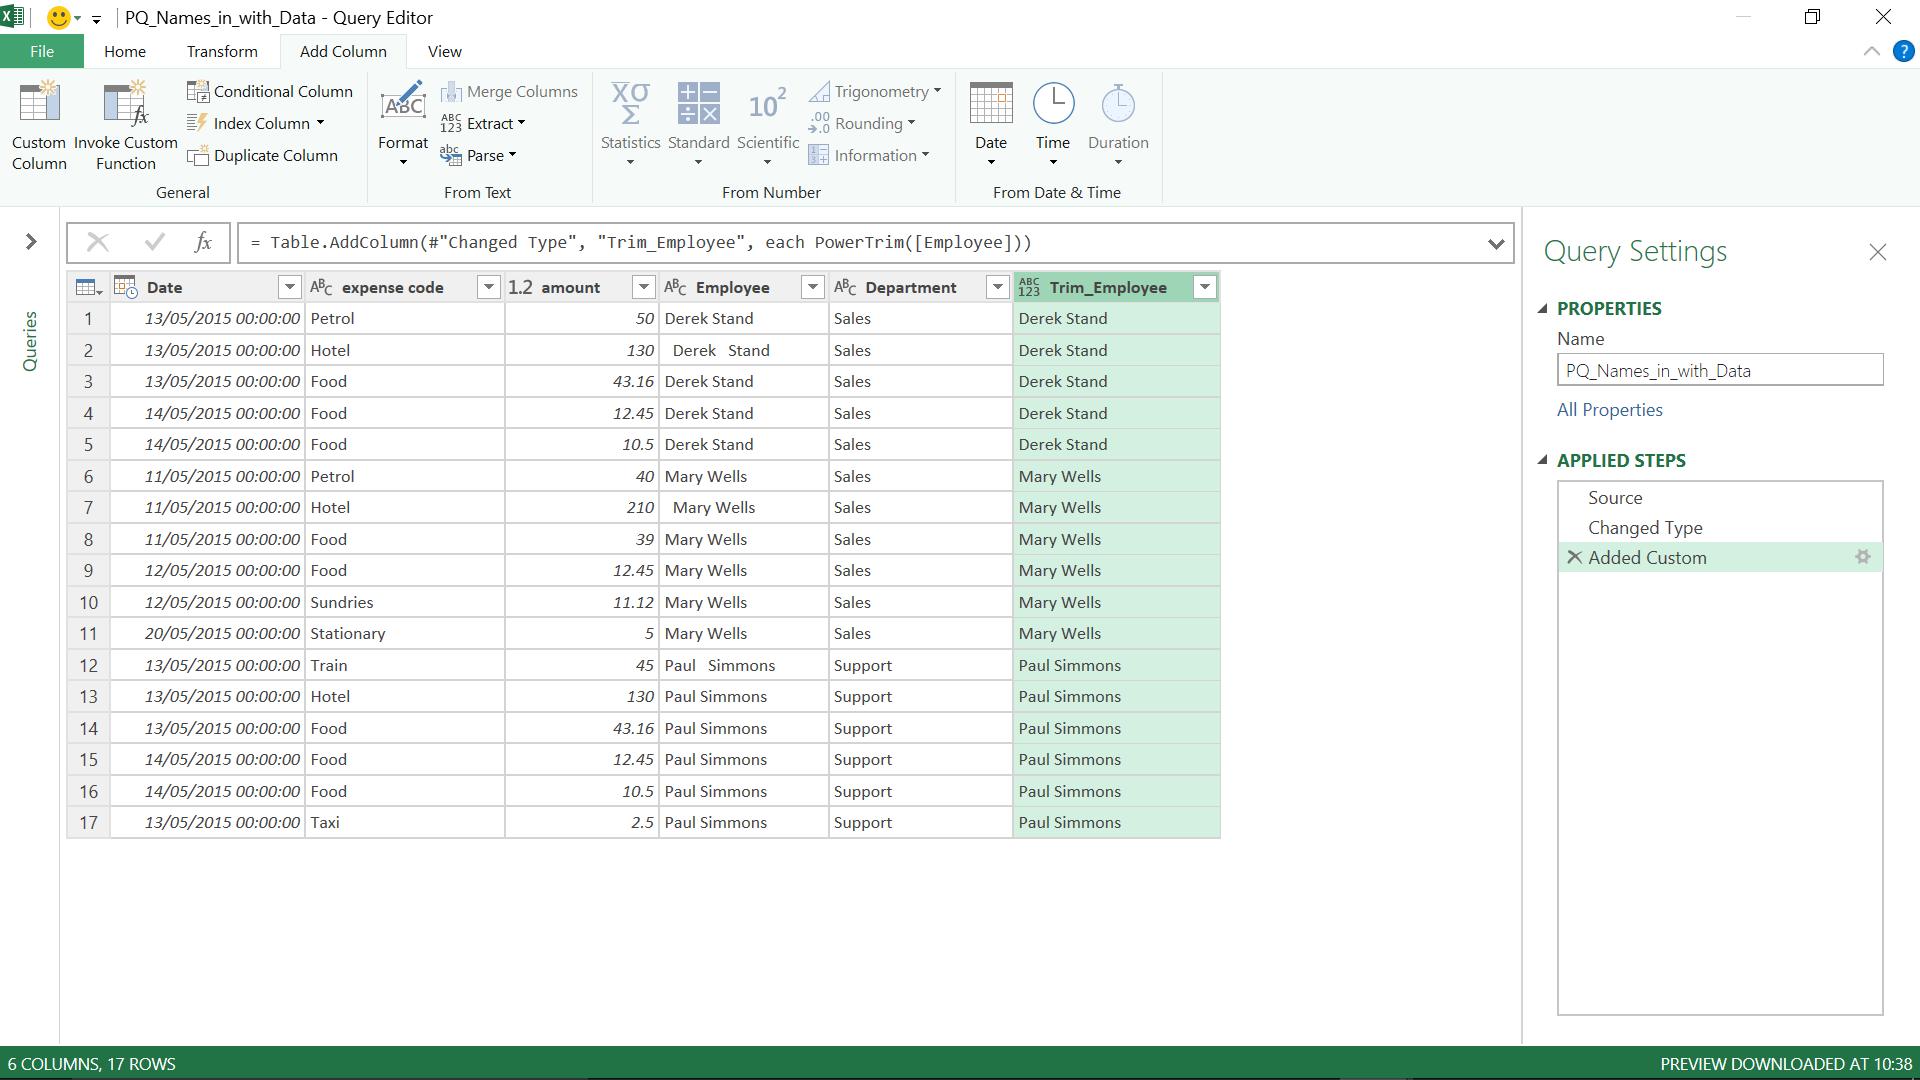
This gives me a column which has stripped out my extra spaces – it has trimmed the way I want it to.
If I am being picky though, what I really want is to be able to use the function in my original column. In order to do this, rather than having a separate query as my function, I need to define it within my current query. In order to do this, I go back to the point in my query where I applied the ‘Trimmed Text’ step, and using the ‘Advanced Editor’, I add a function fPowerTrim to my M code.
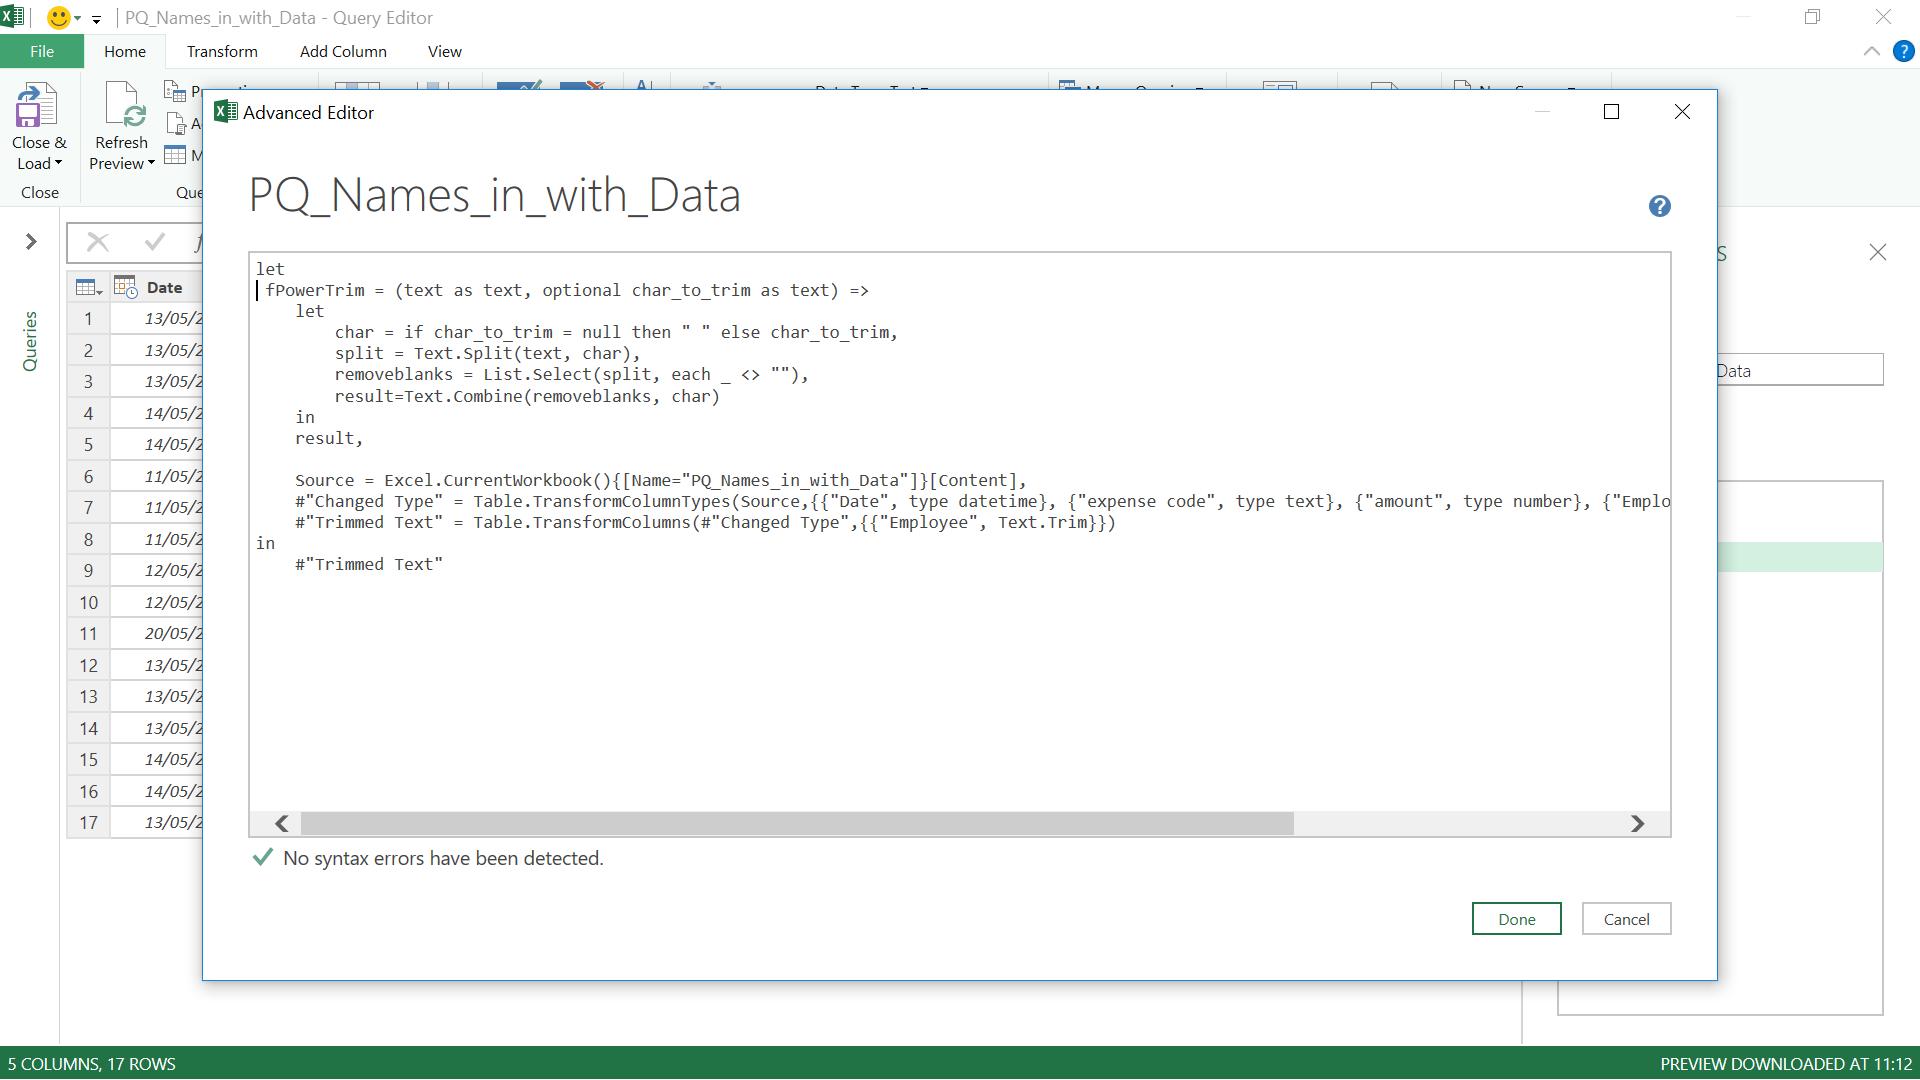
let
fPowerTrim = (text as text, optional char_to_trim as text) =>
let
char = if char_to_trim = null then " " else char_to_trim,
split = Text.Split(text, char),
removeblanks = List.Select(split, each _ <> ""),
result=Text.Combine(removeblanks, char)
in
result,
Source = Excel.CurrentWorkbook(){[Name="PQ_Names_in_with_Data"]}[Content],
#"Changed Type" = Table.TransformColumnTypes(Source,{{"Date", type datetime}, {"expense code", type text}, {"amount", type
number}, {"Employee", type text}, {"Department", type text}}),
#"Trimmed Text" = Table.TransformColumns(#"Changed Type",{{"Employee", Text.Trim}})
in
#"Trimmed Text"
This means, that in my ‘Trimmed Text’ step, I can change the M
= Table.TransformColumns(#"Changed Type",{{"Employee", Text.Trim}})
to
= Table.TransformColumns(#"Changed Type",{{"Employee", each fPowerTrim( _ ) }})
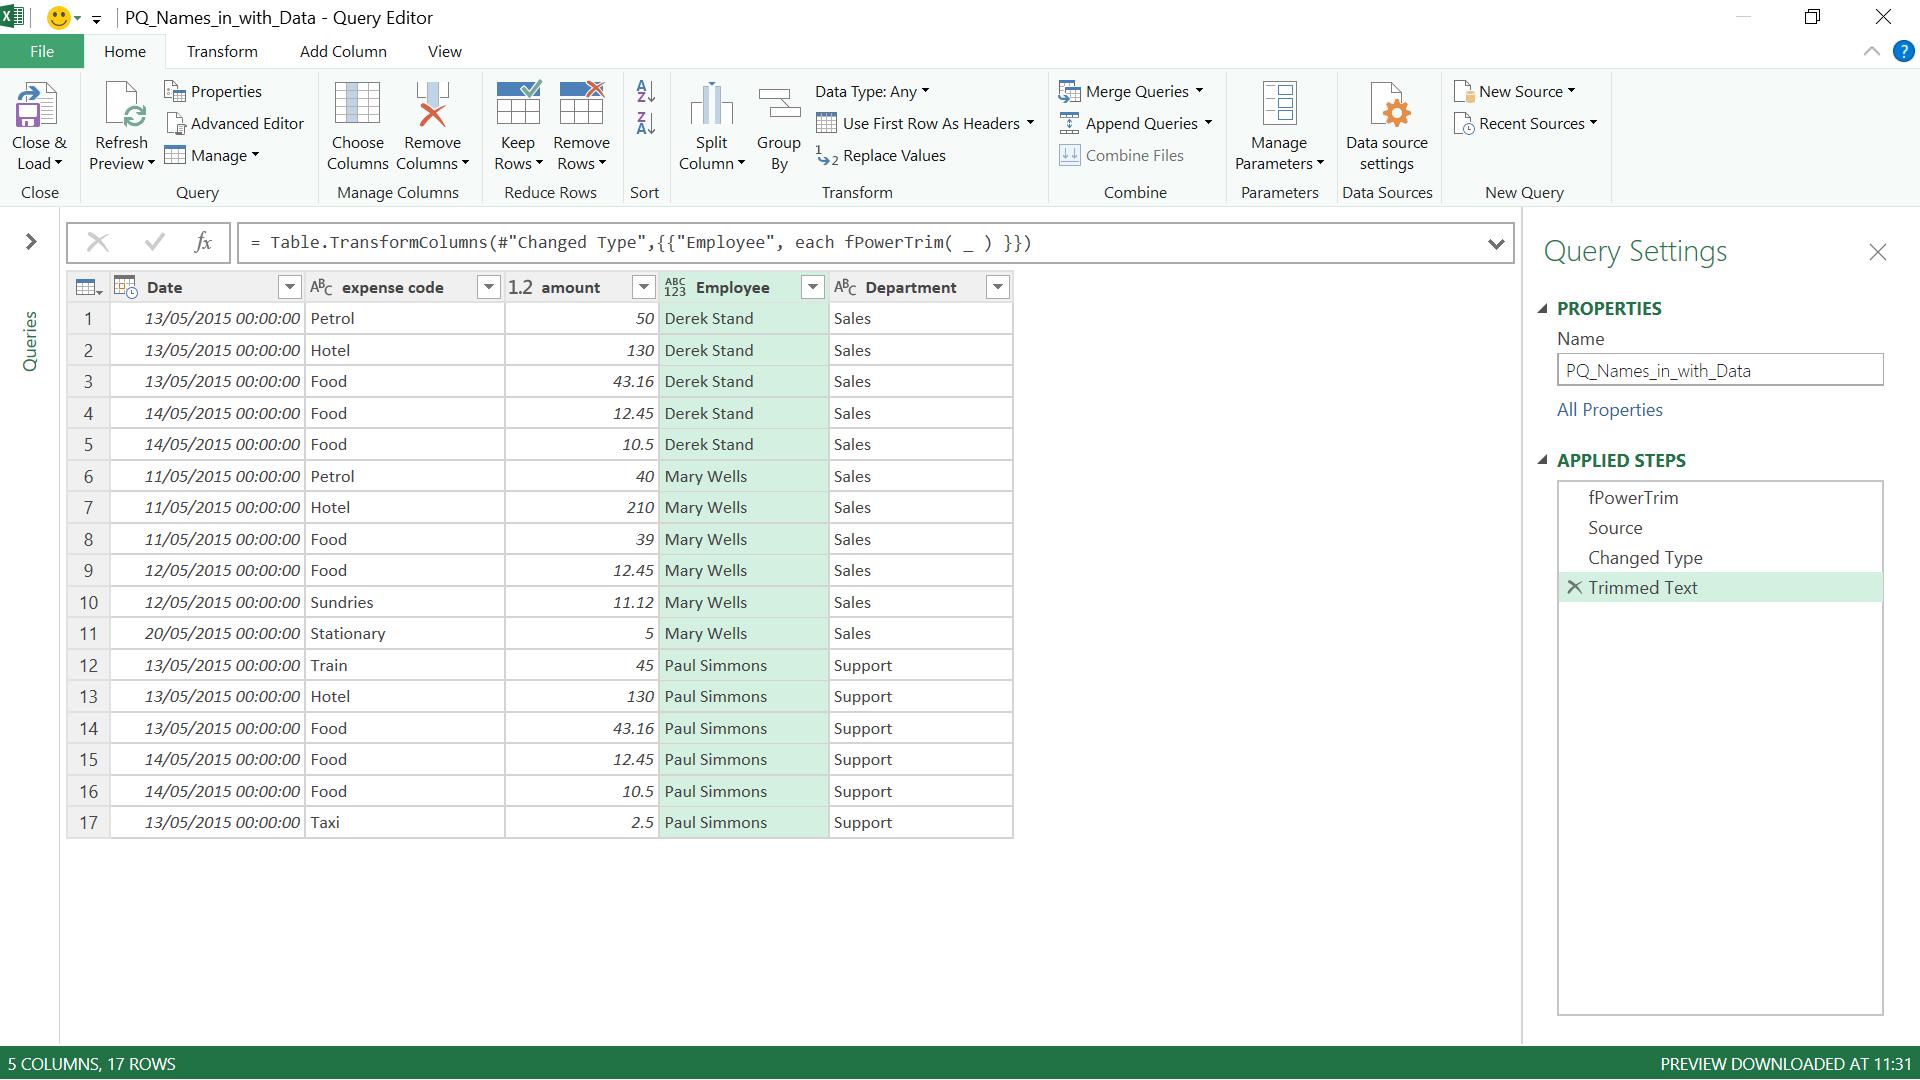
I now have my ‘Employee’ data trimmed in the way I would like.
Want to read more about Power Query? A complete list of all our Power Query blogs can be found here. Come back next time for more ways to use Power Query!

