Power Query: Join Me at the Table
18 April 2018
Welcome to our Power Query blog. This week, I look at the M function Table.Join.
Whilst there are often multiple ways to achieve the same objective in Power Query, the purpose of today’s example is become familiar with the M function, Table.Join. The description in the Microsoft help pages is as follows:
Table.Join(table1 as table,
key1 as any,
table2 as table,
key2 as any,
optional joinKind as nullable number,
optional joinAlgorithm as nullable number,
optional keyEqualityComparers as nullable list) as table
This joins the rows of table1 with the rows of table2 based on the equality of the values of the key columns selected by key1 (for table1) and key2 (for table2).
By default, what is known as an “inner join” is performed, however an optional joinKind may be included to specify the type of join. Options include: JoinKind.Inner, JoinKind.LeftOuter, JoinKind.RightOuter, JoinKind.FullOuter, JoinKind.LeftAnti and JoinKind.RightAnti.
The different types of join work as follows:
- Inner: only matching rows
- Left Outer: all from first, matching from second table
- Right Outer: all from second, matching from first table
- Full Outer: all rows from both tables
- Left Anti: rows only in first table
- Right Anti: rows only in second table.
In order to understand how Table.Join works, I need an example of where it may be used.
My fictional sales people have been busy sending in their expenses, but the administration has not been ideal. I have a folder which contains all the expenses that I need to upload, but there have been inconsistencies that mean some of the expense files appear in more than one of the subfolders.

May is not one of my imaginary salespeople – ‘May Expenses’ holds expenses created in May. However, not all my expense files are in here, so how can I see which files are duplicated? My example is simple, but this method will apply to much larger folders.
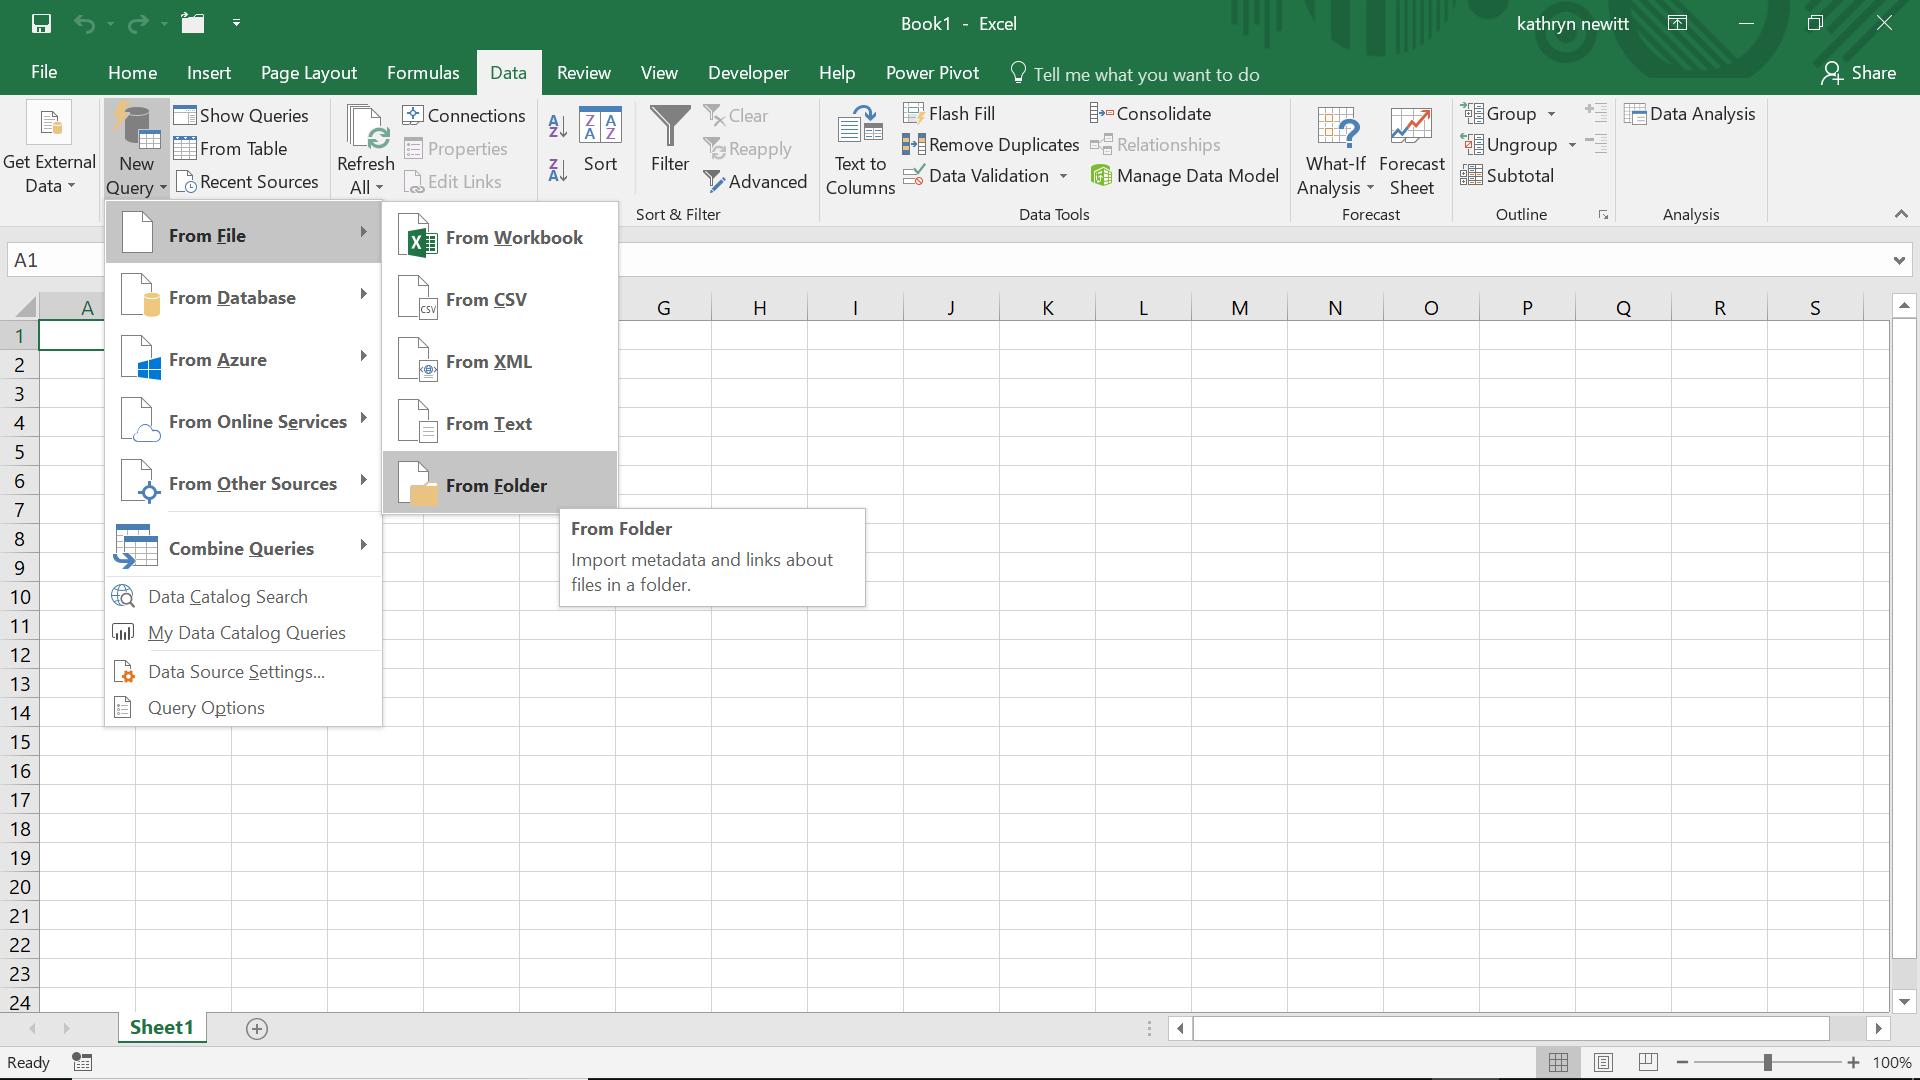
In a new workbook, I create a new query ‘From Folder’ on the ‘From File’ option in the ‘Get and Transform’ section of the ‘Data Tab’:
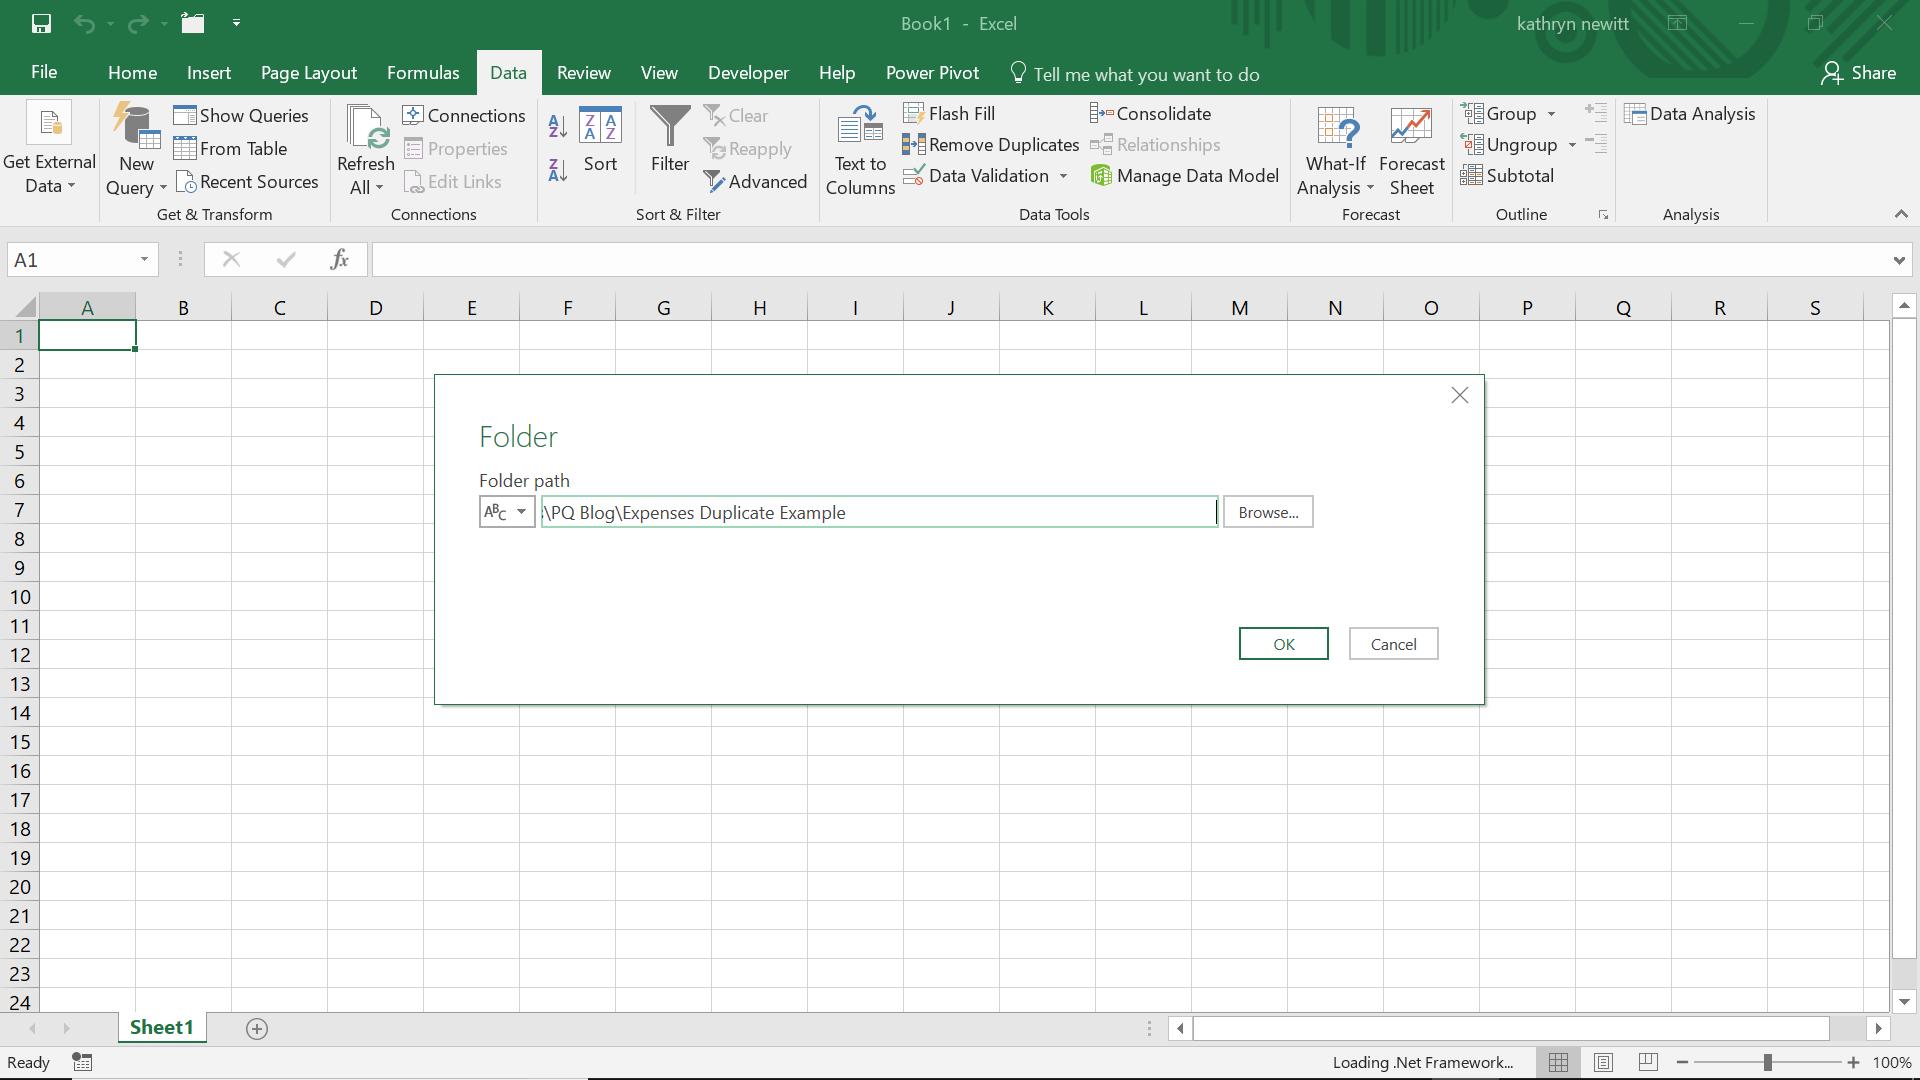
My folder in this illustration is located in ‘…PQ Blog\Expenses Duplicate Example’; this folder contains all the expense folders where I am looking for duplicates.
When I click ‘OK’, I can see a list of all the files in the folders beneath my specified folder:
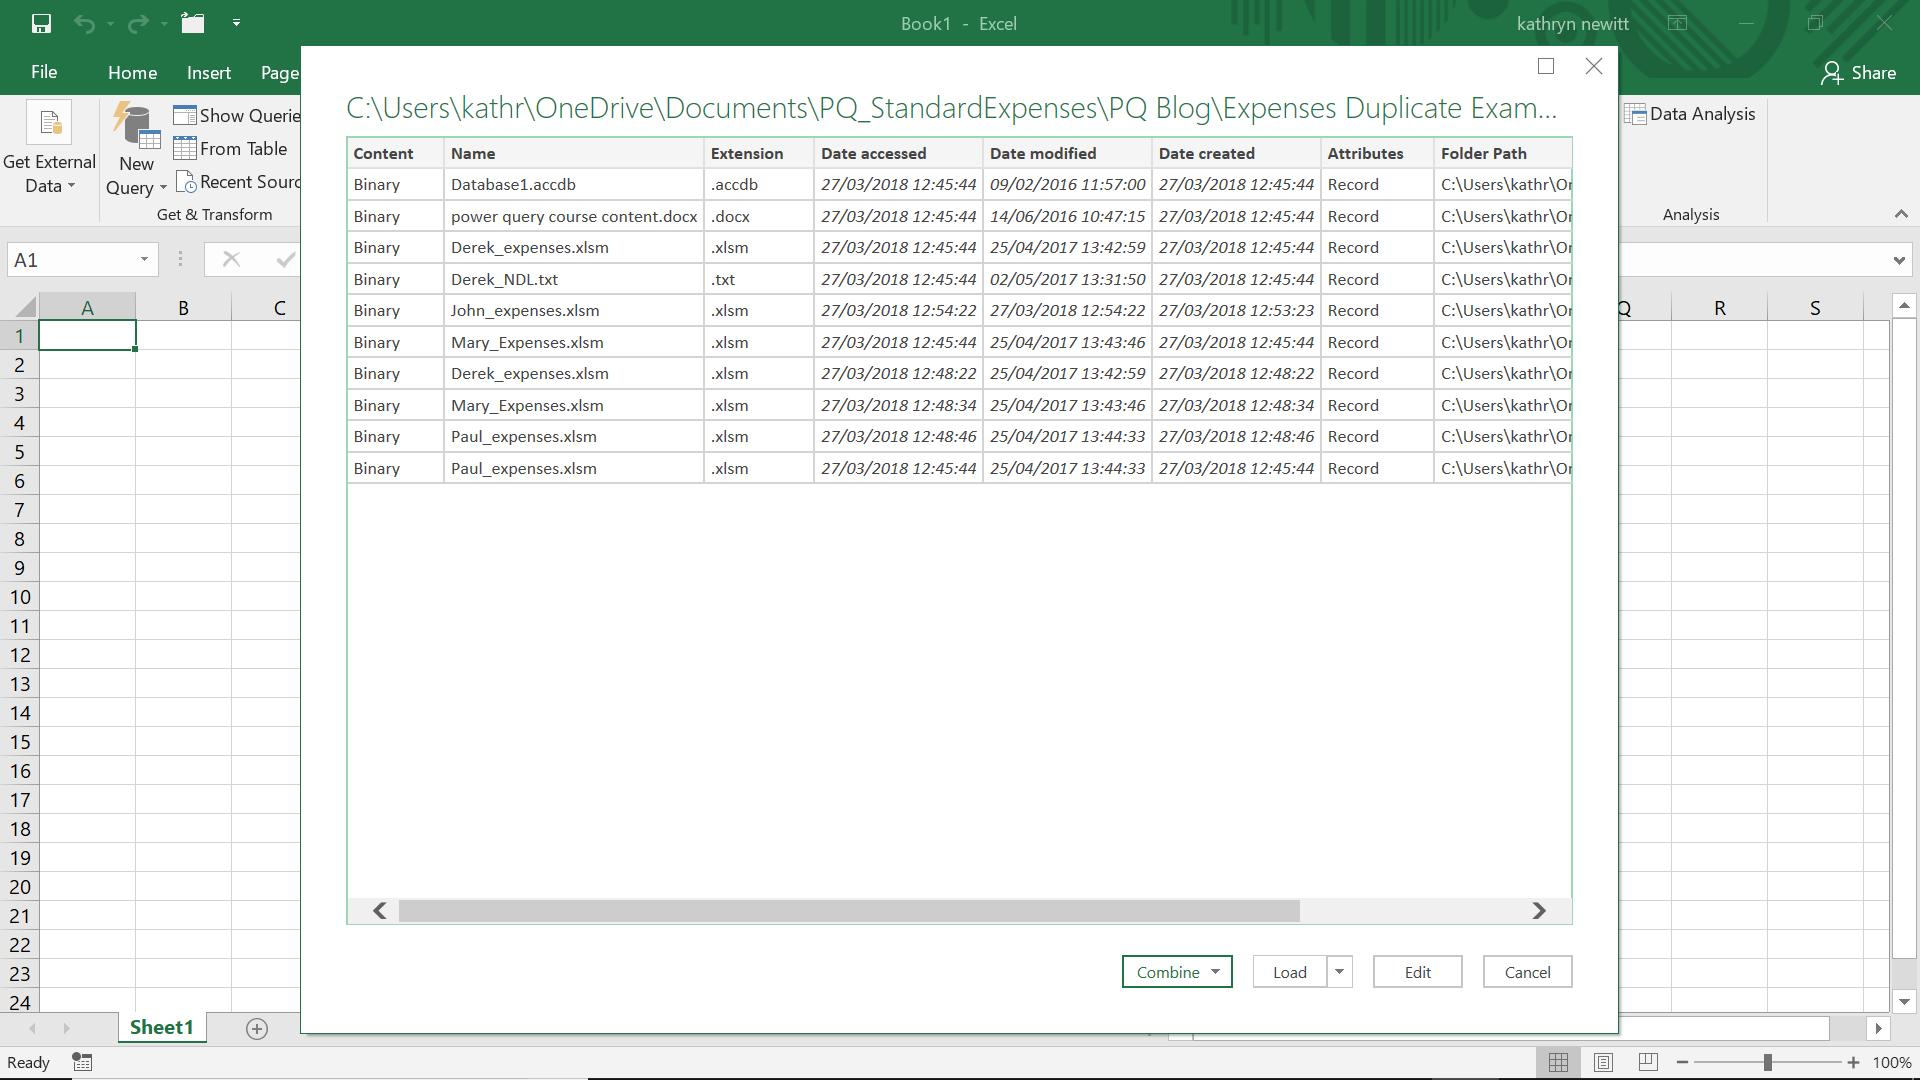
For this task, I want to see the duplicates, not combine or load all the files, so I choose to ‘Edit’. In fact, I always choose to edit first, to make sure I am getting the data that I expect.
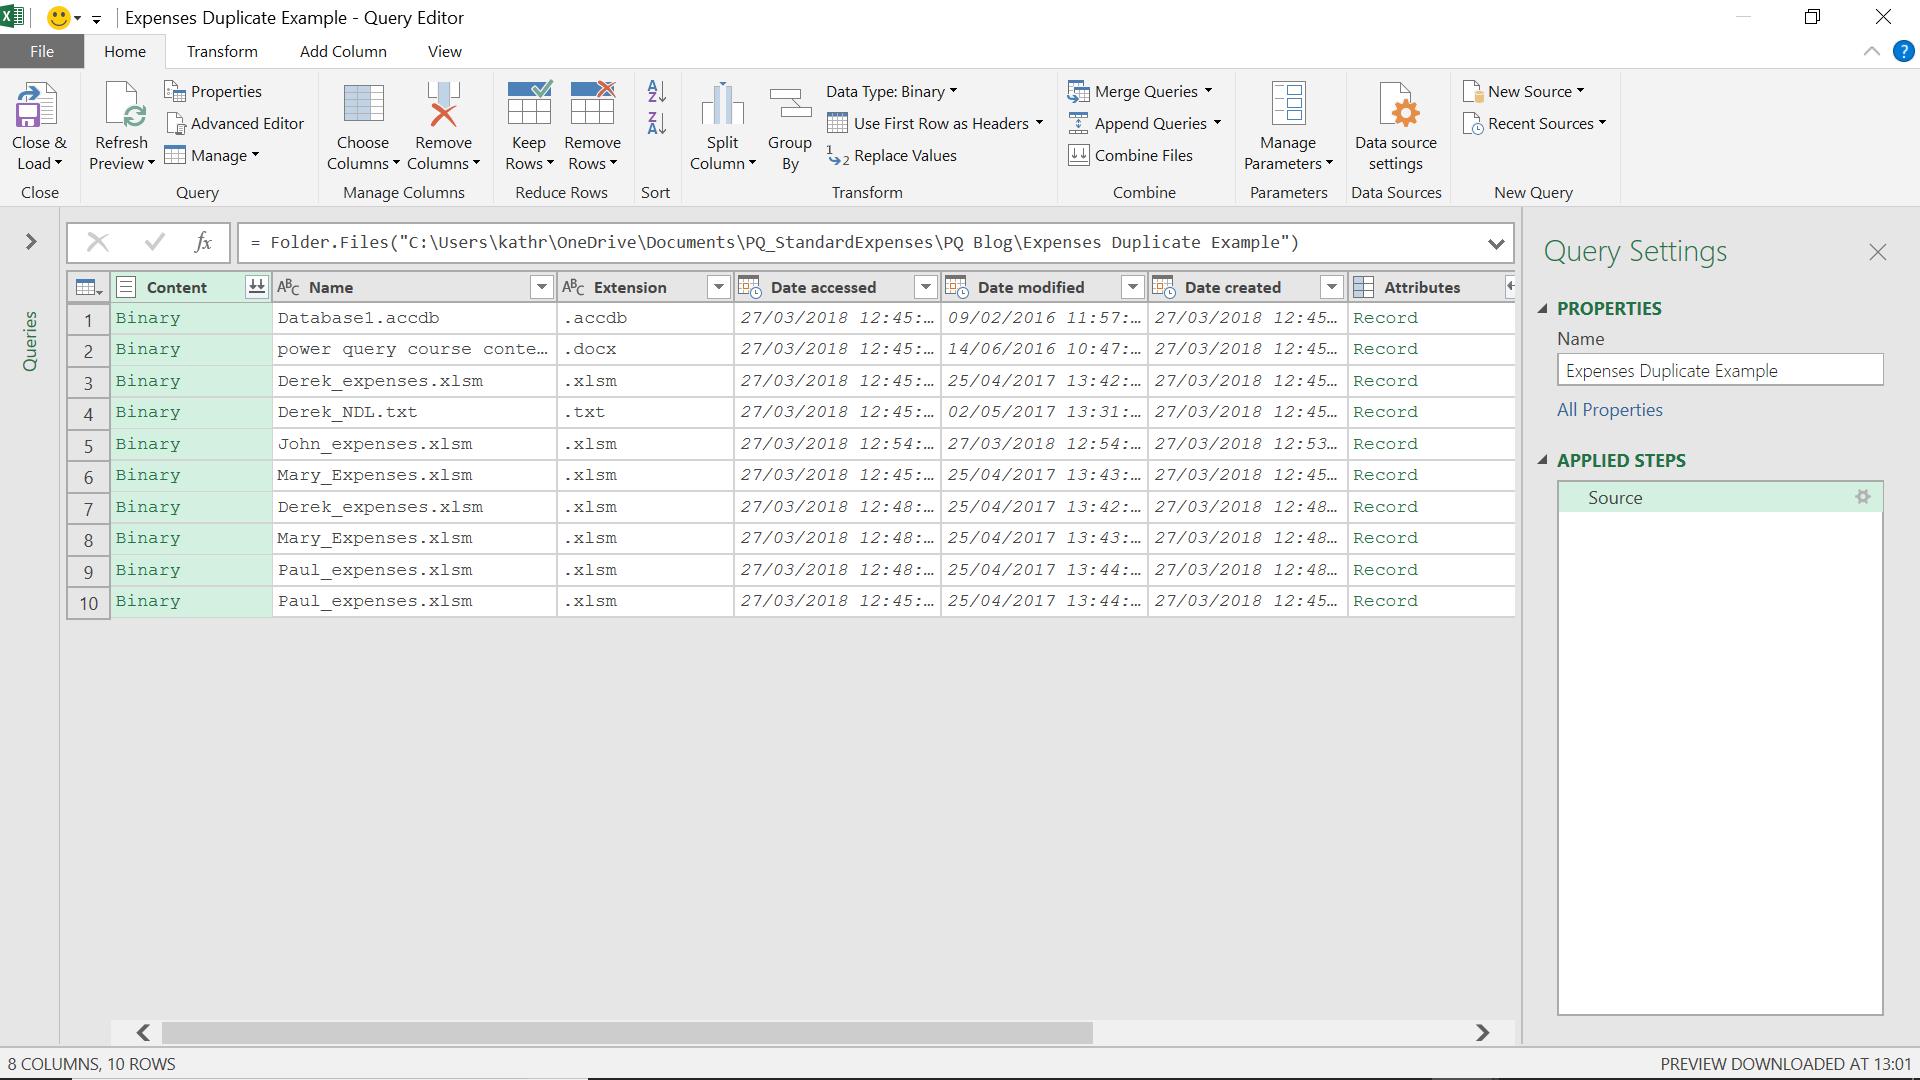
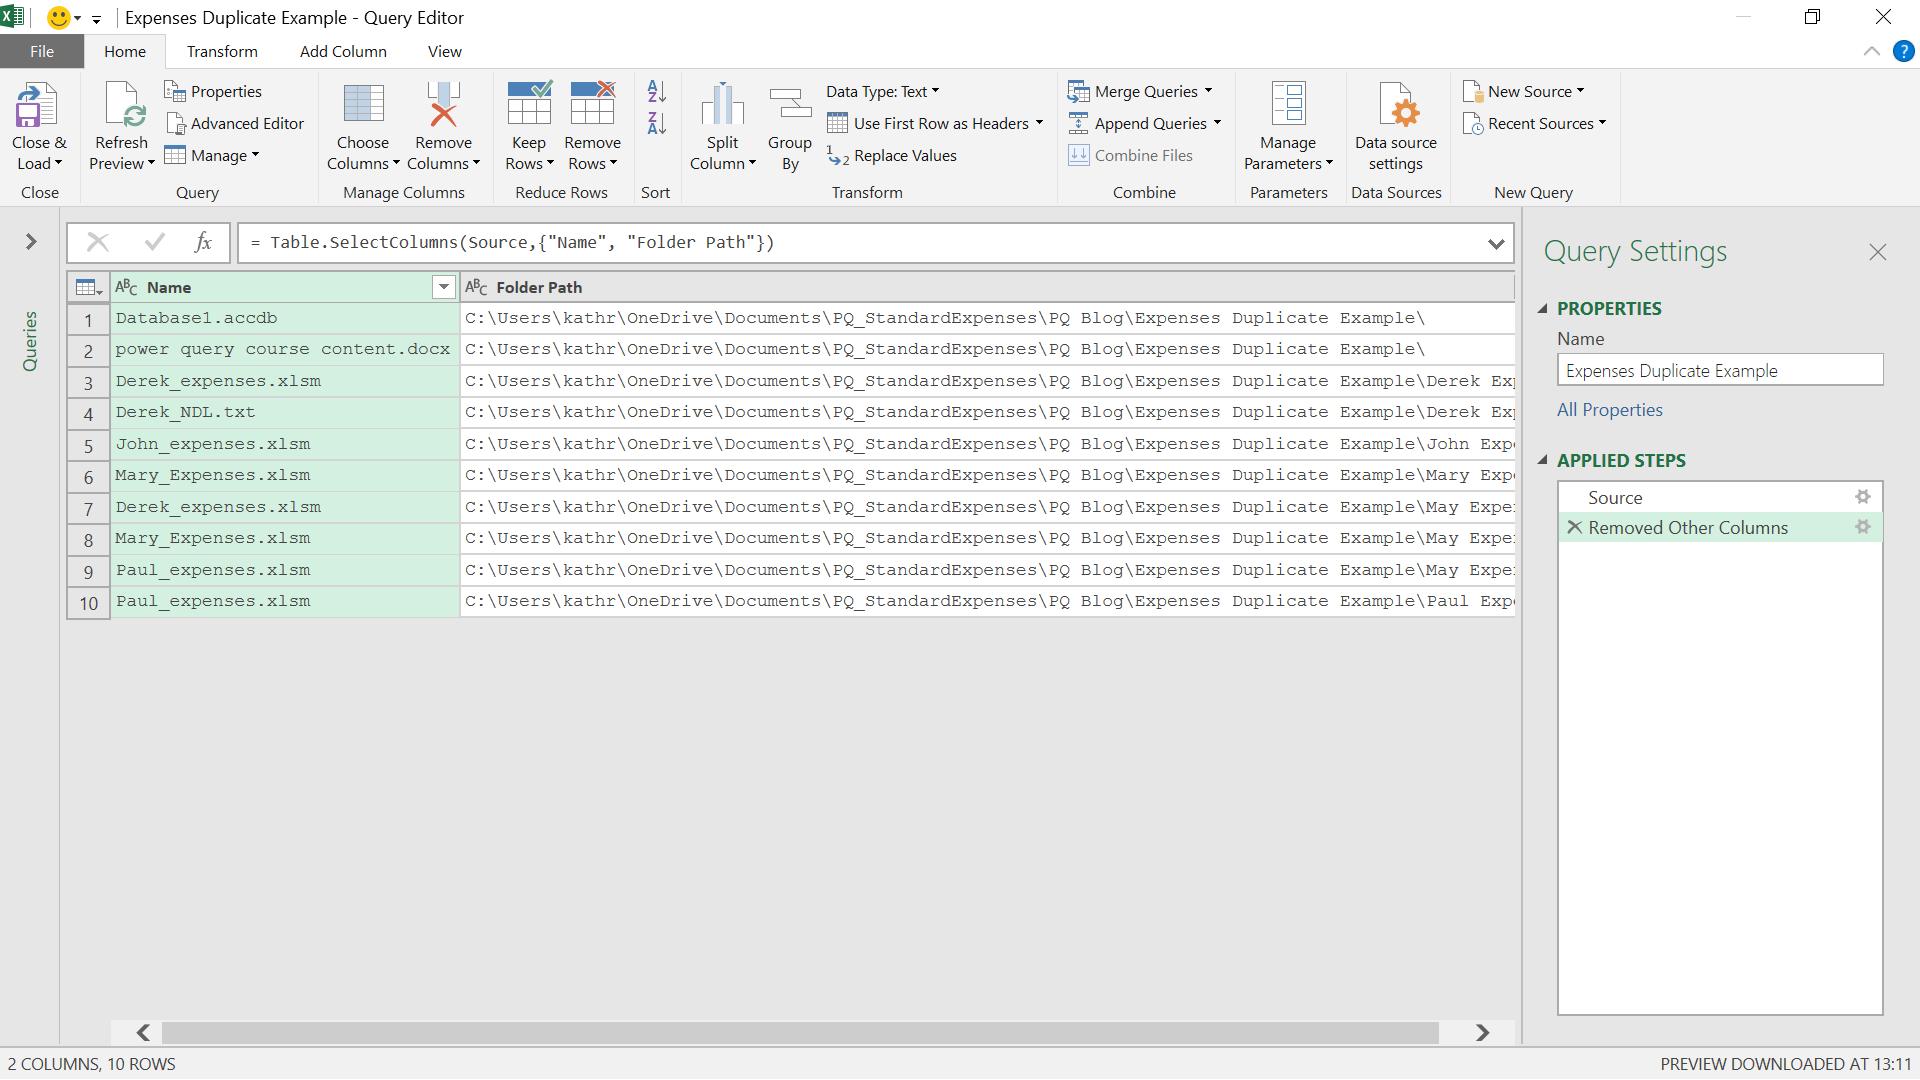
For this exercise, I only need the Name and Folder Path columns, so I select those columns and choose to ‘Remove Other Columns’ from the ‘Remove Columns’ dropdown on the ‘Manage Columns’ section of the ‘Home’ tab.
Arguably, I should also upshift the Name column for comparison. This really depends if a file with uppercase text is really the same file as one with the same name, but using lowercase text. This will depend on the practices of the users concerned. If required, I would then select the Name column and use the ‘UPPERCASE’ option in the ‘Format’ dropdown on the ‘Transform’ menu as shown below.
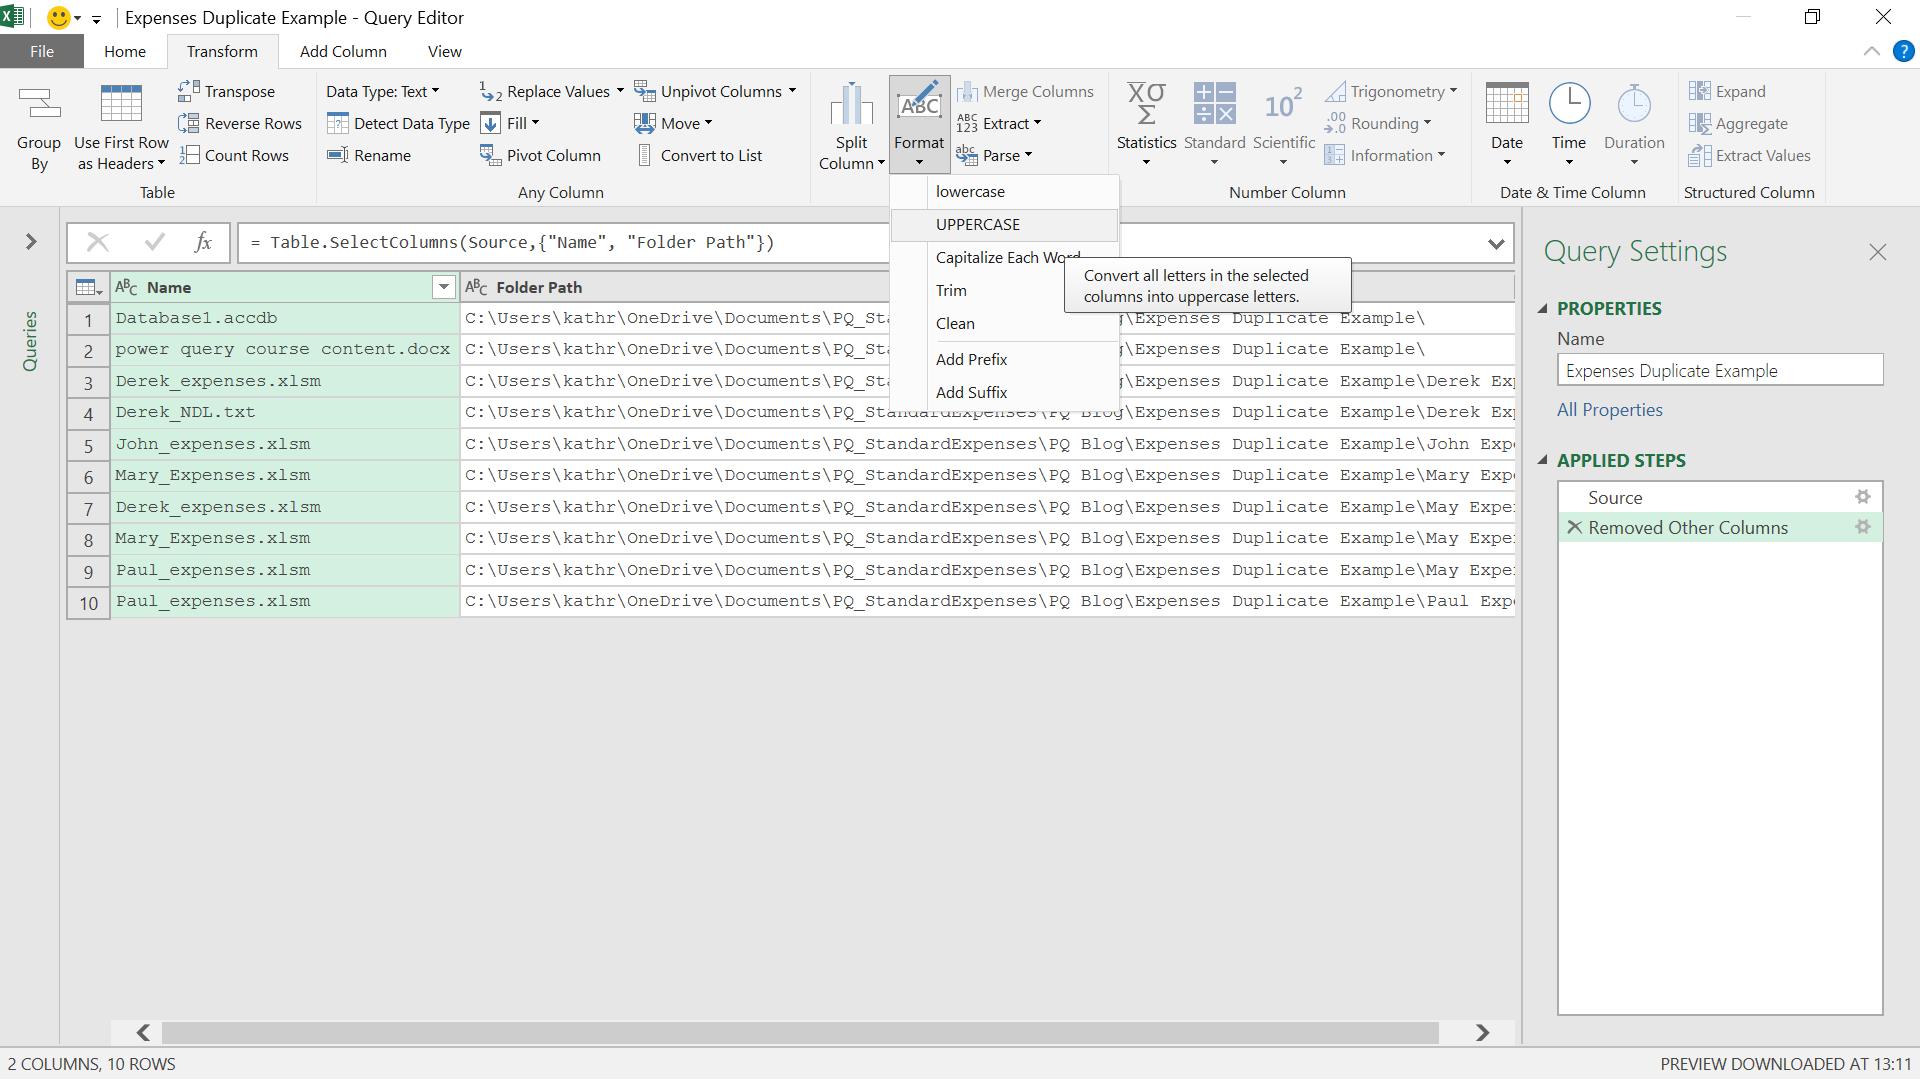
I will not be upshifting my text, so my final step for this part of the process is ‘Removed Other Columns’. I need to remember this step, as I will show later.
The next step is to group by name and to do this I use the ‘Group By’ option in the ‘Table’ section of the ‘Transform’ tab. I should add at this point, that there are other ways to do this grouping, and I am doing it this way to allow me to user Table.Join later!
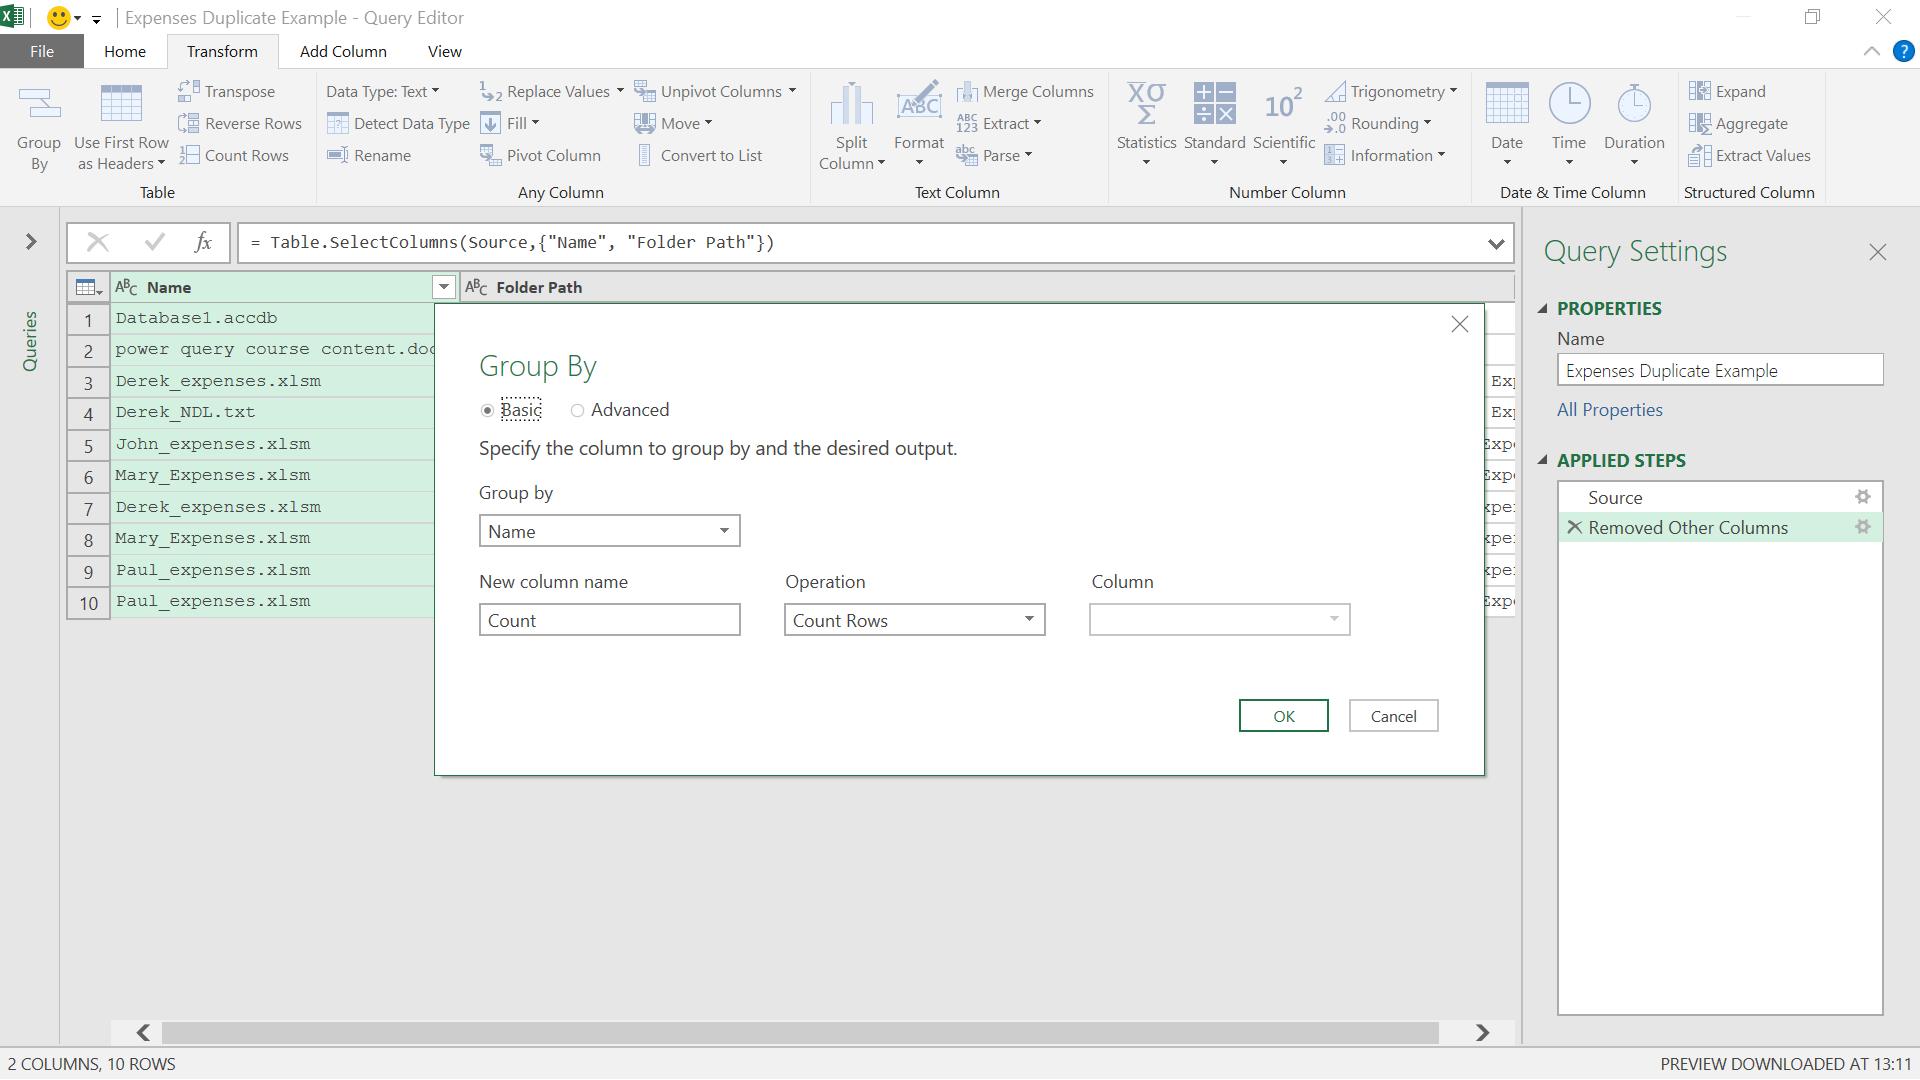
I choose to call my new column Occurrences, which will count the number of rows for each name.
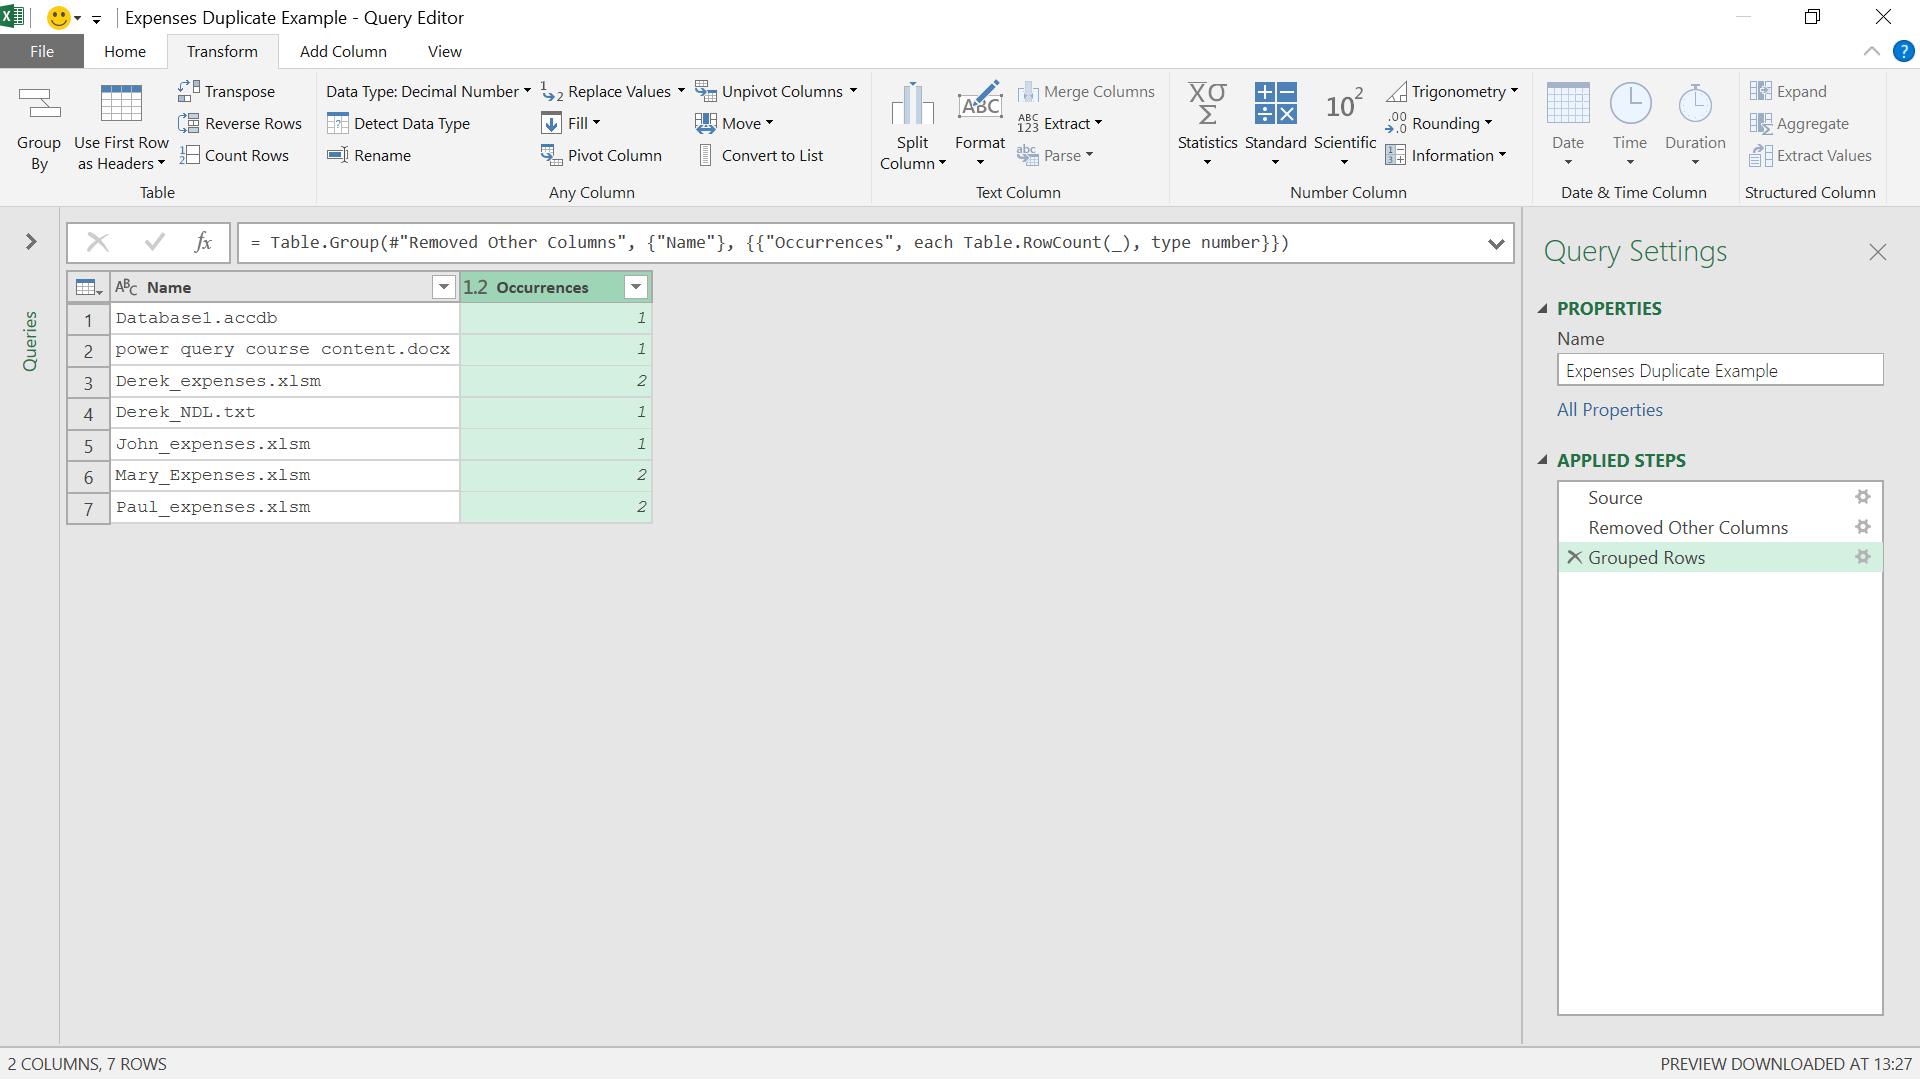
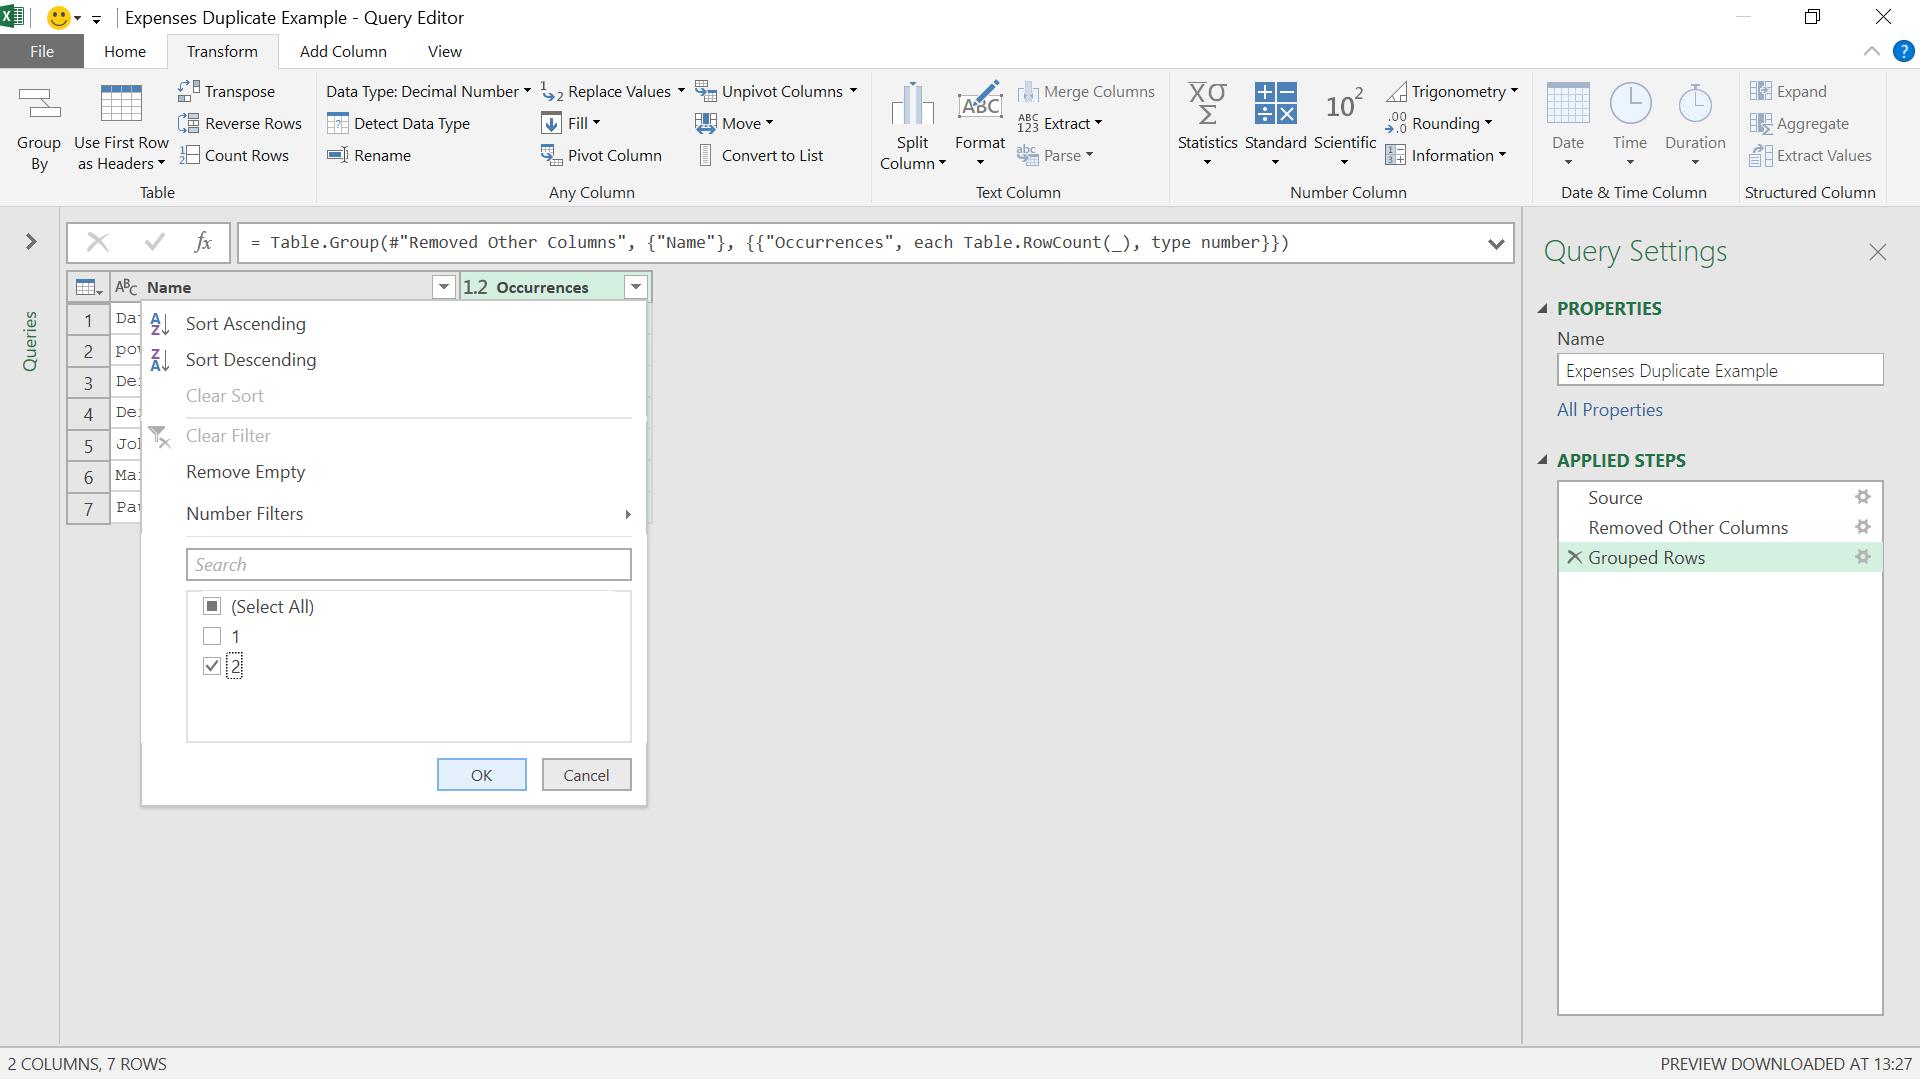
I can filter out those names that only appear once by applying a filter to Occurrences.
This then leaves me with the duplicates.
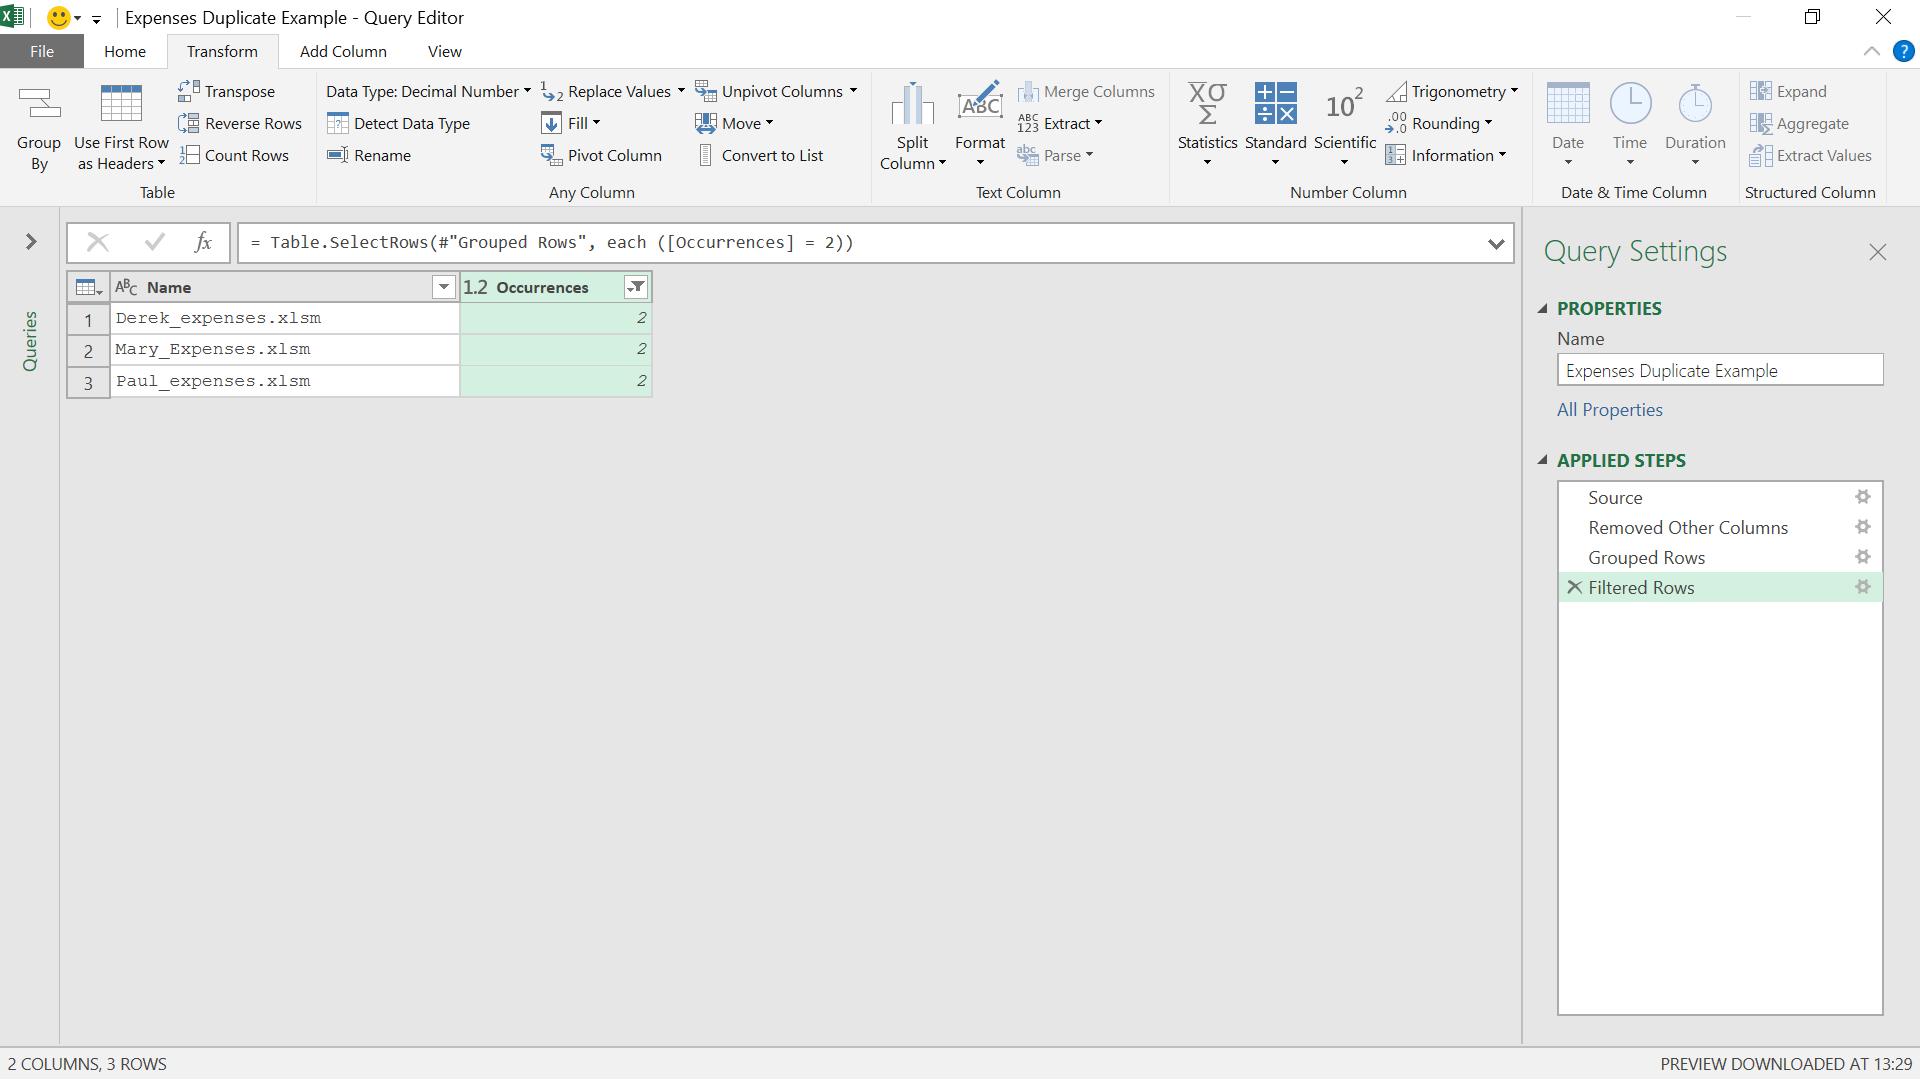
Thus, I have the names of the files that are duplicated, but now I want to go back and look at the folder path. I want to merge the data I had in step ‘Removed Other Columns’ (see now why I had to remember this step?) with the data I have in step ‘Filtered Rows’. This is where I can use Table.Join.
My first table is at the step ‘Removed Other Columns’, and my second table is at ‘Filtered Rows’.
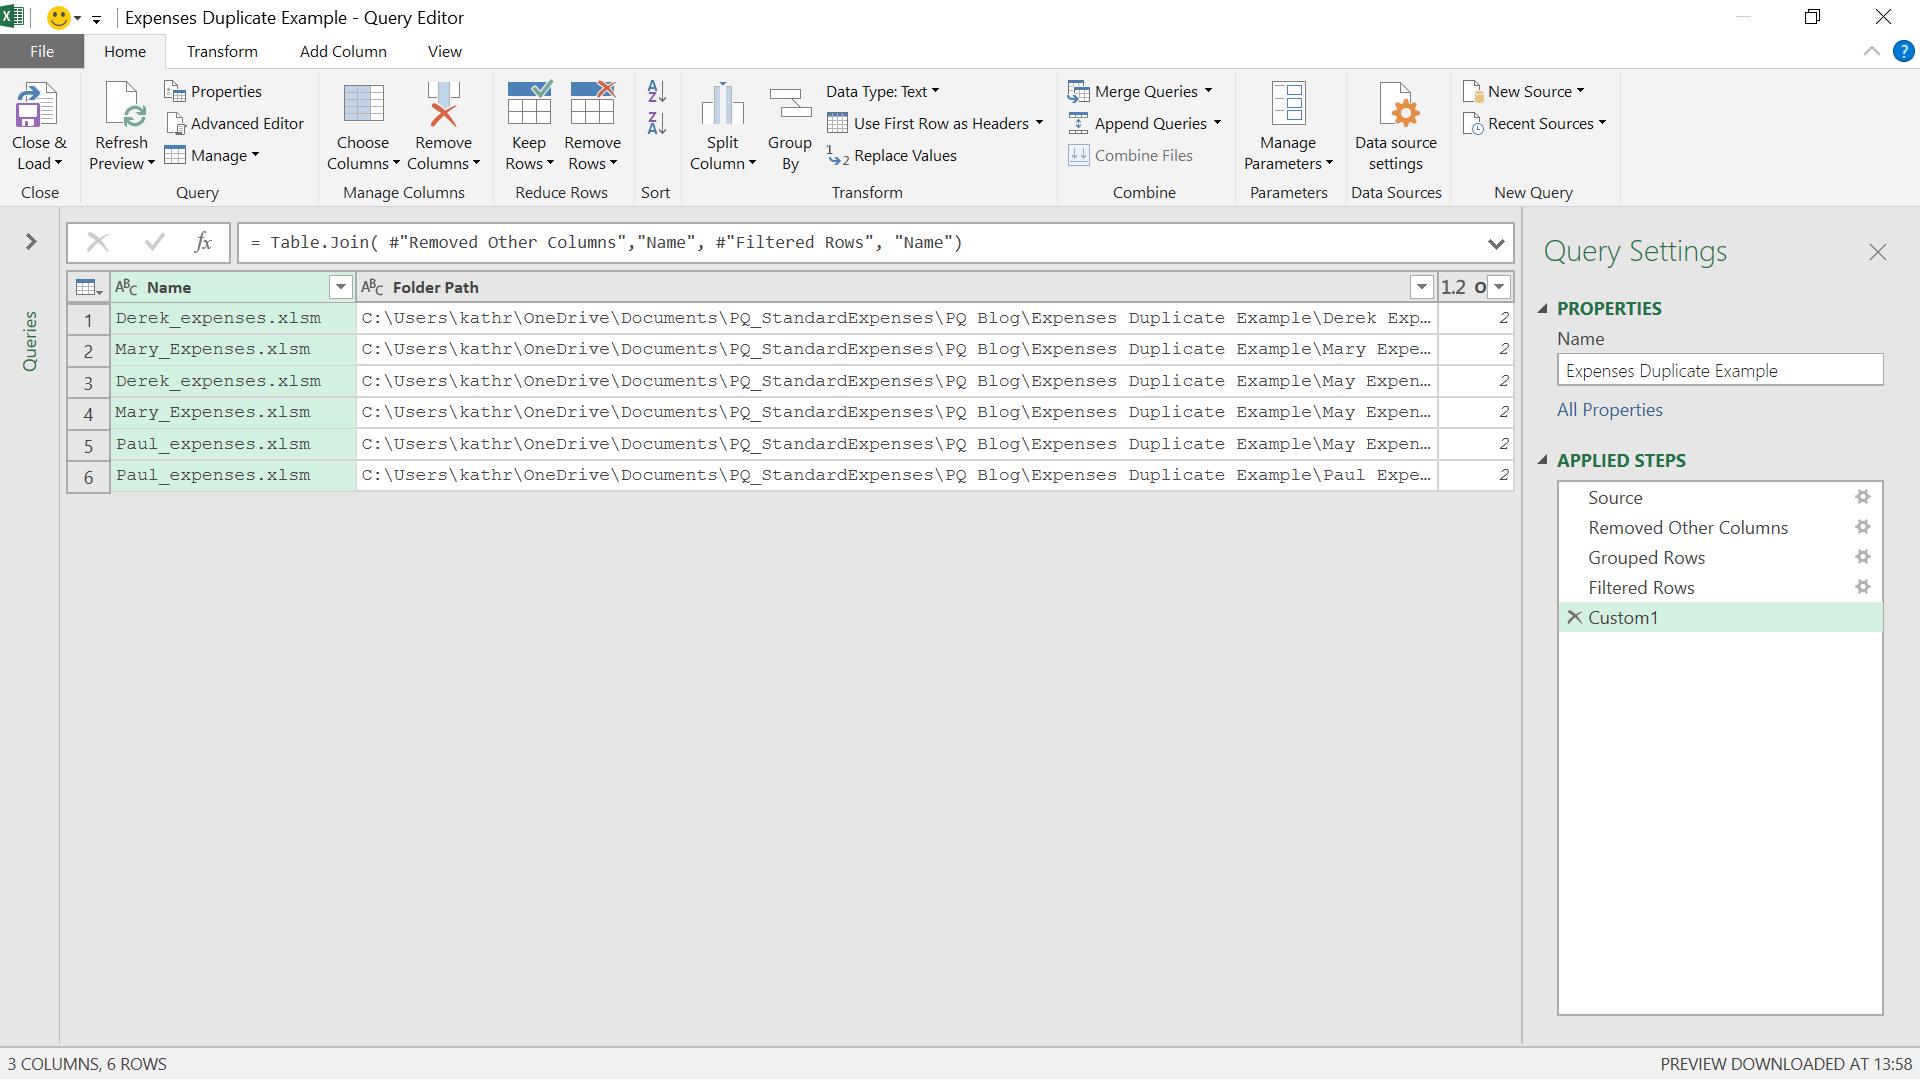
I now have my file name, folder path and the number of occurrences – so I can see where every duplicate file is.
The syntax I used is:
= Table.Join( #"Removed Other Columns","Name", #"Filtered Rows", "Name")
The reason for the #’s is because I have names with gaps, and the # simply tells M to ignore the spaces in the names. I could also rename my steps, but I prefer to do it this way, so I can see exactly where I am combining my data. “Name” tells Power Query how to join my two tables – if the name matches, then join the rows. I am using the default join here, the inner join.
Now I know where the duplicate files are, I can sort out the administration.
Want to read more about Power Query? A complete list of all our Power Query blogs can be found here. Come back next time for more ways to use Power Query!

