Power Query: Knowing Your Type is the Key
28 June 2017
Welcome to our Power Query blog. Today I look at extracting data by using differences in data types.
When transforming data with Power Query, the most important skill is knowing where to start, and this week I look at one such scenario.
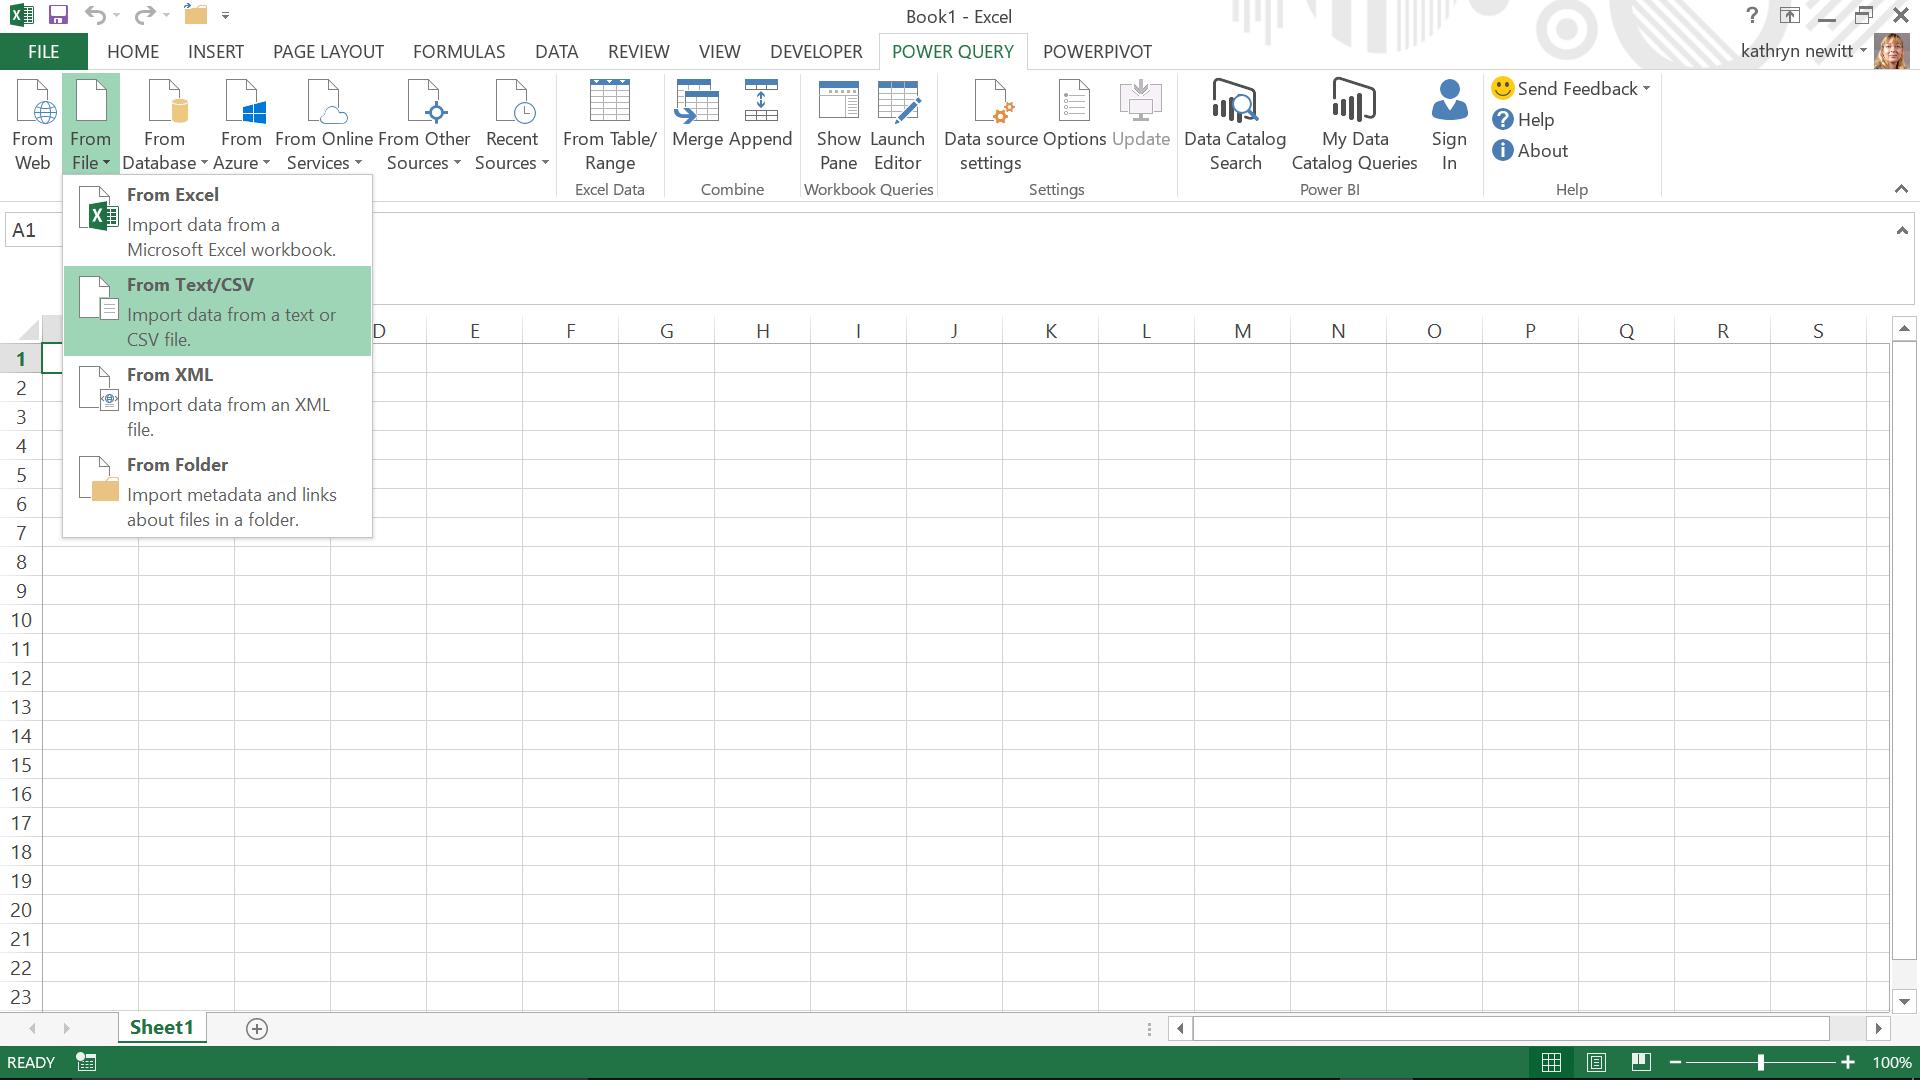
I have received a CSV file containing expense information for a number of employees. The creator of the file has included heading information, but it is embedded in the expense data. Starting from a fresh Excel workbook, I load my data using the same method I employed in Getting Started. To do this, I go to the Power Query tab, and choose ‘From File’. I select the ‘From Text/CSV’ option:
Having selected my file, I choose to edit prior to loading so that I access the Power Query Editor.
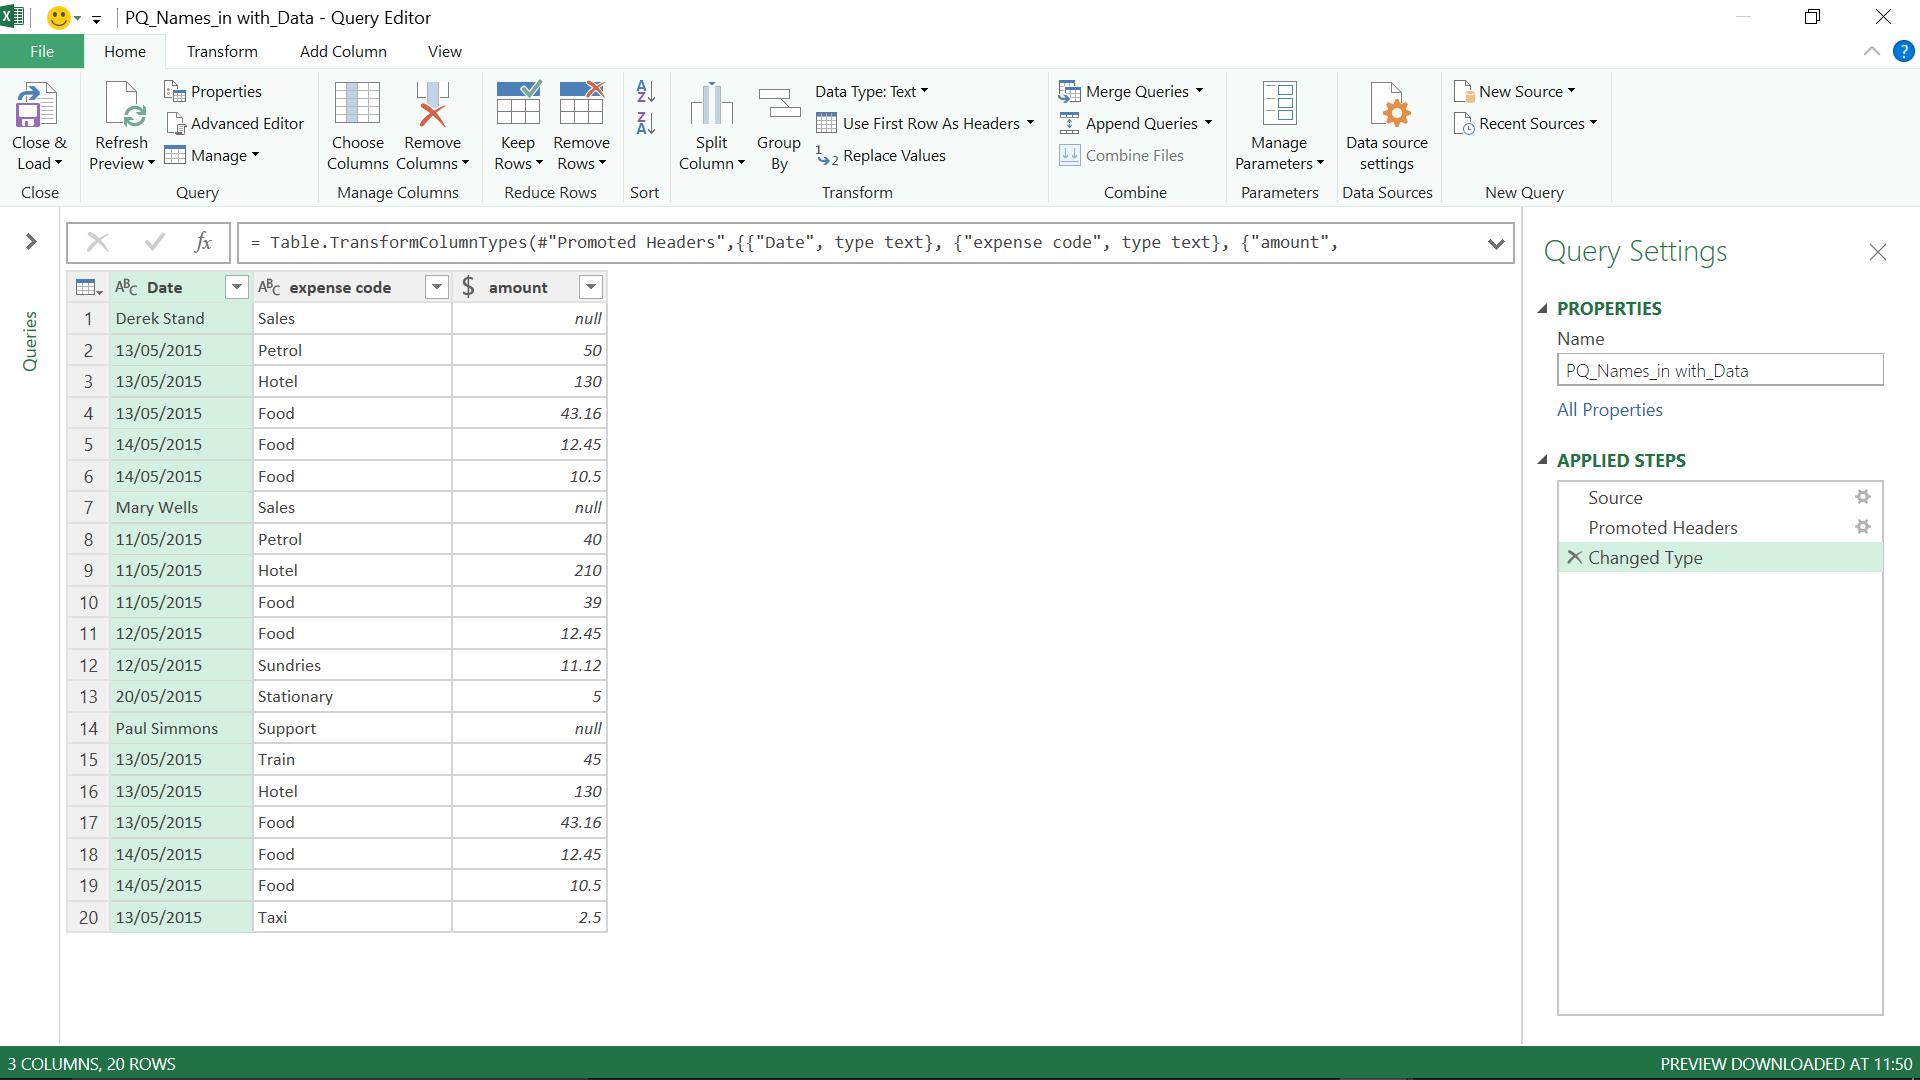
Note that because my top row contained text for each column, Power Query has correctly assumed that this is the title row and ‘Promoted Headers’ accordingly which saves me renaming my columns and deleting that row. However, now I can see the problem. Since the creator of the file has included the employee and department information between the expense rows, my Date column has some names in it, and my expense code column has some departments. I need to extract my name and department data from the other rows.
In these situations, I have to look for a way of distinguishing the data that I need to extract. My expense code column doesn’t help much, as departments and expense codes look fairly similar. In my Date column however, the names are a different format to the dates, and this is a reliable indicator, as I am not likely to have someone with a name that resembles a date!
I have two problems – I want to get rid of the rows that have an ‘irregular’ date, but I also need to extract my name data. The first step I will take, is to make a copy of my Date column. To do this, I right-click my Date column and choose ‘Duplicate Column’:
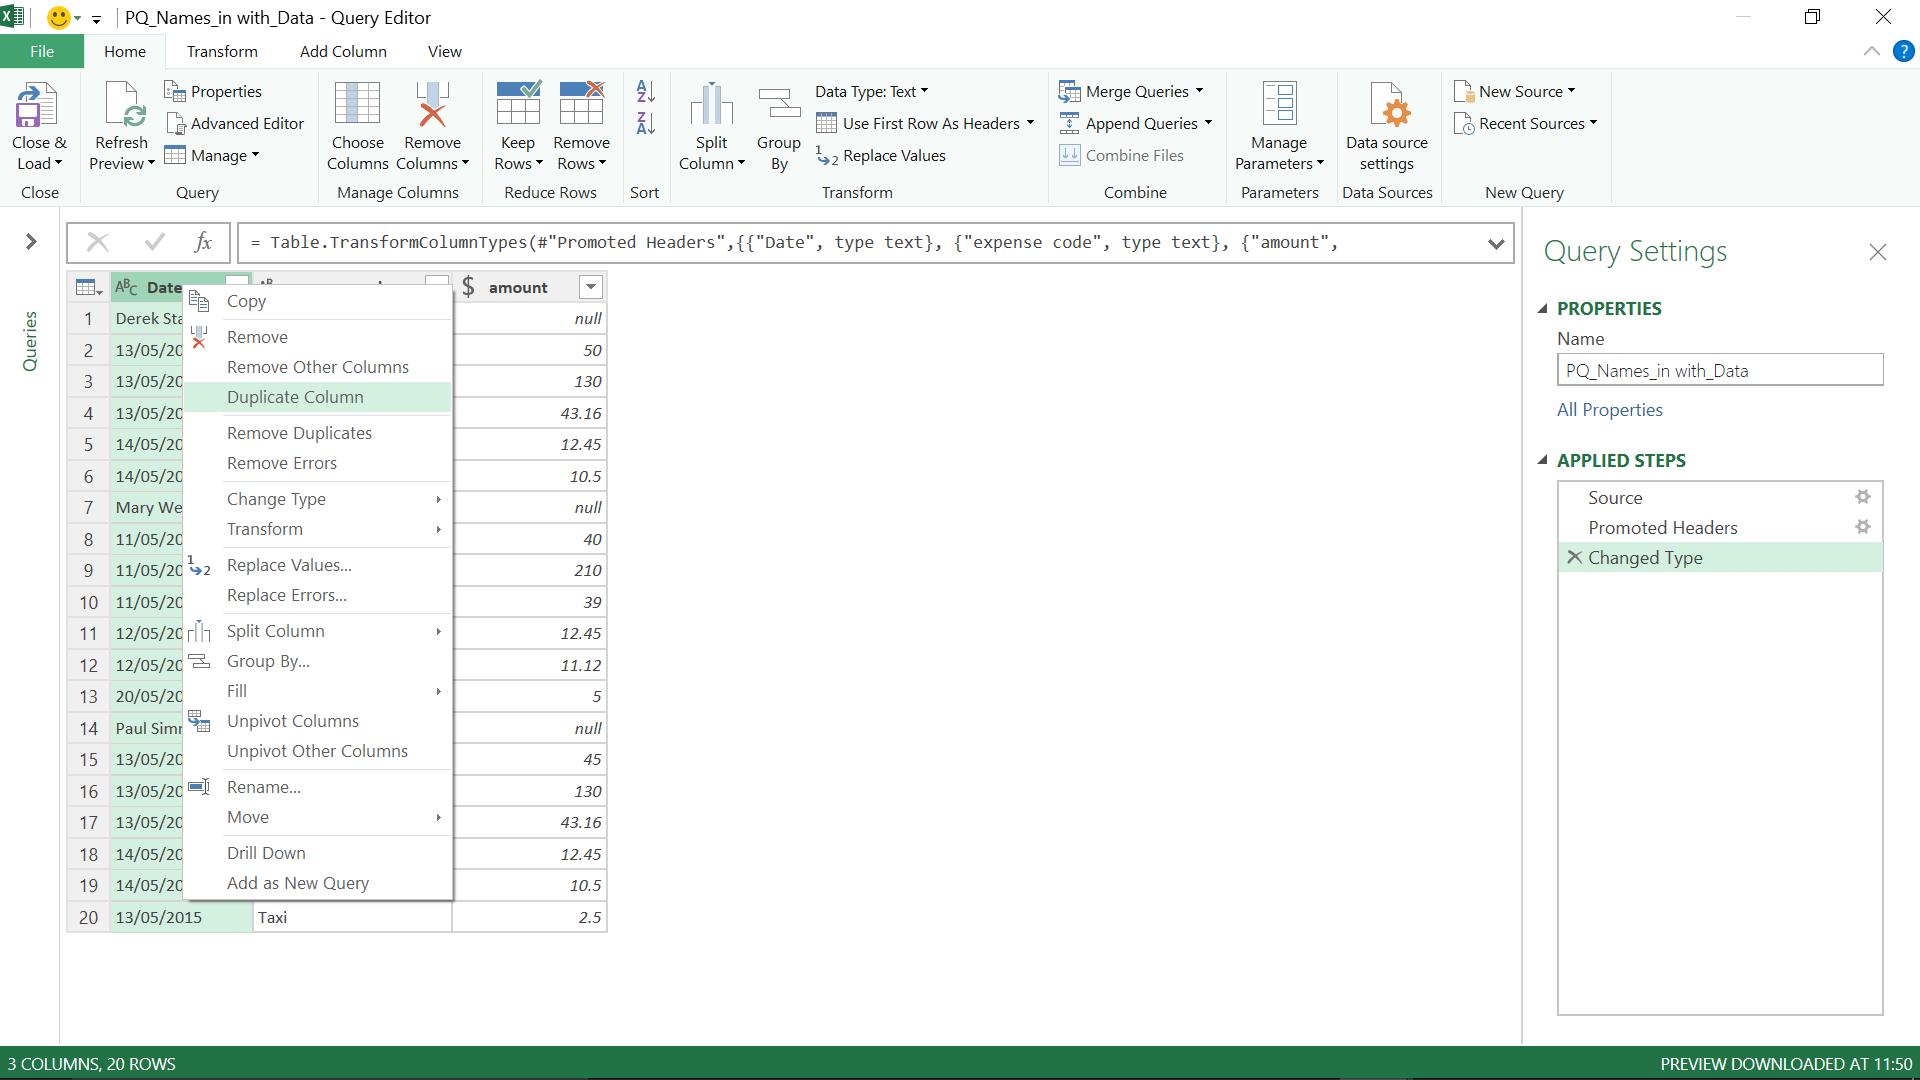
I complete this process and create a Date – Copy column which I can manipulate without losing data from the original column. I right-click my copied column and choose to change the type to ‘Date’, which means that my names are flagged as errors:
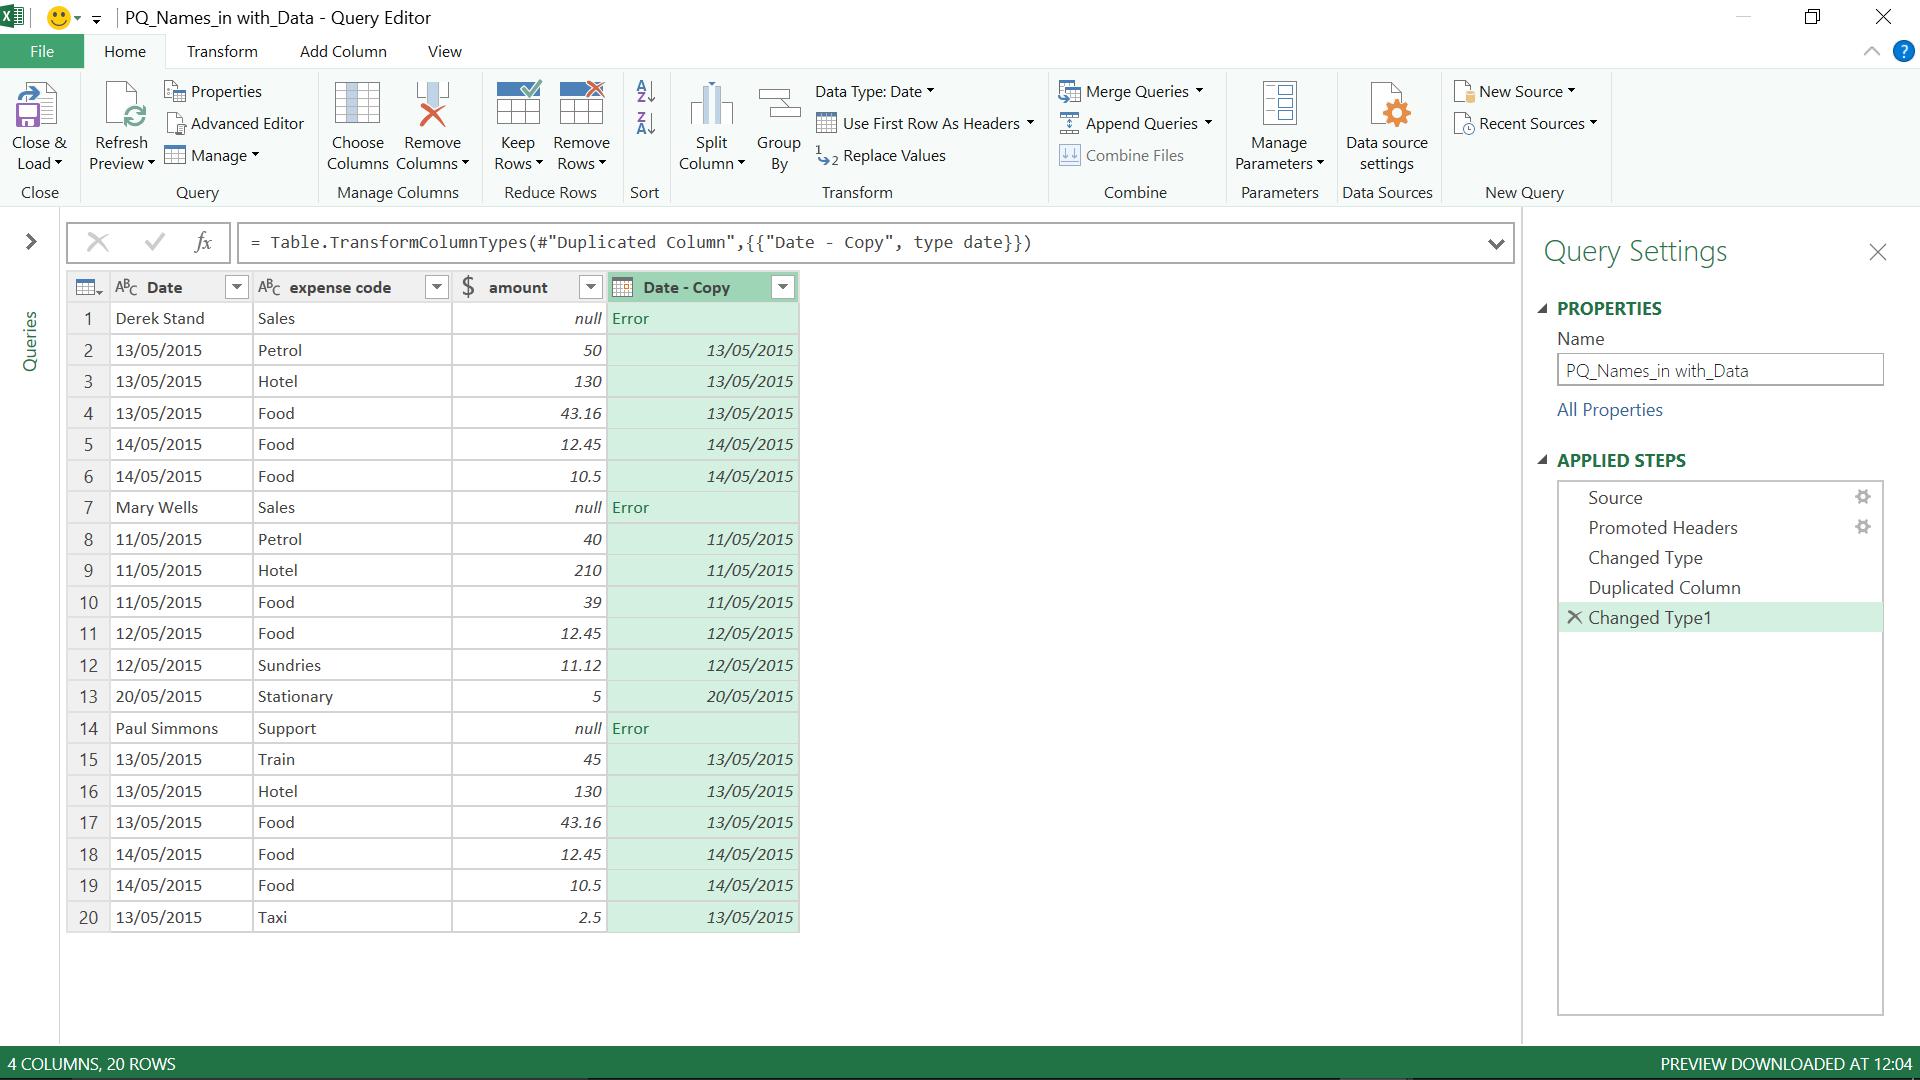
I can now reset the data in the ‘Error’ entries to null – I right click my copied column again and choose to ‘Replace Errors’ with null.
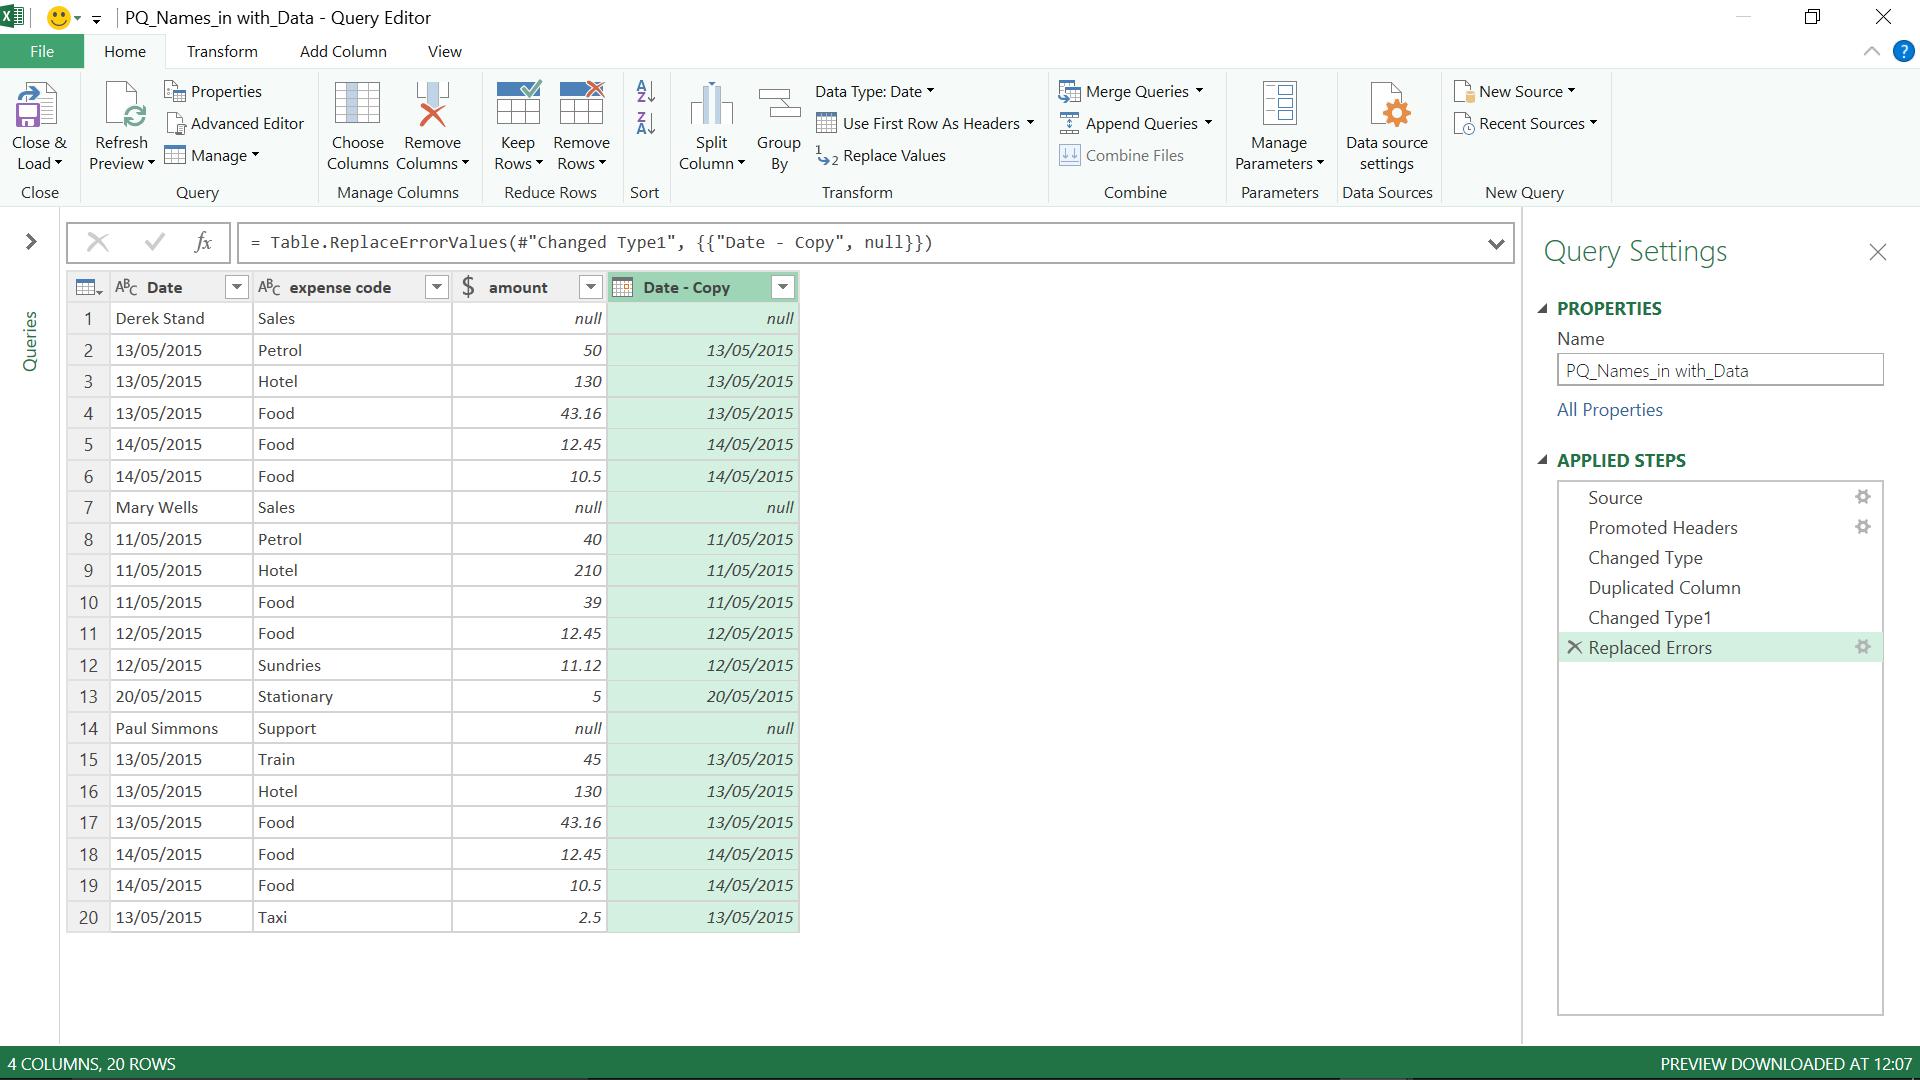
The reason that null is more useful to me than an error, is because I can use null in the conditional logic that I need to extract my name data.
I create a new column by choosing ‘Conditional Column’ from the ‘General’ section on the ‘Add Column’ tab. I want to create a column that is populated with the employee name.
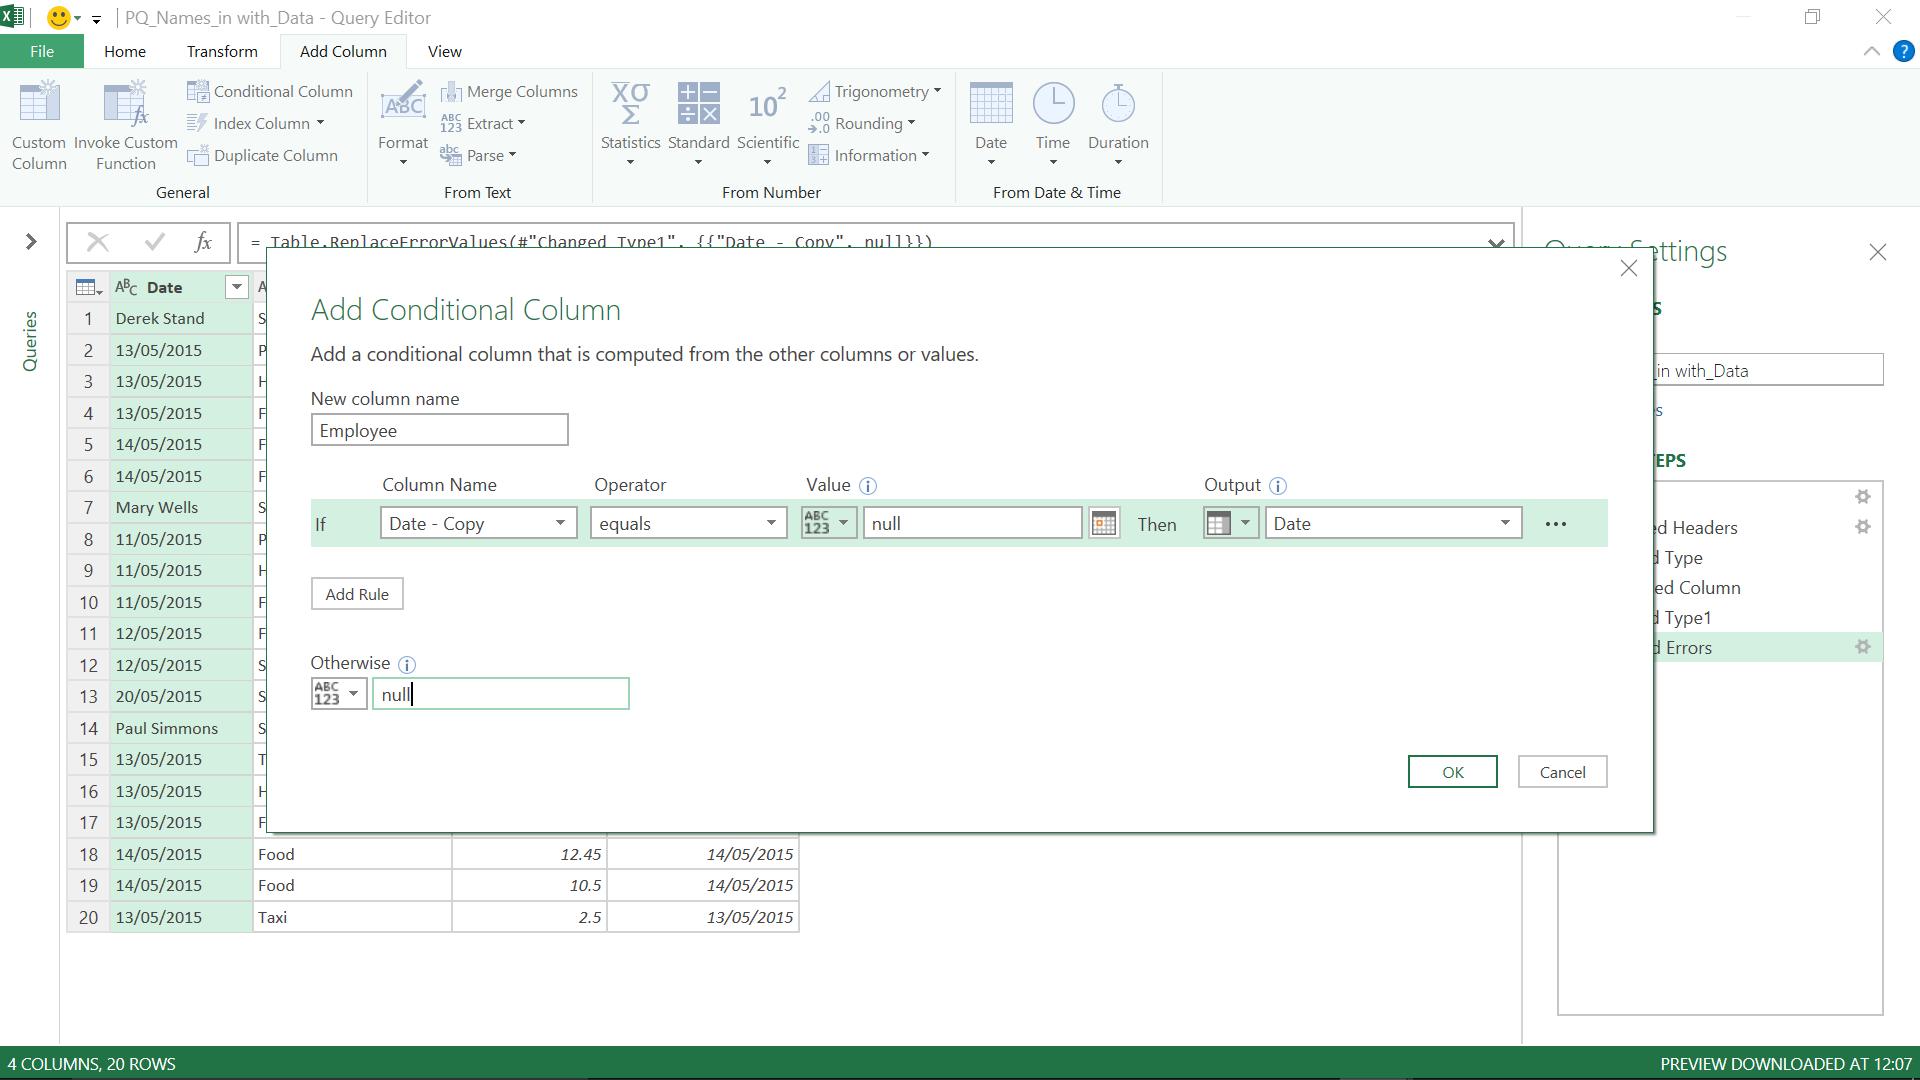
Power Query builds the logic statement, so I just need to supply the location of the data.
If Date_Copy equals null, Then Date, Otherwise null
Note that the default for the Value and the Output is a value, and since my chosen output is a column, I need to select that from the icon under Output, otherwise I will be inserting the value ‘Date’ instead of the value in Date. Choosing to output null when the condition is not met will help with the next step.
With this borne in mind, I click ‘OK’ to see my new column:
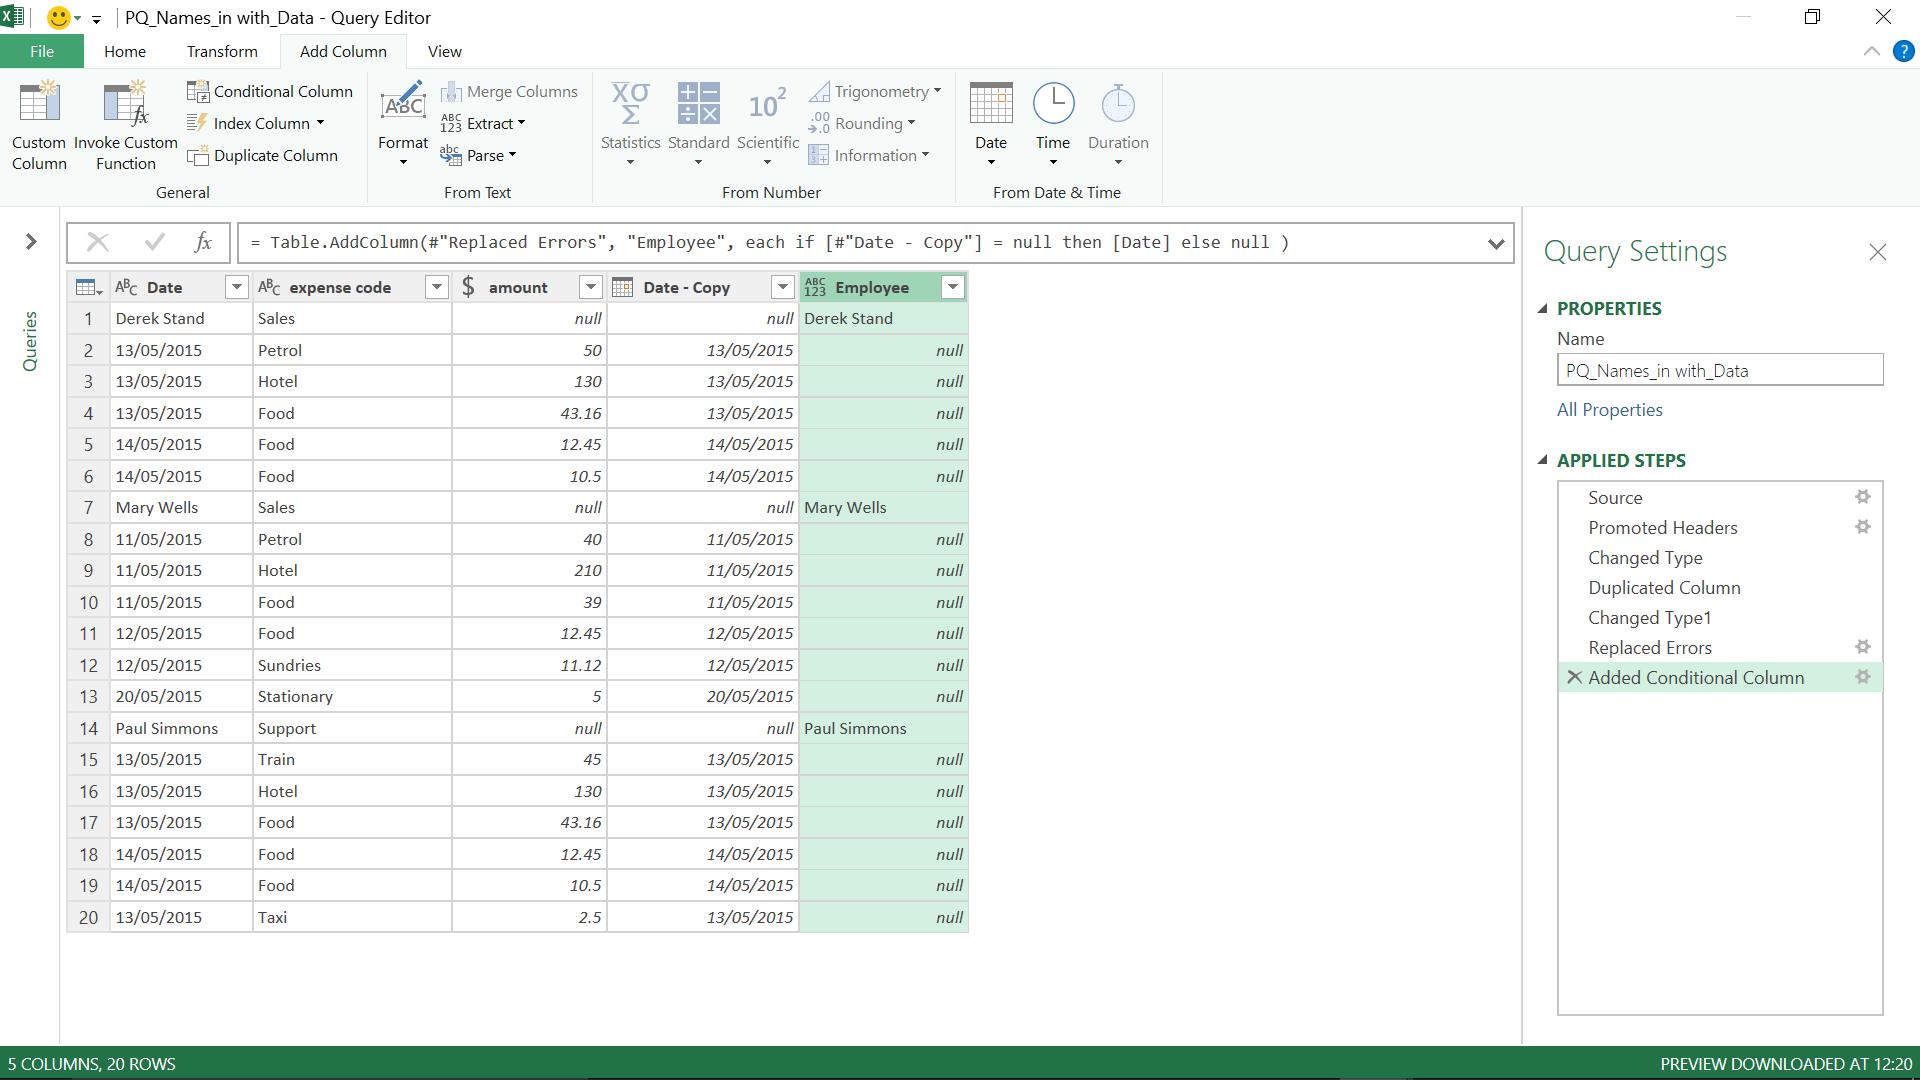
Since the value in my new column is either a name or null, I can populate the rest of the data. I right-click my new column and choose ‘Fill’ and then ‘Down’.
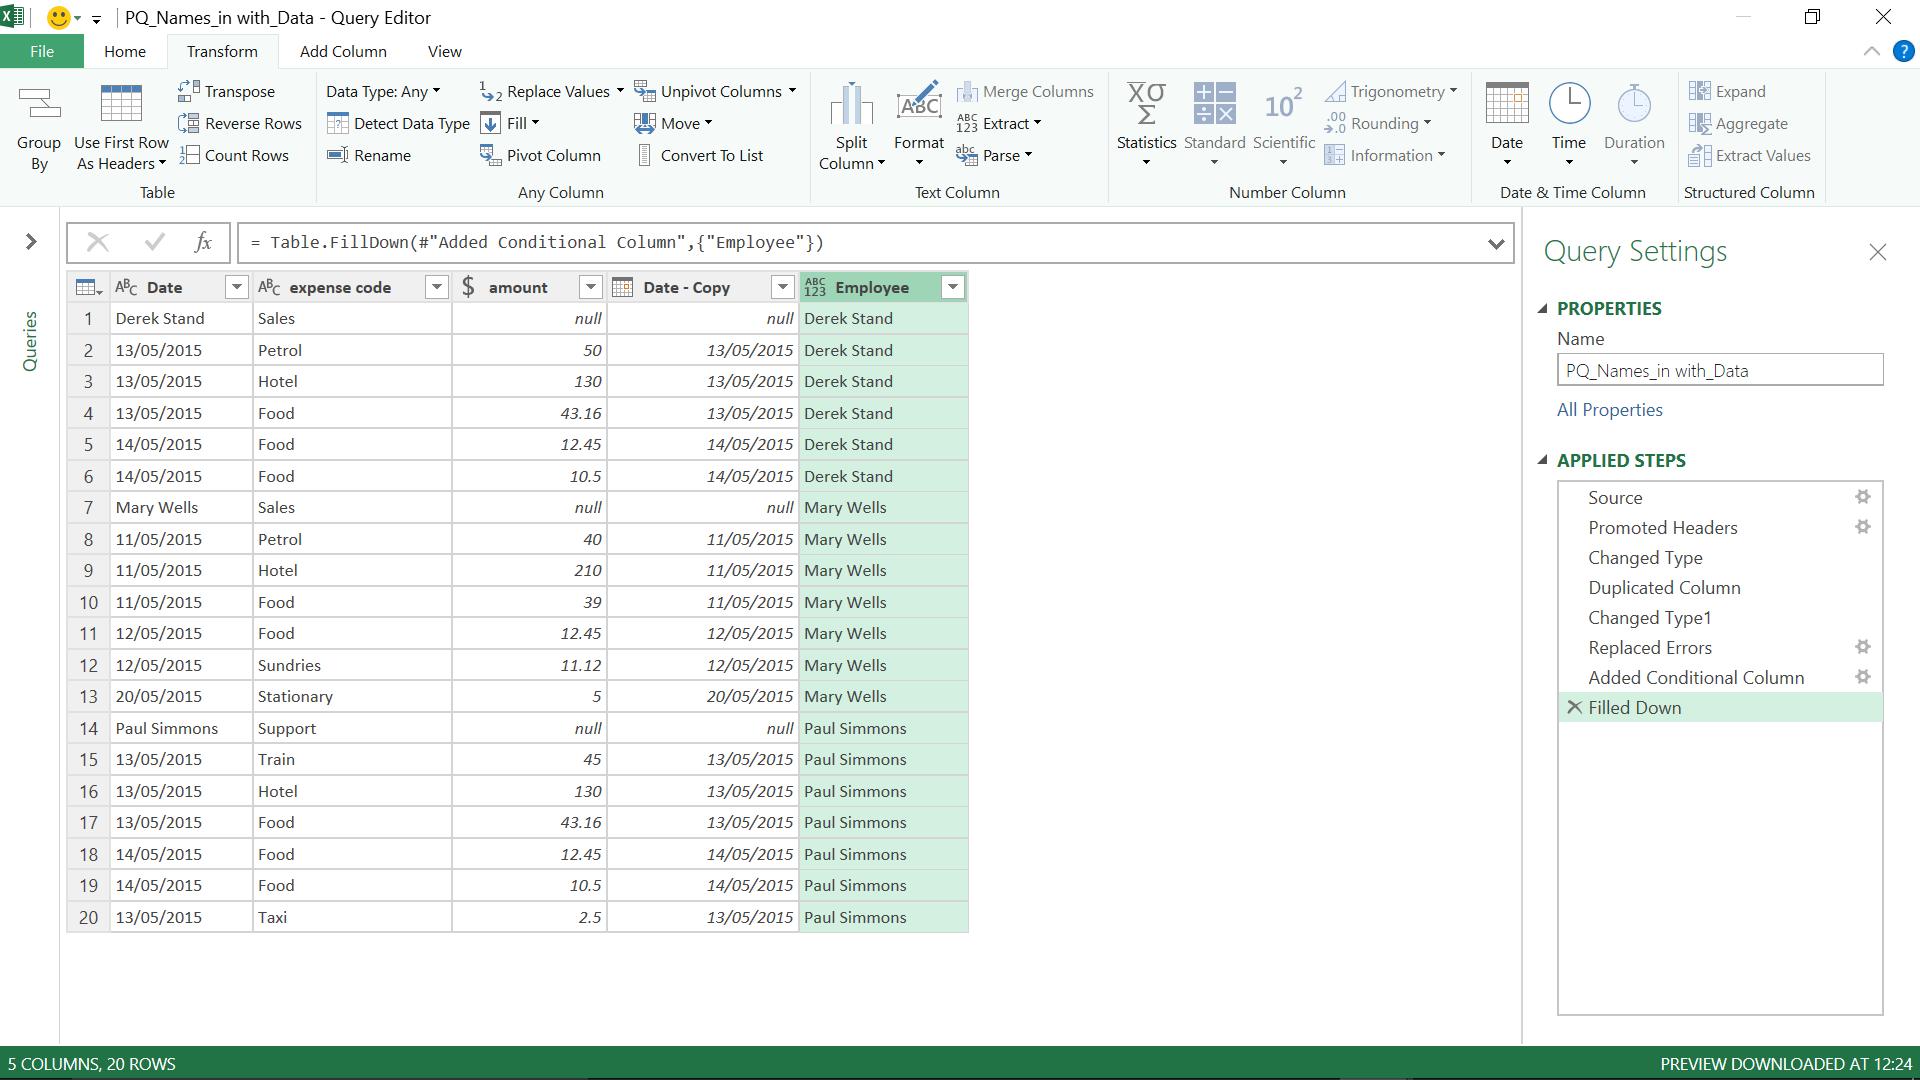
I have my names; I can now create another Conditional Column to get my department information – this time my output is the expense code column.
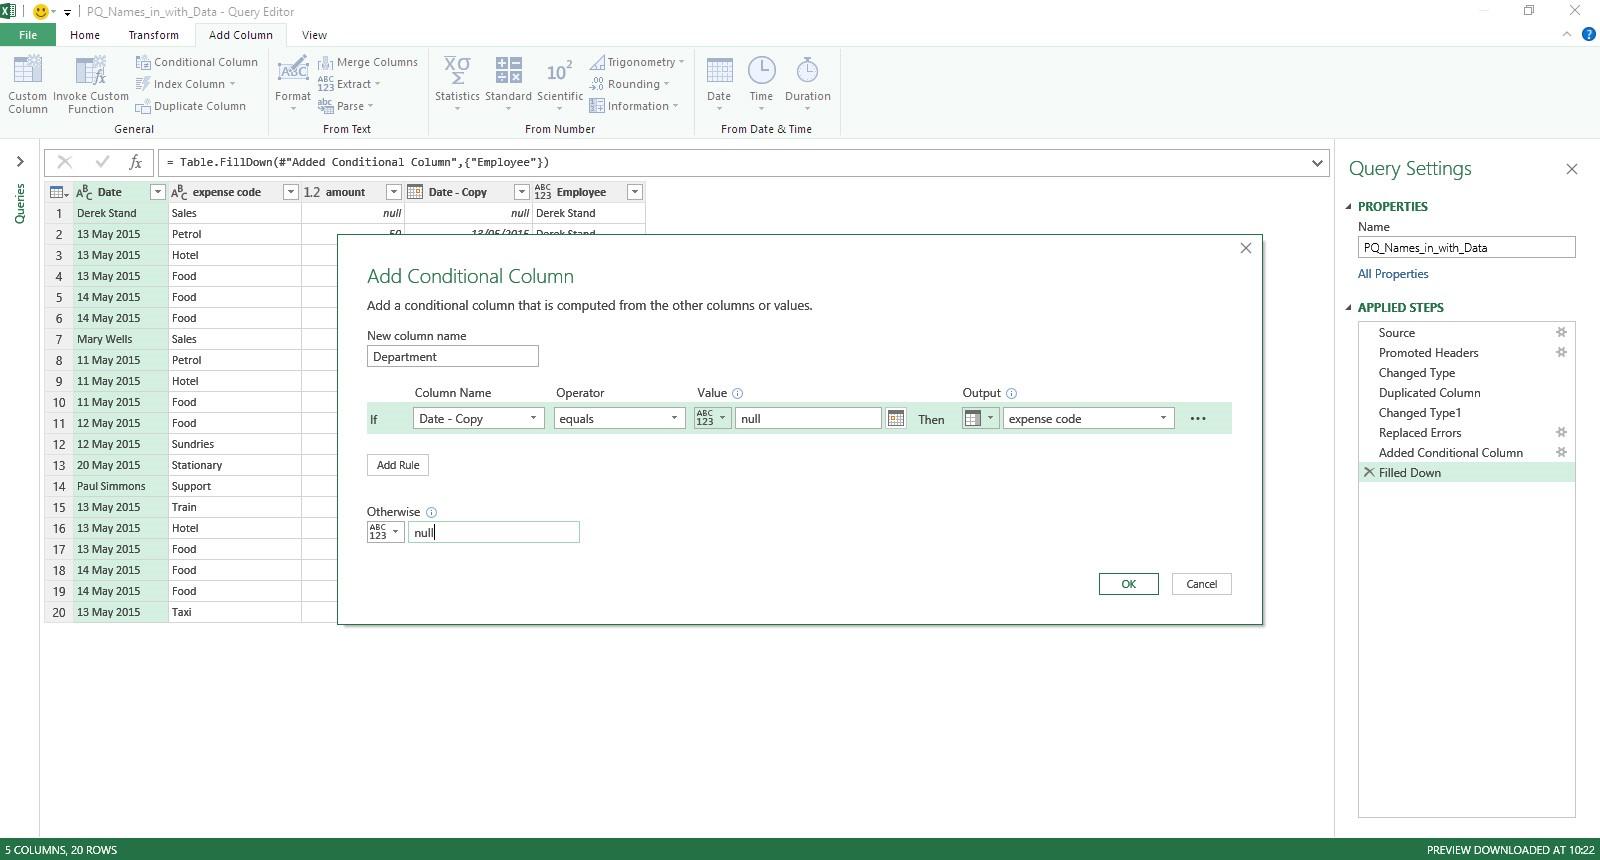
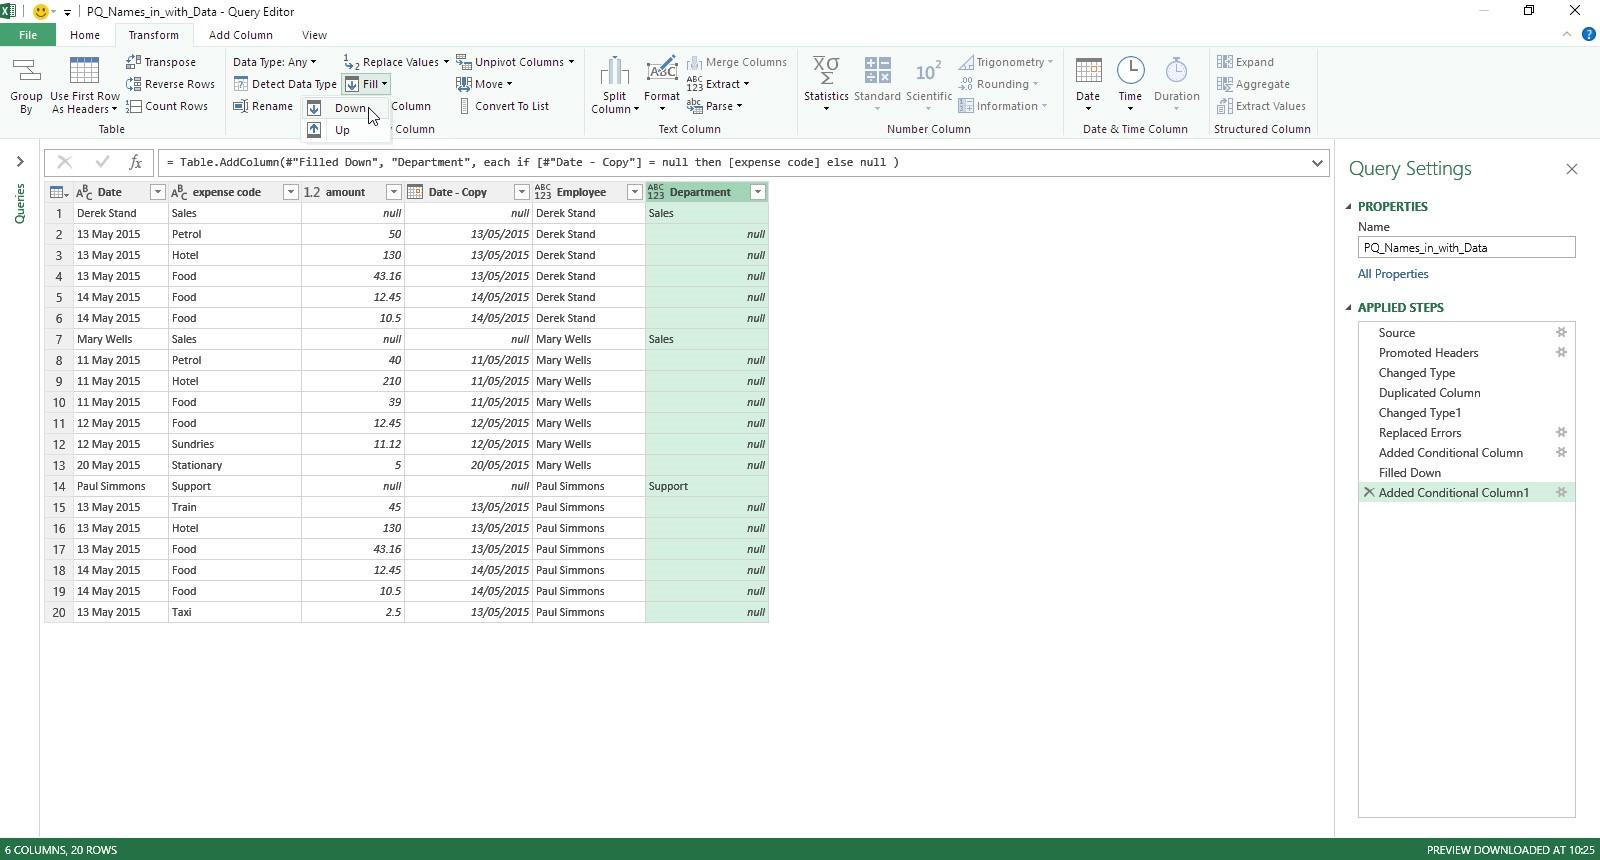
Since the value in my new column is either a department name or null, I can populate the rest of the data. I right-click my new column and choose ‘Fill’ and then ‘Down’ as before:
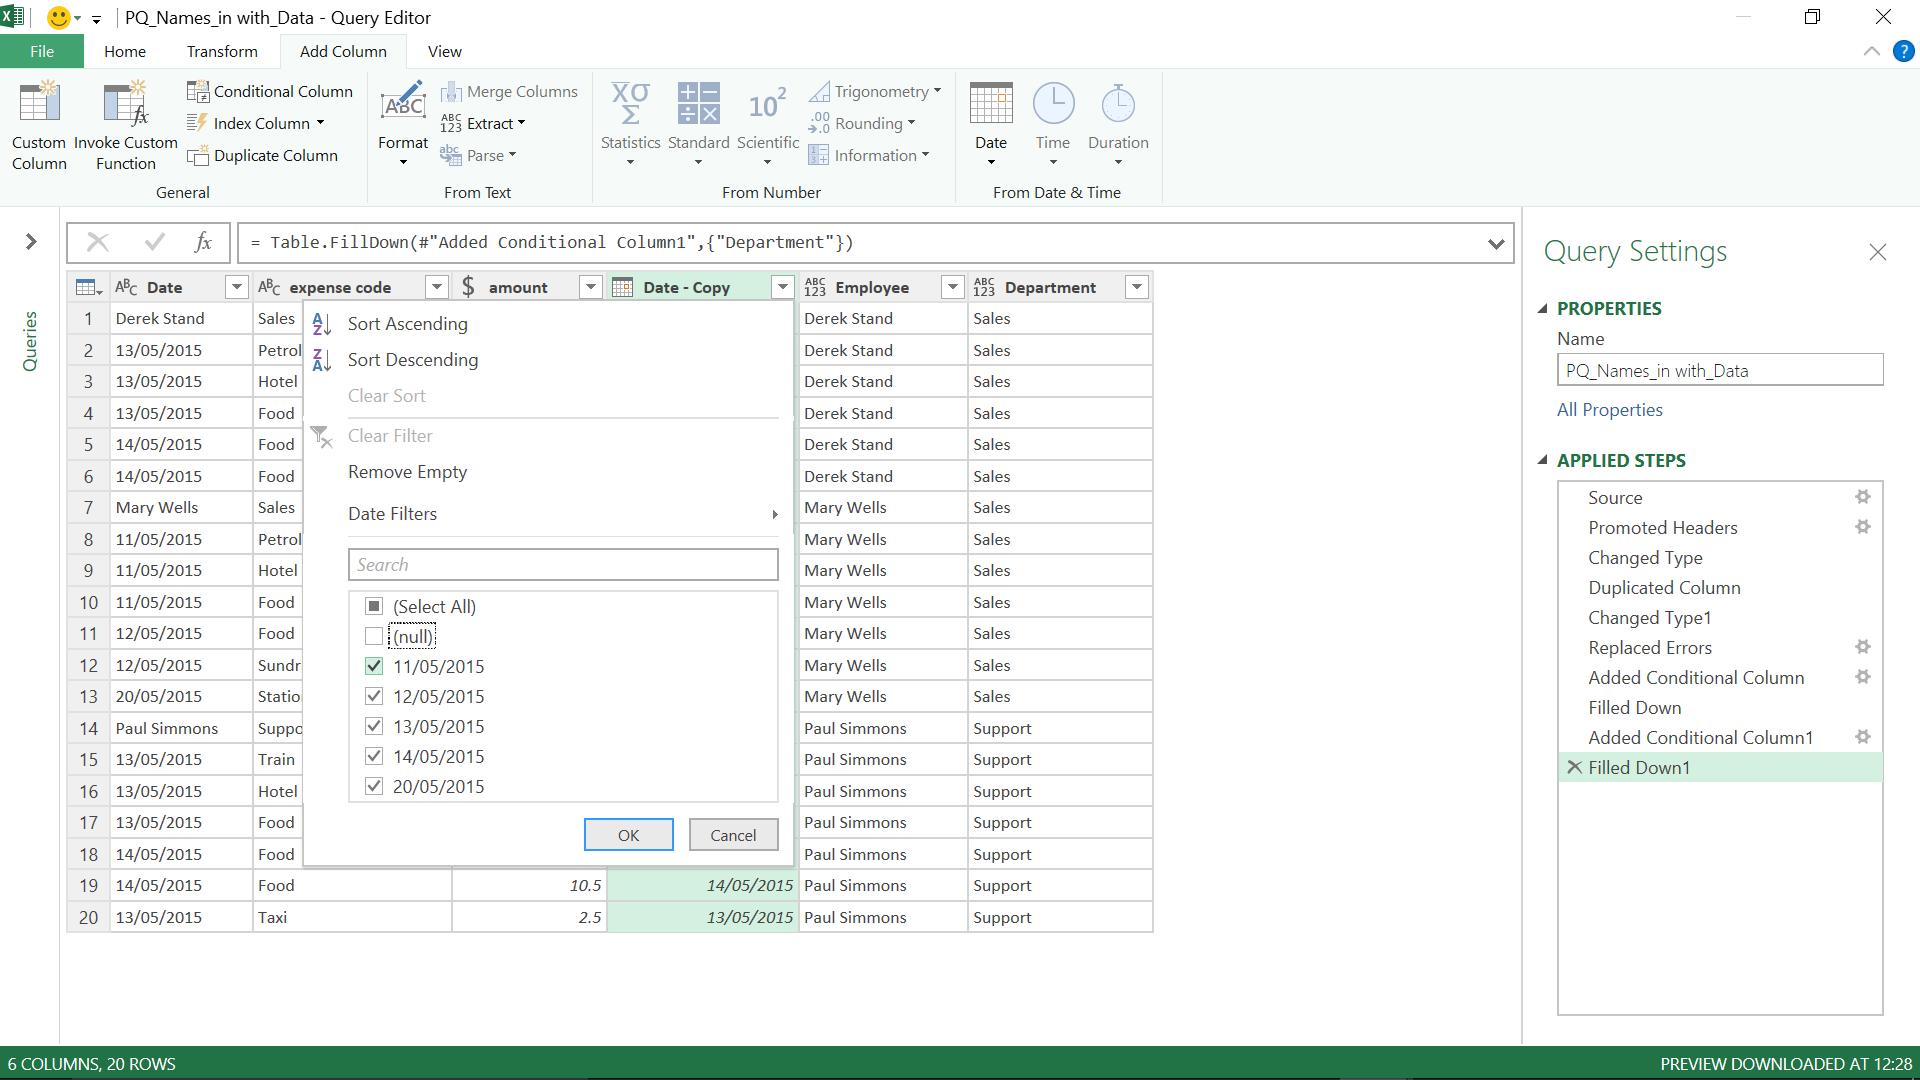
Now all I need is to get rid of my redundant columns and rows. There are a number of ways I could approach this, but since I still have nulls in Date – Copy, I use this column. Then, I use the filter icon next to the Date – Copy column to remove null values.
This gives me the rows I want.
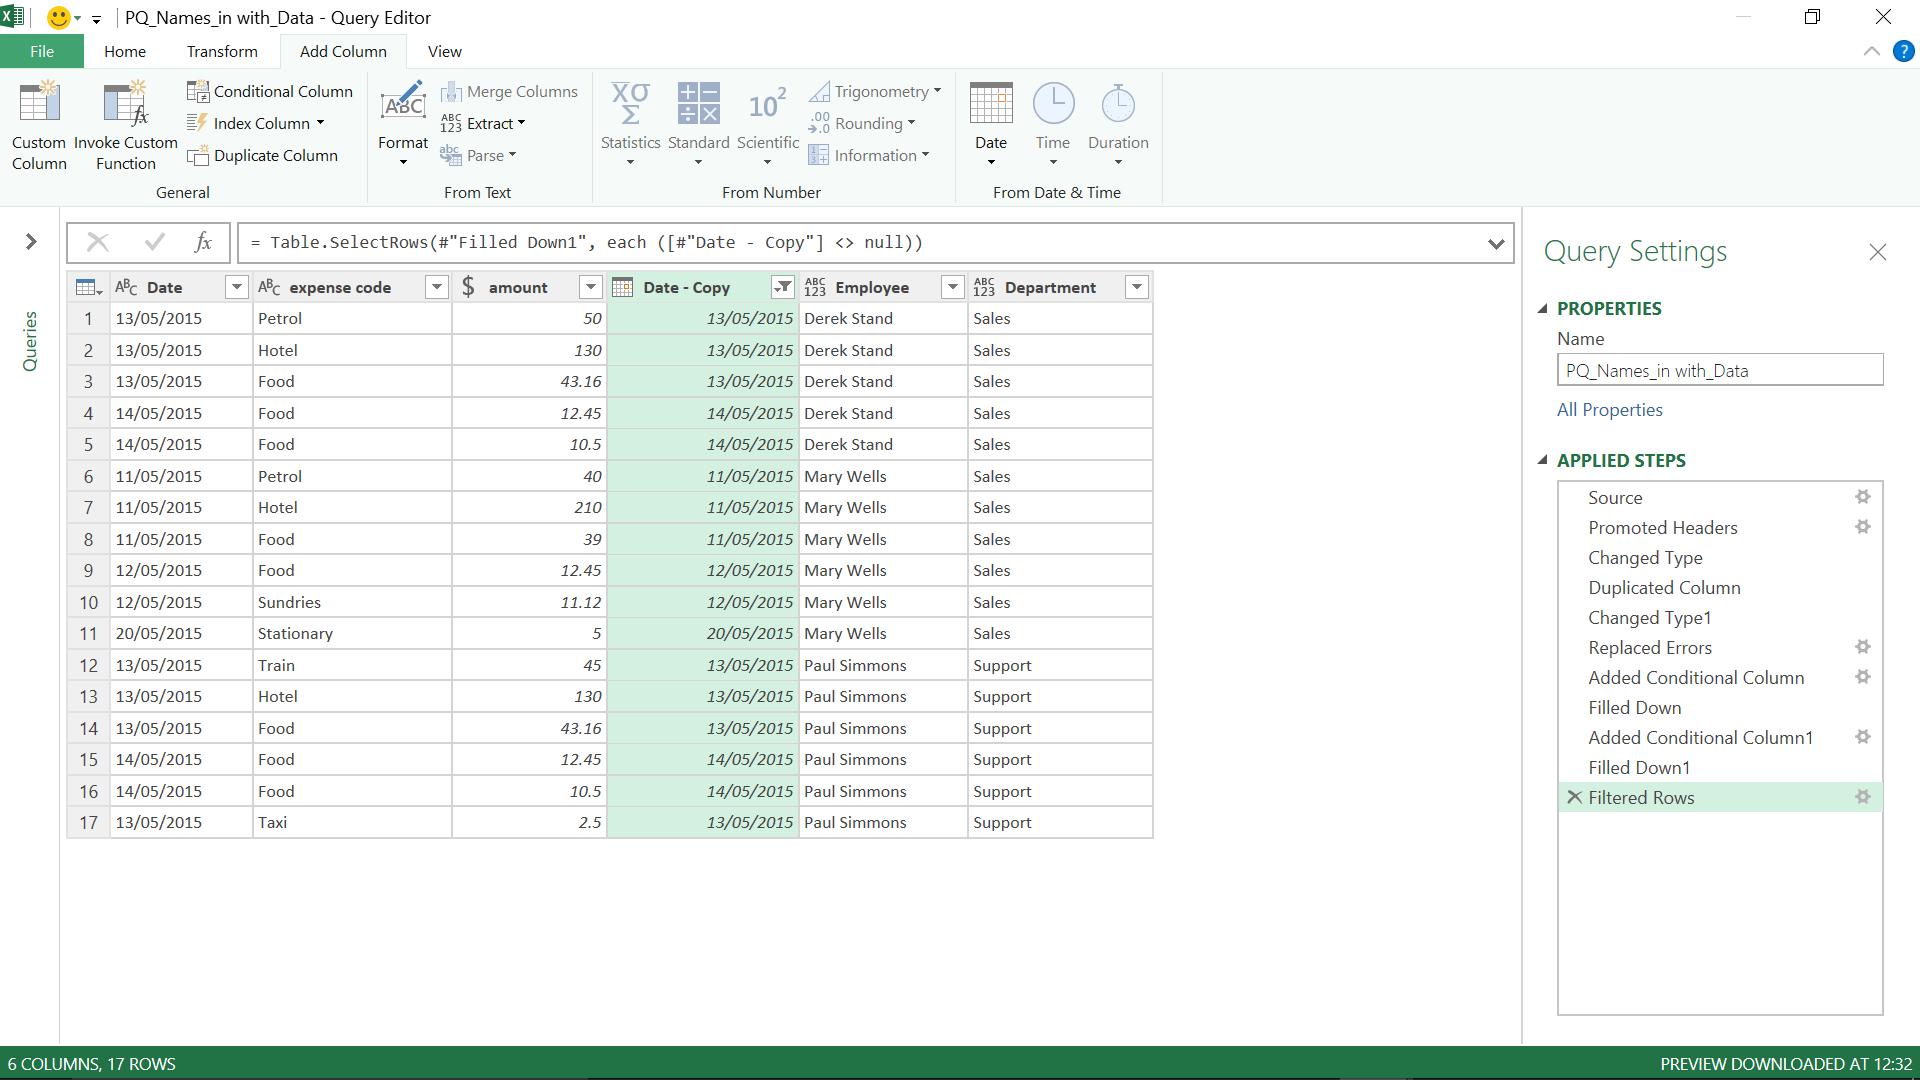
I delete Date - Copy and set the data types on the columns I want to keep. I am now ready to ‘Close and Load’ my data to an Excel worksheet.
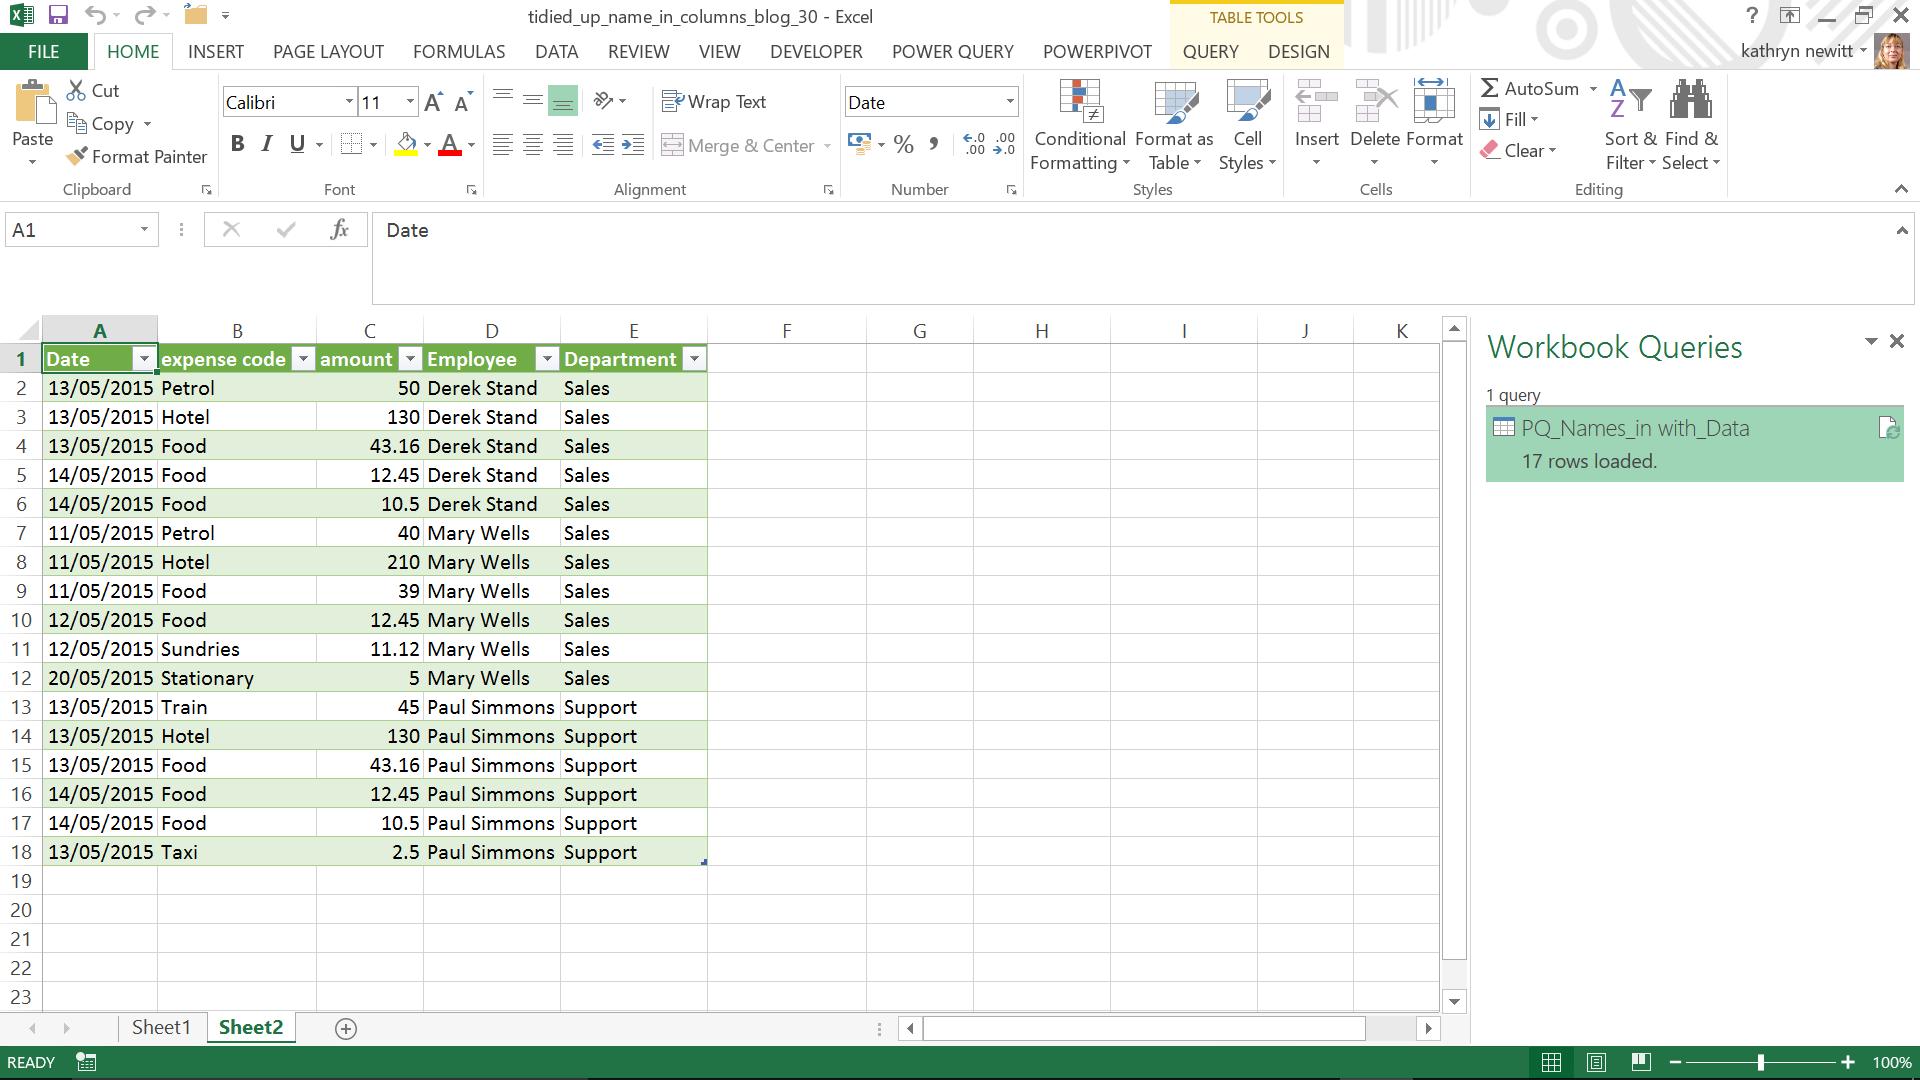
By spotting the differences in data types in my original Date column, I have been able to pull out the data I need and format it in a useful way.
Want to read more about Power Query? A complete list of all our Power Query blogs can be found here. Come back next time for more ways to use Power Query!

