
Power Query: Reconcilable Differences
22 January 2020
Welcome to our Power Query blog. This week, I look at a common problem in Finance – performing that pesky bank reconciliation!
Imagine you had two data tables – it could be your bank statement and a spreadsheet – and you wanted to perform a reconciliation. Here, let’s have ’Revenues’ and ‘Costs’ tables:
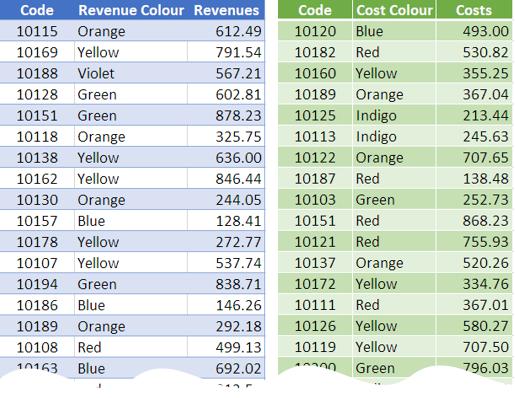
Do you see both use a five-digit code number? I want to see which items do not reconcile. Yes, this could be performed with COUNTIF formulae in Excel, but again, manual manipulation is required.
An alternative is to both merge and append tables:
- Merging is when columns from one table are added to another (this requires a field that can be used to identify which rows match)
- Appending is when rows from one table are added to another (this requires the tables to share the same field names).
The first thing is to import both tables into Power Query. Once there, select one of the tables (say ‘Revenues’) and then click on the ‘Merge’ dropdown on the ‘Home’ tab and click on ‘Merge Queries as New’ (to generate a new table, rather than merge with an existing one).
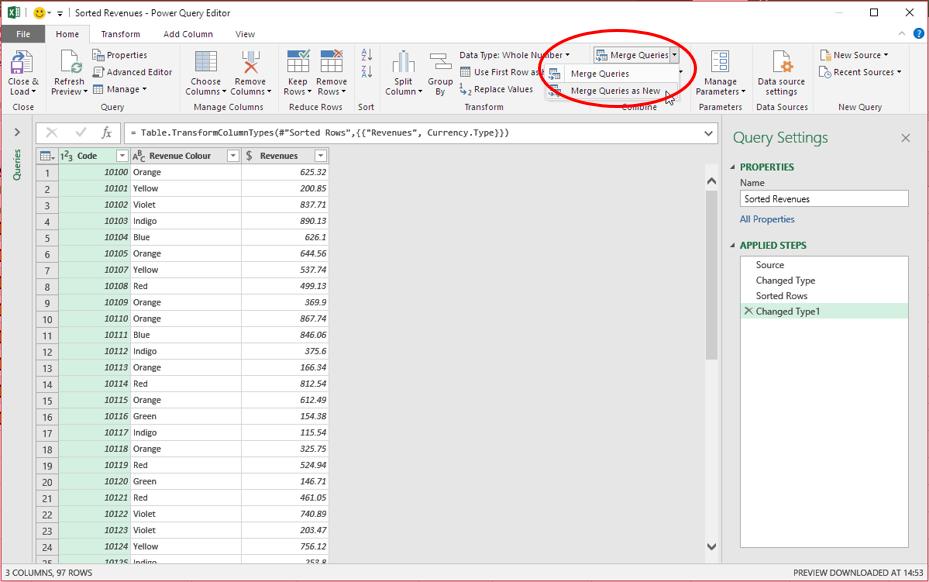
This gives rise to the ‘Merge’ dialog box, where the two tables and fields may be selected:
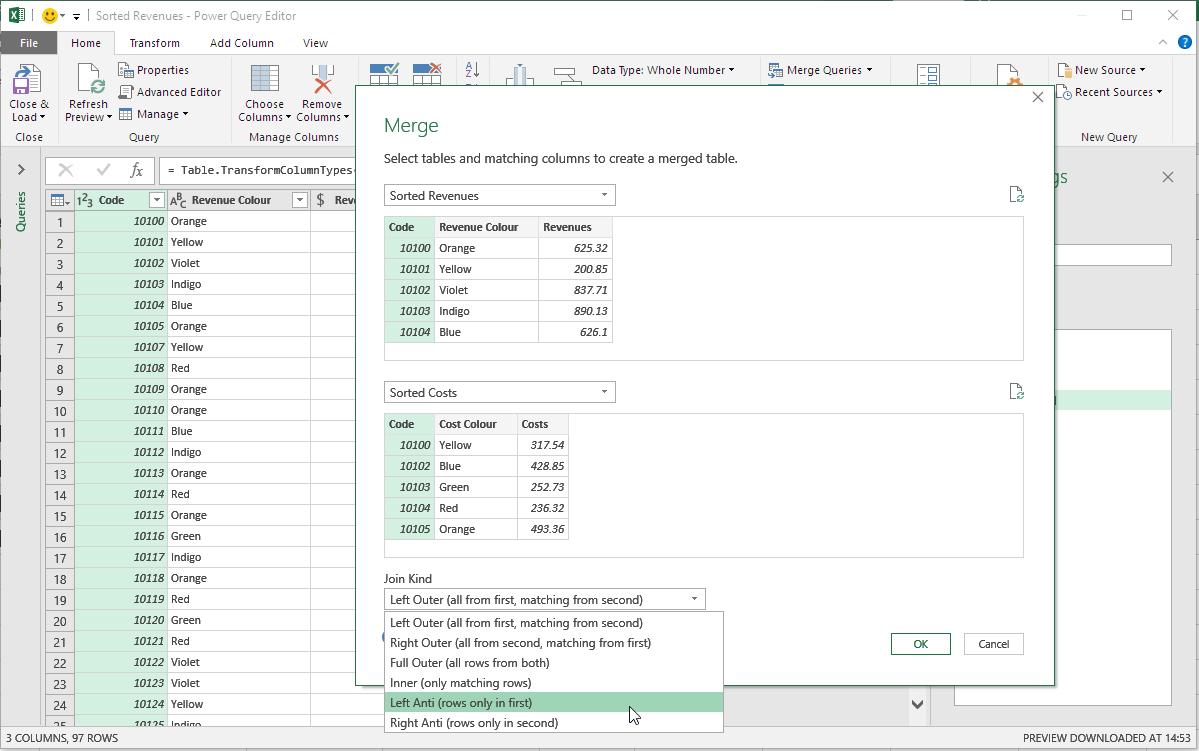
Don’t worry about the revised names in the screenshot – I have simply ordered the two tables based upon their ‘Code’. There are several join kinds (pictured above); the one required is the ‘Left Anti’ (“left” is the top table and “right” is the bottom one). This creates a table where records in the top table do not have a corresponding item in the second table (i.e. cannot be reconciled). Clicking ‘OK’ creates the following:
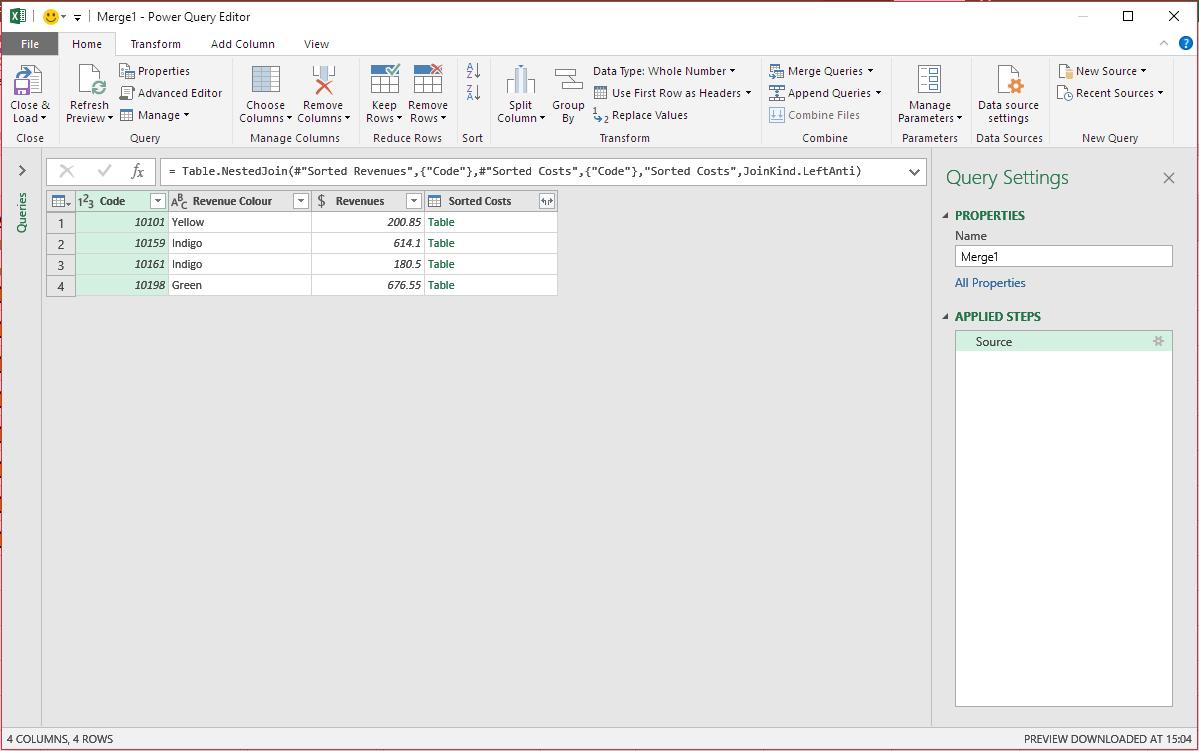
Notice the final column says ‘Table’ (in green). This means Power Query cannot display all of the fields in one column. However, note there is an icon:
to the right of the final field header. Clicking on this and selecting the correct fields generates the following table:
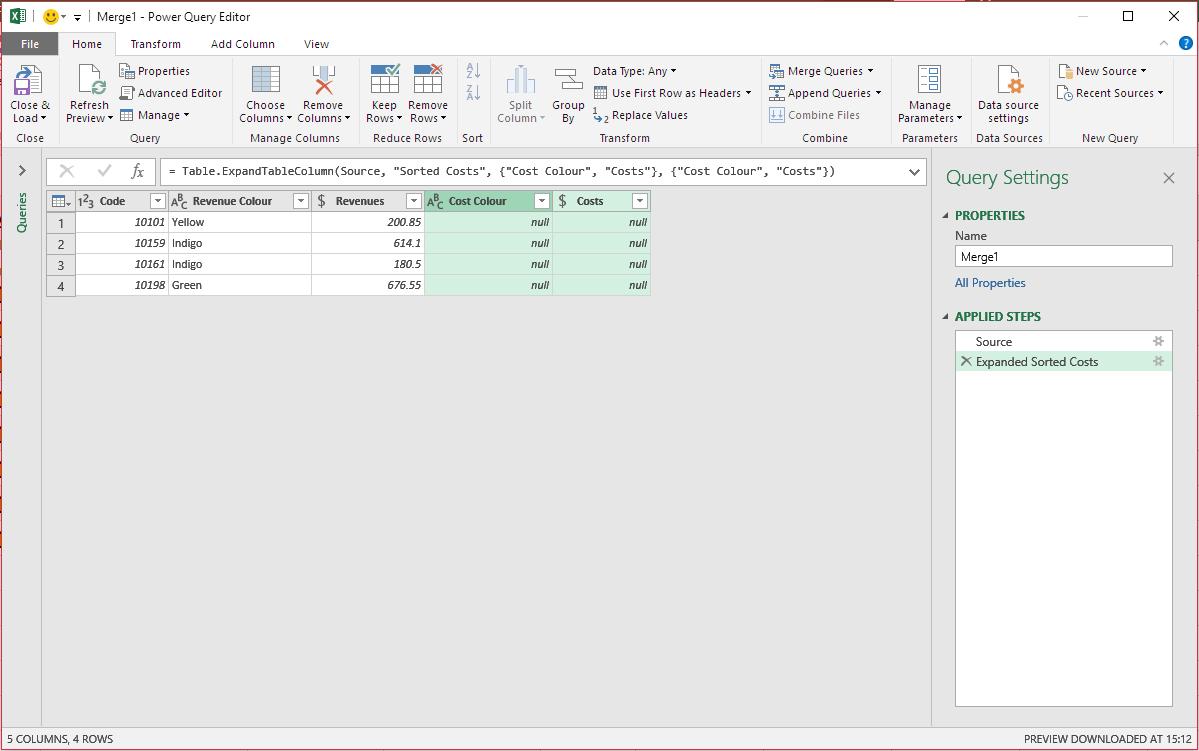
We have the first part of the table, and this query should be saved. Repeating this entire process and using the ‘Right Anti’ join creates the other half of the reconciliation – this time, rows in the second table not in the first.
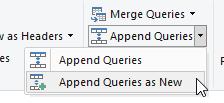
Appending (using the feature on the Home tab of the Ribbon)
and closing and loading these two tables will then produce the following report (once sorted by code):
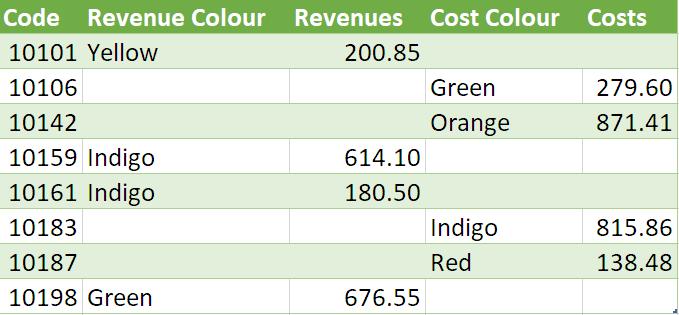
This might be an involved process, but again, it only ever has to be performed once – refreshing is all that’s required for future reconciliations. Tedious bank reconciliation tasks will become a thing of the past!
Come back next time for more ways to use Power Query!