
Power Query: Riveting Results Part 3
29 December 2021
Welcome to our Power Query blog. This week, I add the parameters I created last week to the query from the week before.
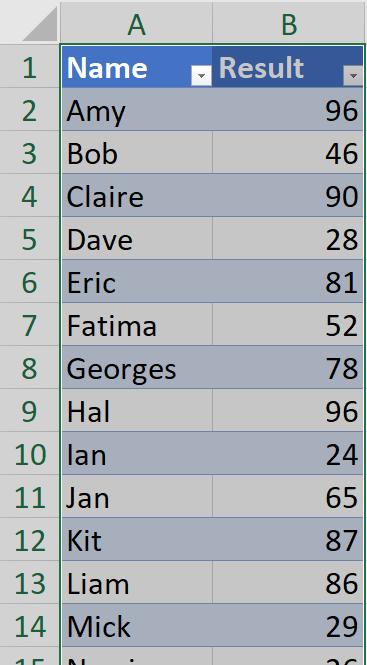
My salespeople are having a big break. This week, I continue looking at the exam results I created in Power Query: Riveting Results Part 1:
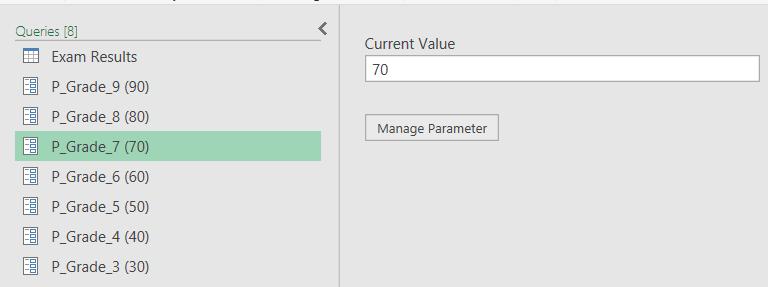
I will be grading the results, and I will be using this example to explore parameters. Last week, I created the parameters:
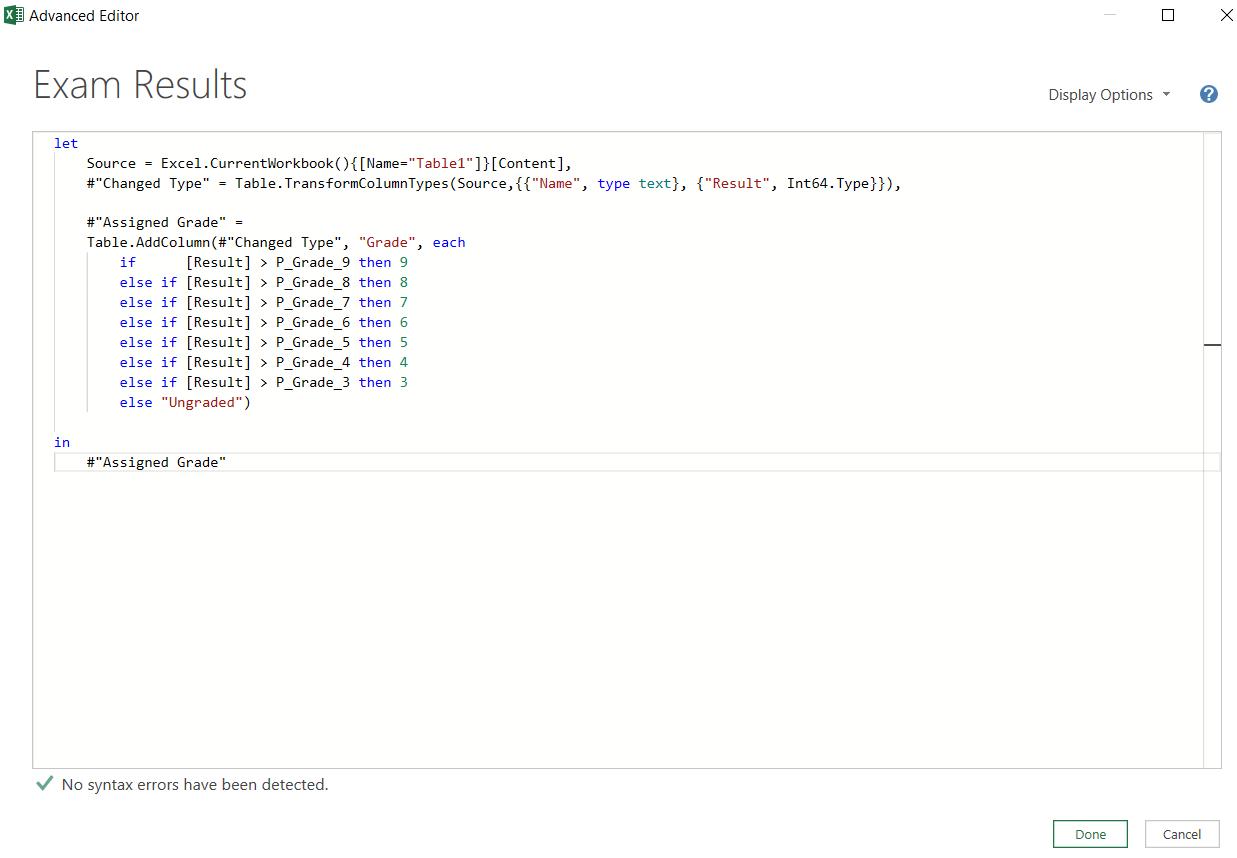
I can now edit the original query using the Advanced Editor, which I access from the Home tab:
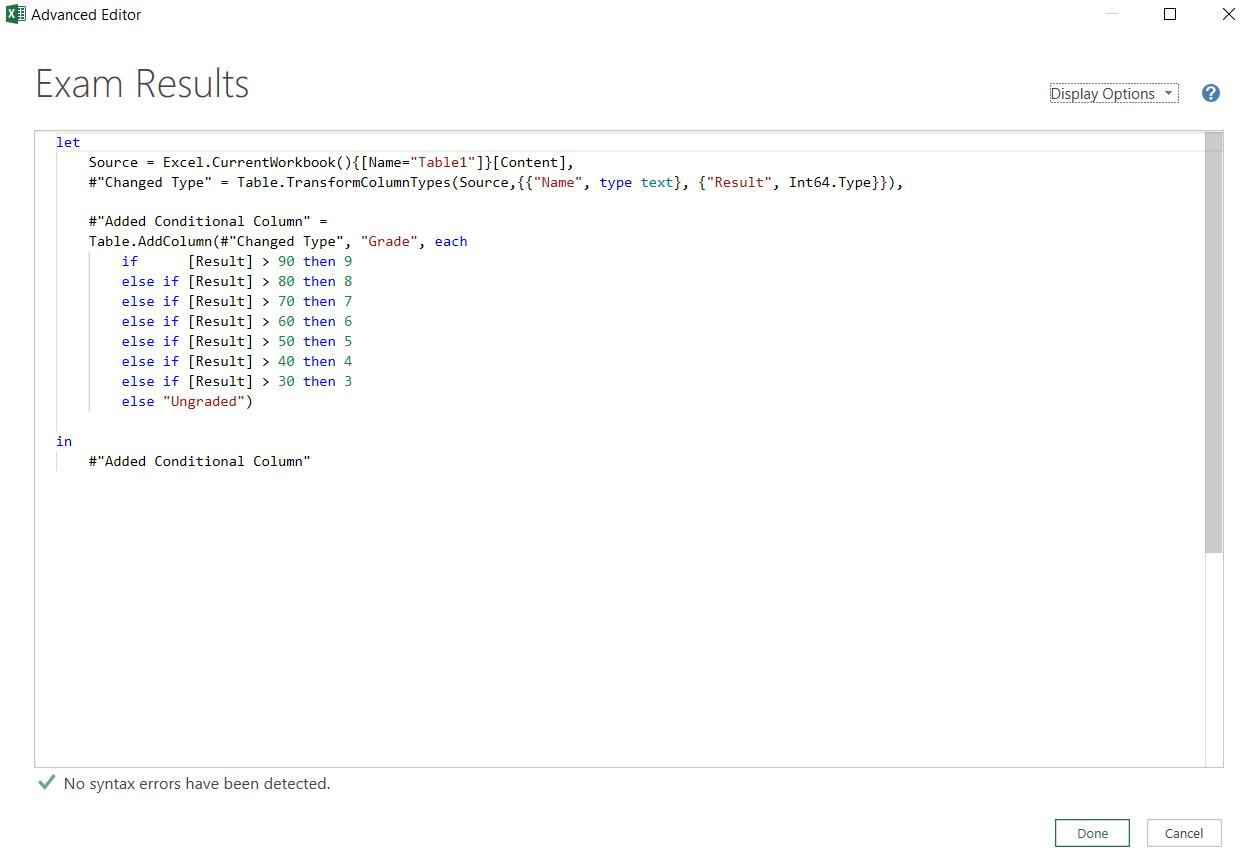
I change the M code in the ‘Added Conditional Column’ step from:
Table.AddColumn(#"Changed Type", "Grade", each
if [Result] > 90 then 9
else if [Result] > 80 then 8
else if [Result] > 70 then 7
else if [Result] > 60 then 6
else if [Result] > 50 then 5
else if [Result] > 40 then 4
else if [Result] > 30 then 3
else "Ungraded")
to
Table.AddColumn(#"Changed Type", "Grade", each
if [Result] > P_Grade_9 then 9
else if [Result] > P_Grade_8 then 8
else if [Result] > P_Grade_7 then 7
else if [Result] > P_Grade_6 then 6
else if [Result] > P_Grade_5 then 5
else if [Result] > P_Grade_4 then 4
else if [Result] > P_Grade_3 then 3
else "Ungraded")
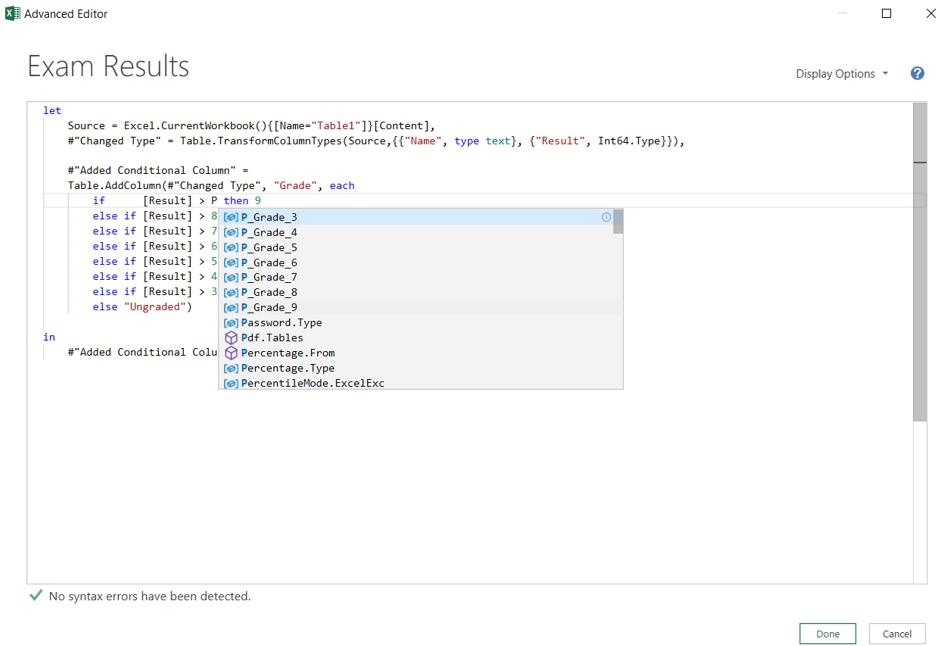
I can use the Intellisense to make sure I enter the correct name for each parameter:
I also rename the step to ‘Assigned Grade’:
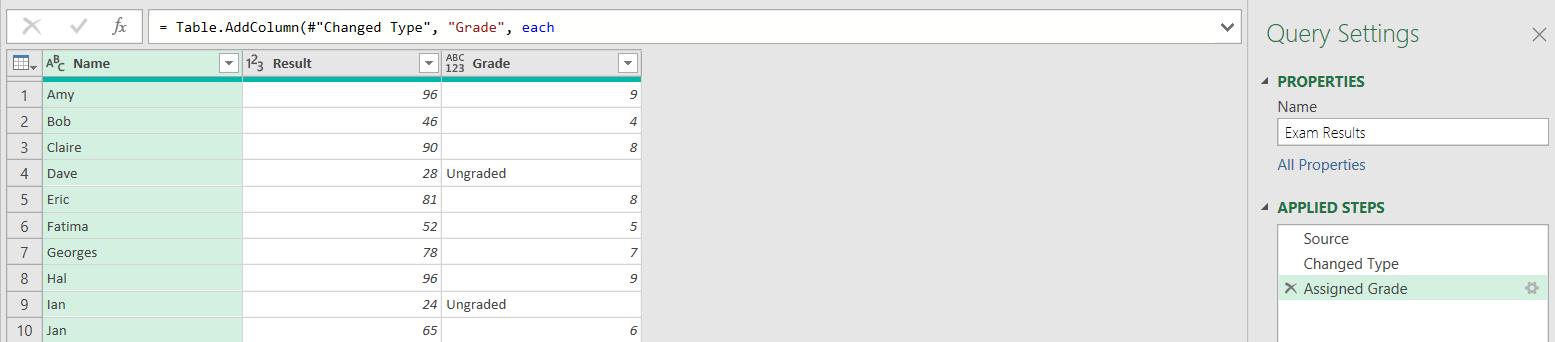
I click ‘Done’ to make sure that the query still works as I expect:
Next time, I will look at how to create parameters I can control from Excel.
Come back next time for more ways to use Power Query!