
Power Query: Selective Staffing Part 1
27 October 2021
Welcome to our Power Query blog. This week, I look at a solution that involves inclusion.
I have some areas where I have allocated salespeople.
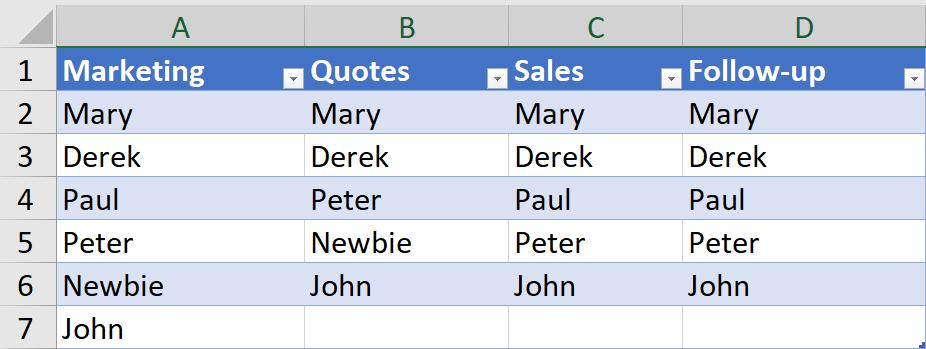
However, some staff are not currently available, so I have a list of salespeople to include.
I want to create a new table which shows only the included salespeople for each area.
I start as usual by extracting my data to Power Query. I click somewhere in my first table called Staffing, and choose ‘From Table/Range’ from the ‘Get & Transform’ section of the Data tab. I repeat this process for my second table, which I’ve named Selection.

Staffing shows the salespeople in a similar format to the table. Power Query has added a ‘Changed Type’ step, setting all the data types to text, which I will keep for now.

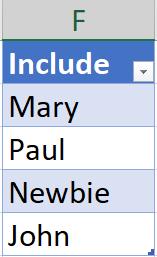
Selection has been imported as a table too. However, I plan to use this as a list to compare to the values in each column of Staffing. Therefore, I begin by converting this to a list from the Transform tab.
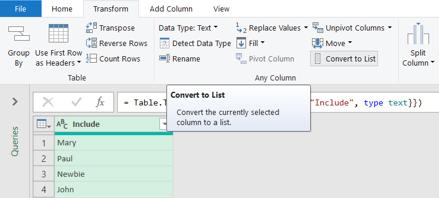
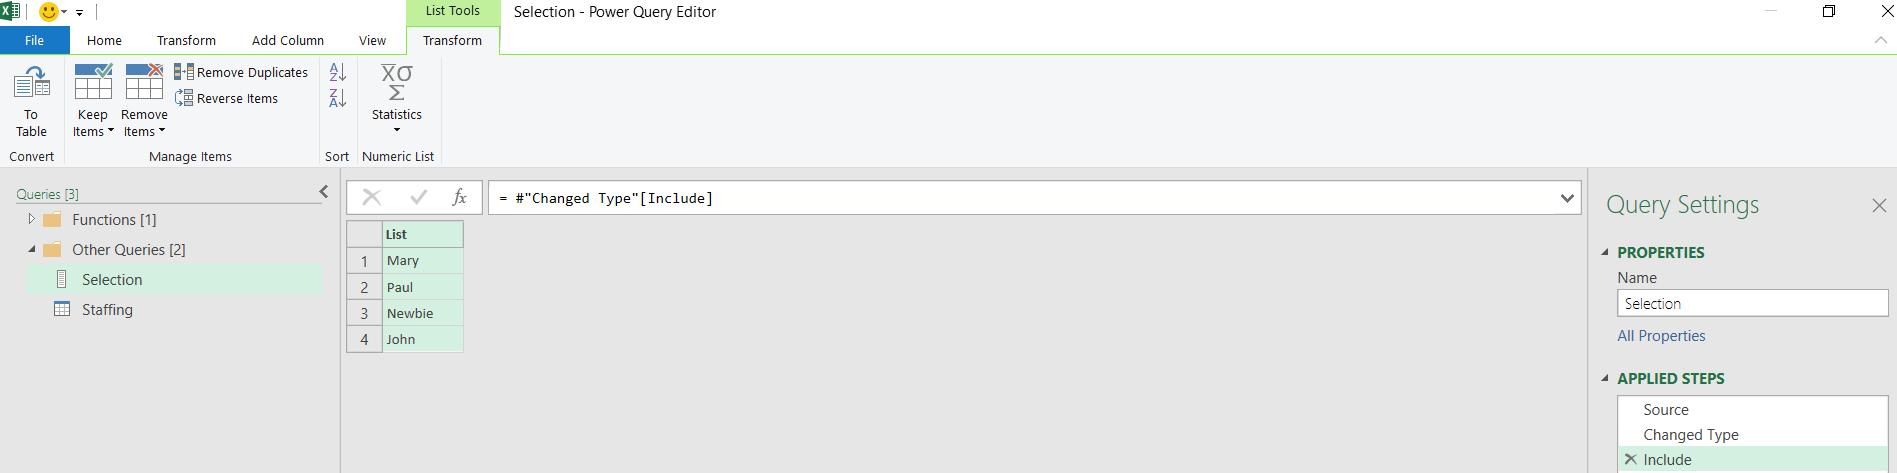
This changes not only the table to a list, but also changes the query icon and the tabs available:
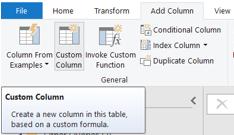
I go back to the Staffing query and create a new Custom Column from the ‘Add Column’ tab.
I call the new column New Marketing and enter some M code which uses List() functionality. I described List.ContainsAny() in Power Query: Words are Key.
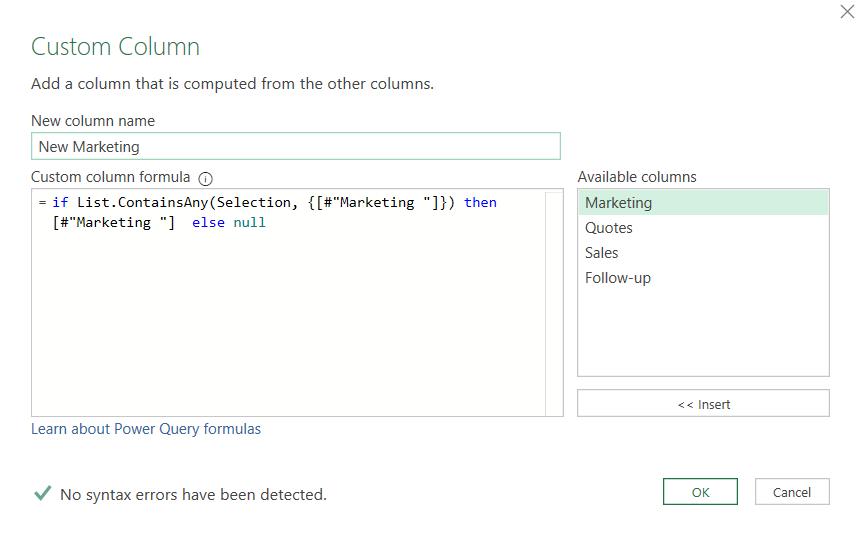
The new column uses the following M code:
= if List.ContainsAny(Selection, {[#"Marketing "]}) then [#"Marketing "] else null
For each value in Marketing, this looks to see if the value, for example ‘Mary’ appears in the Selection list. If the value is on the list, then it appears in this new column, called New Marketing, otherwise null appears instead.
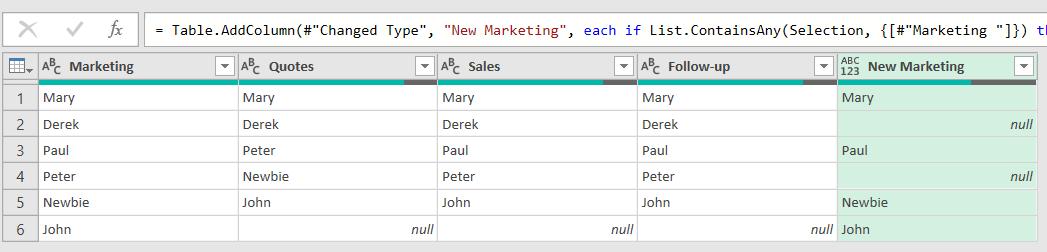
I repeat this process for the other columns:
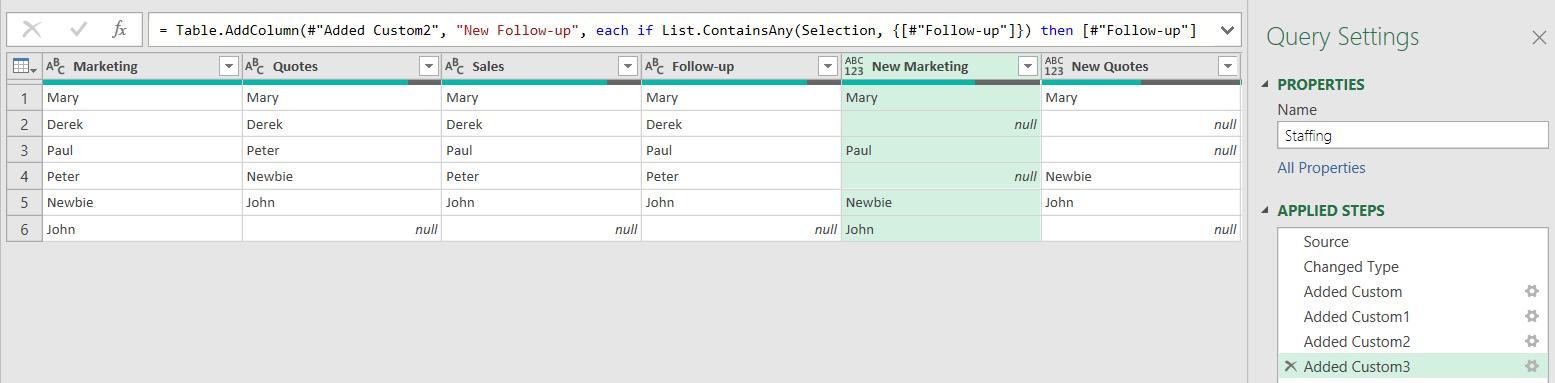
I can then select the new columns whilst holding down CTRL and right-click to ‘Remove Other Columns’.

This leaves me with the data I want.

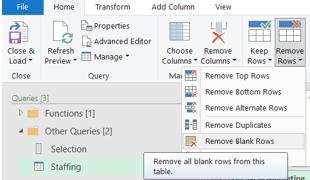
I can tidy up a little by selecting all the columns and removing any blank rows. I can do this from the Home tab:
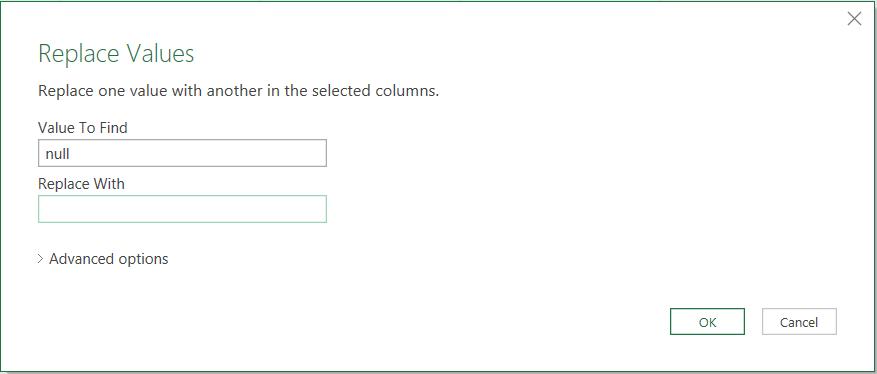
This removes one line, but leaves me with a lot of null values. I can replace them with a space by right clicking and choosing ‘Replace Values’:

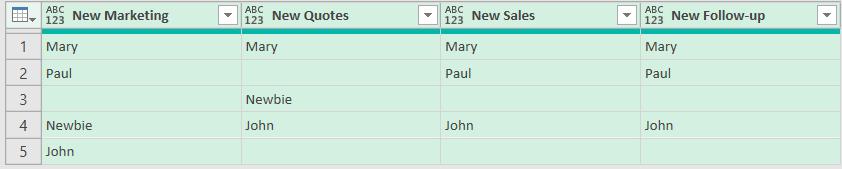
I can then remove the null values:
This gives me a table with spaces for the missing names:
I can’t remove these by removing columns or rows as I will lose data. Next time, I will continue transforming the data to so that I can display the table with no blanks between the values in a column.
Come back next time for more ways to use Power Query!