Power Query: What's in a Name?
18 January 2017
Welcome our new Power Query blog. Today I extract information from a file name.
I previously visited the idea of importing from a folder in Power Query - One Folder One Query. Whilst the filenames in that example did not contain any data we needed to load, it’s not unusual to include a date as part of the name of the file – for example the date the expense claim was made. If we need to extract information from the file name, then the file properties can be preserved.
I initially follow the same procedure as I did for Power Query - One Folder One Query. Opening a blank workbook, I opt to create a new query using the ‘From File’ option and use the drop down to select ‘From Folder’. I filter to choose those files with a csv / CSV extension as before, but this time I am going to pay more attention to the metadata.
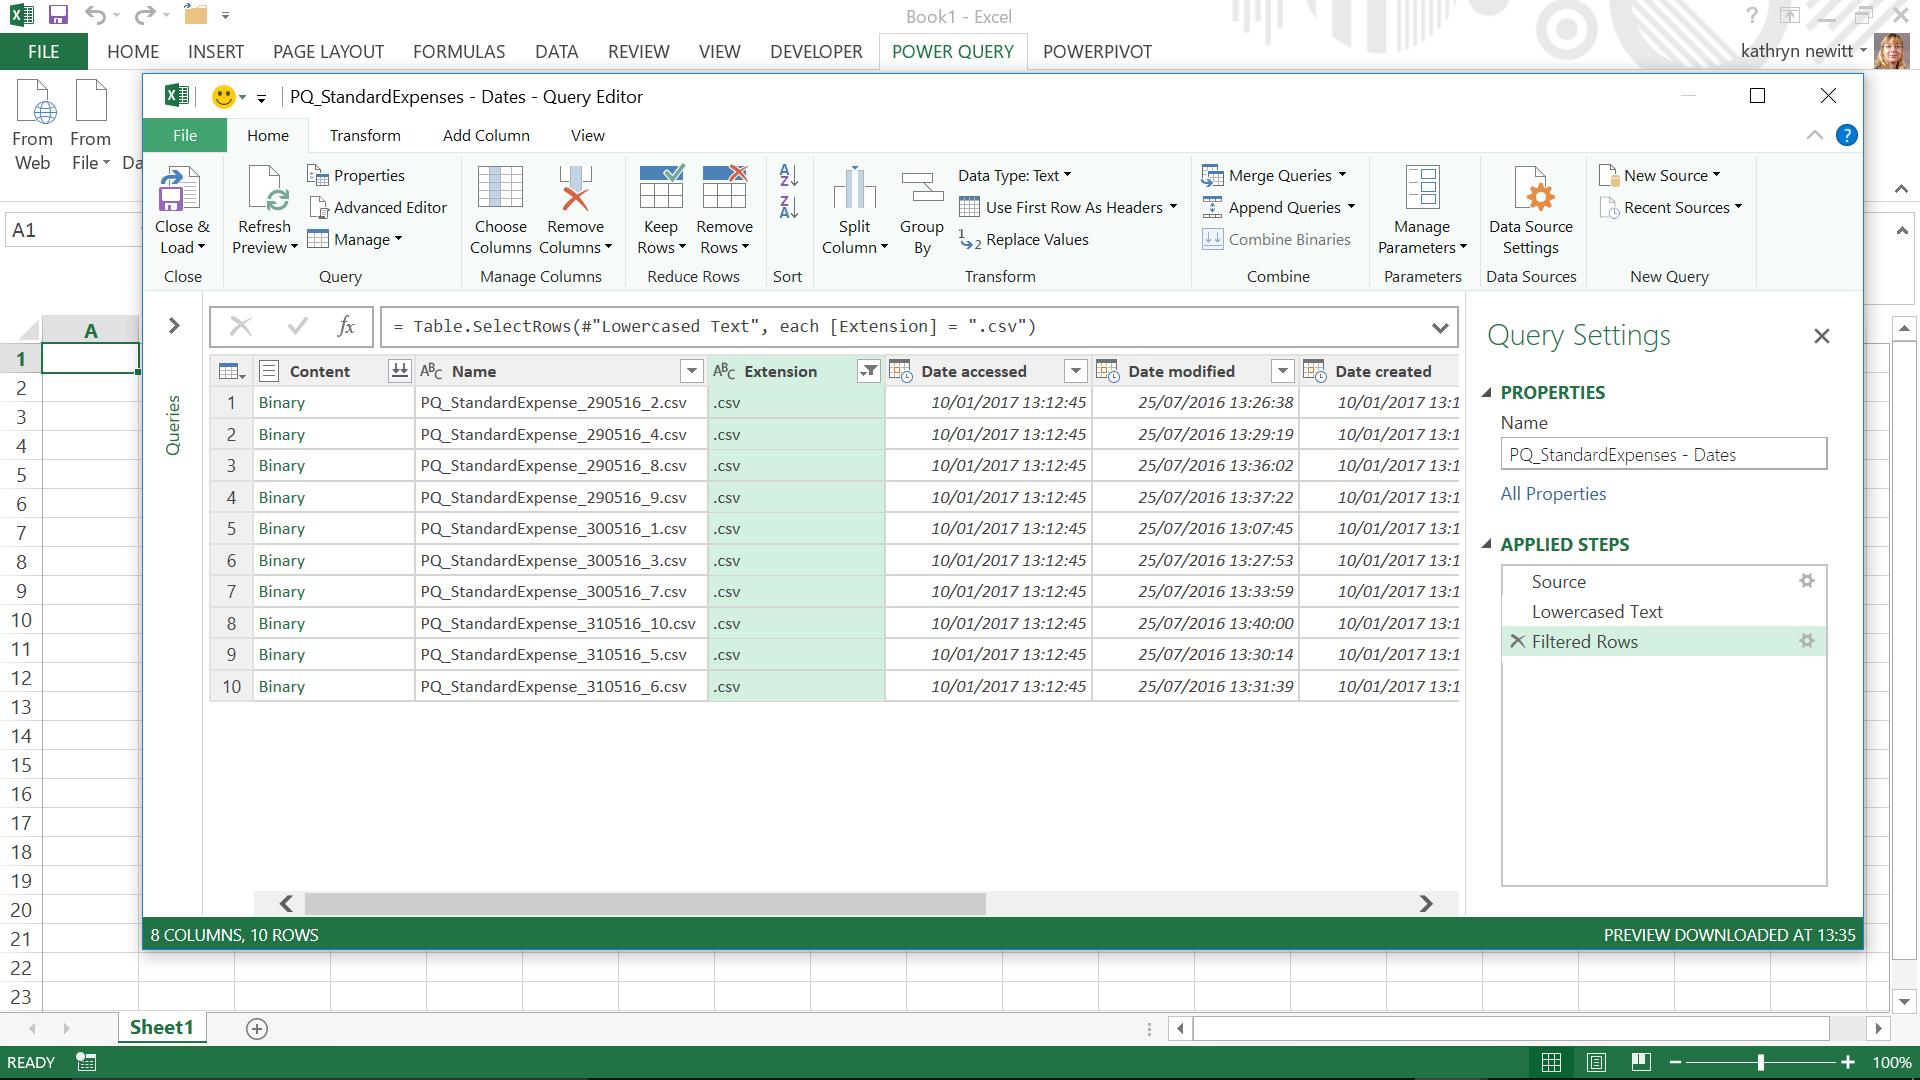
The only metadata we are interested in is the ‘Name” and ‘Content’ columns, so rather than choosing what to remove, allow me to choose what to keep instead. Whilst keeping the CTRL button pressed, I select the ‘Name’ and ‘Content’ columns. I can right click either of these columns and choose to remove other columns – note that because Power Query is a sequential macro recorder, it will still keep track of the filtered extension column which is no longer visible.
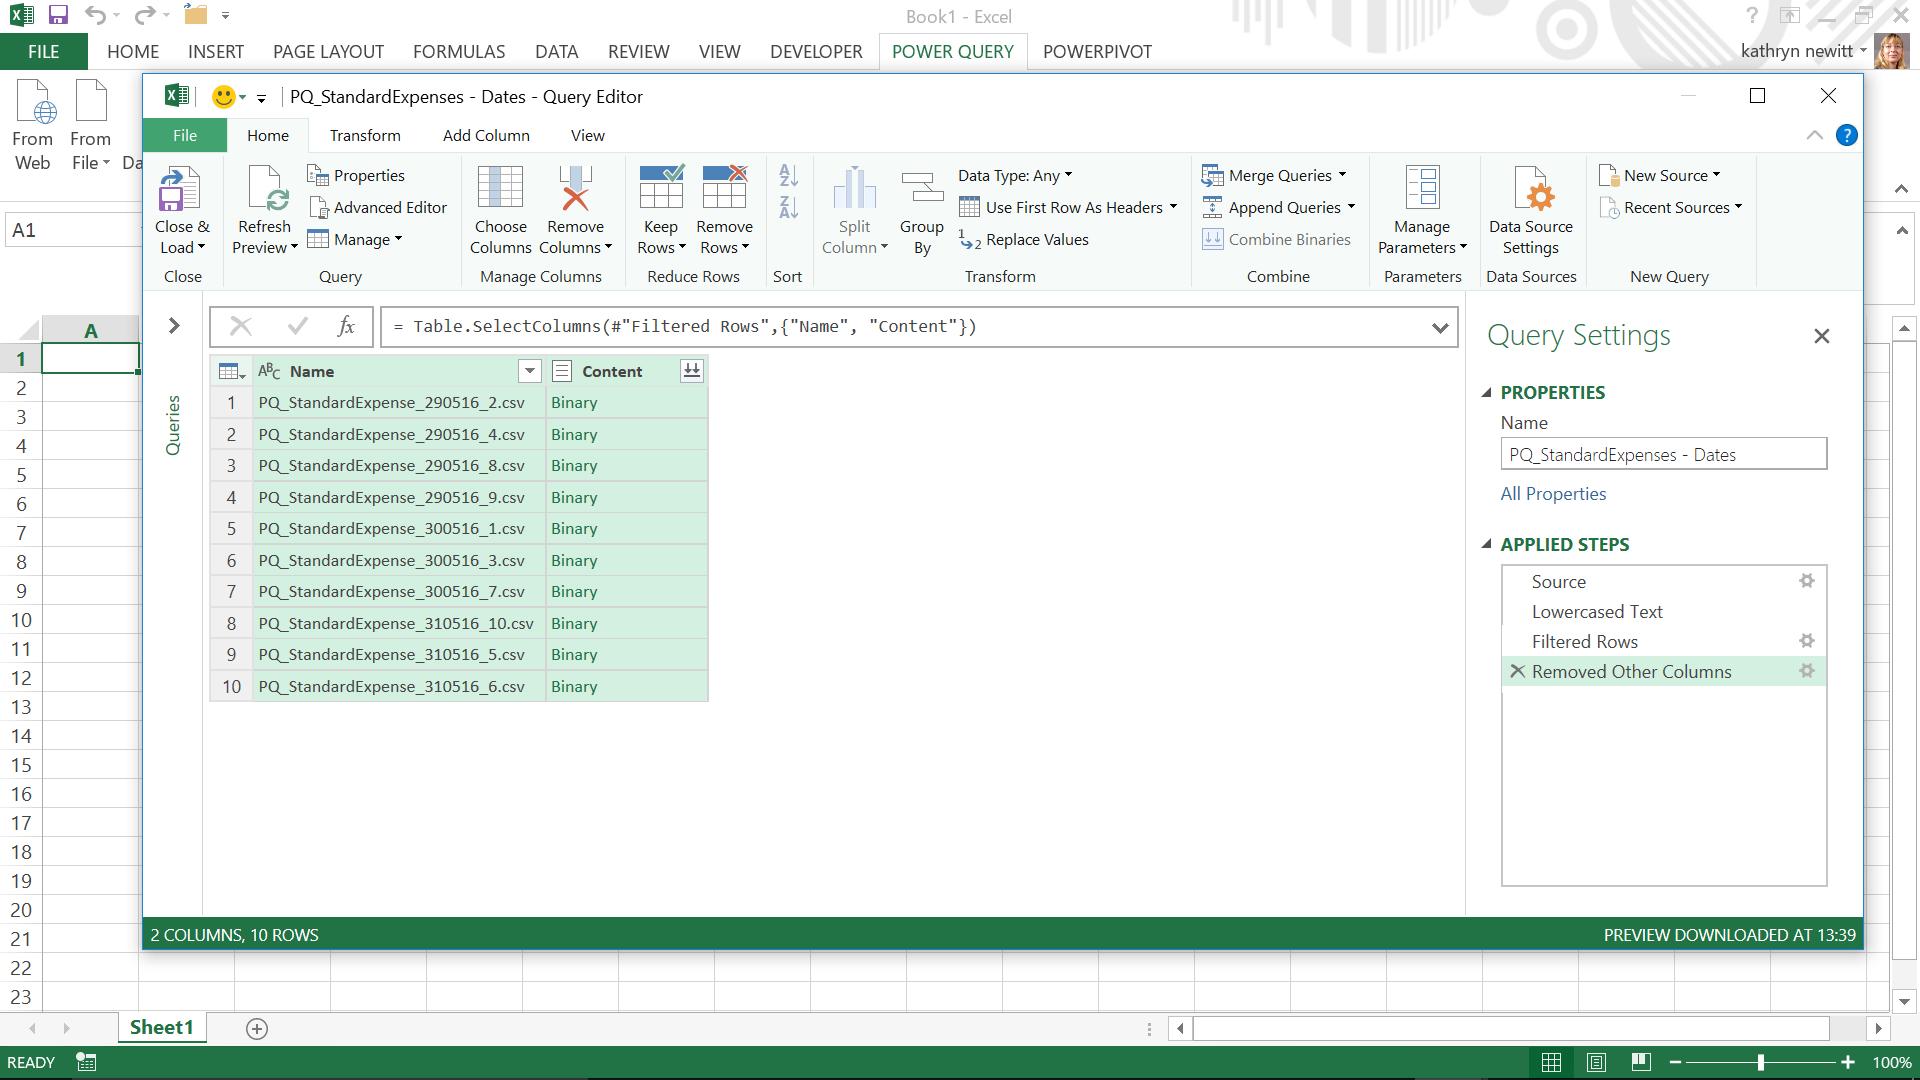
The text in the file name column can now be converted in order to extract the date.
Here, I have ‘PQ_StandardExpense_290516_2.csv’, and I need to remove the unnecessary text. To do this, I right click the ‘Name’ column, then choose to replace values. I repeat this process several times, in each case finding and replacing part of the text:
- find ‘PQ_StandardExpense_’ and replace with blank
- find ‘.csv’ and replace with blank
- find ‘_10’ and replace with blank (we repeat this step for each number).
Now I am left with ‘290516’:
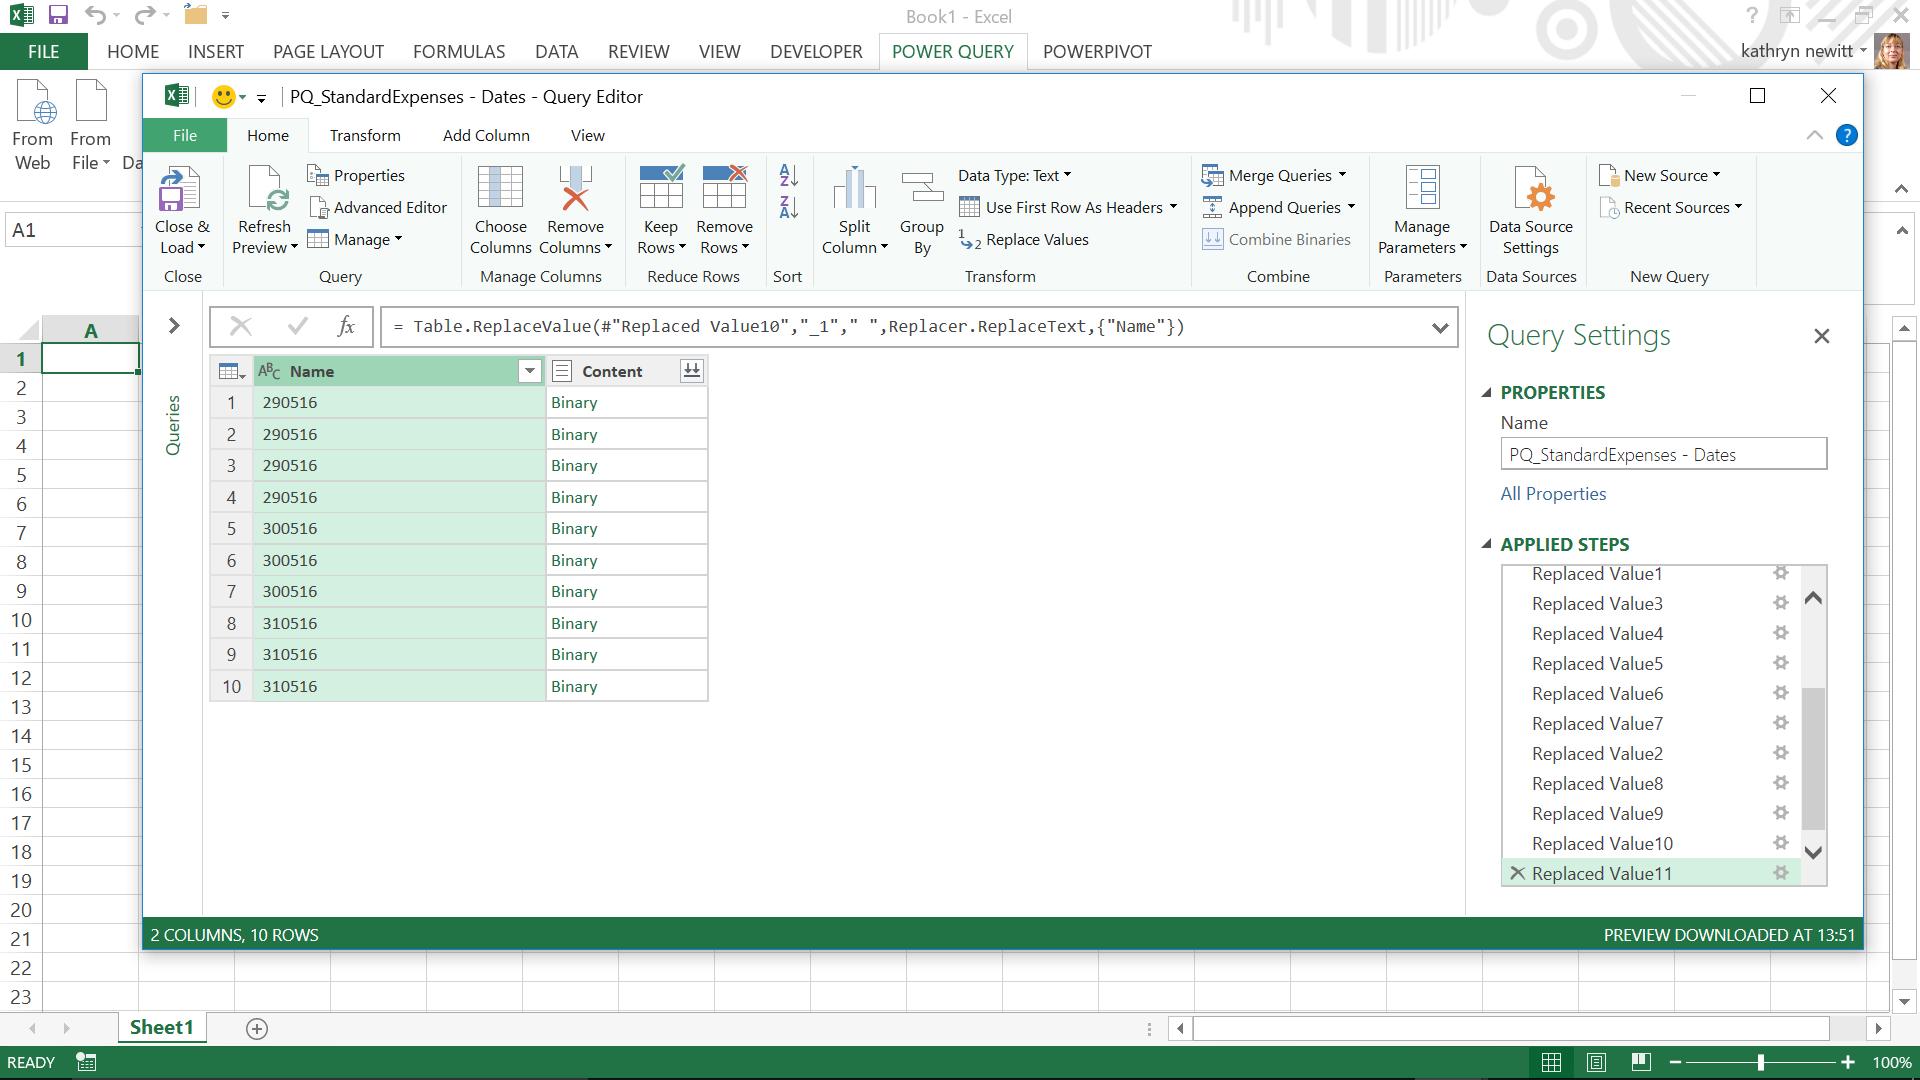
In order to convert this column to a date, I need to introduce some commas to the format, otherwise Power Query will fail to parse the date from the data
In this instance (and there are plenty of other ways to do this), I right click the ‘Name’ column once more, then choose to replace values one more time. This time, the aim is to find “0516’ and replace with ‘,05,16’.
Power Query will now allow the column to be converted to a date using Data type dropdown in the ‘Transform’ tab. The column can also be renamed to something more suitable like ‘Claim Date’ viz.
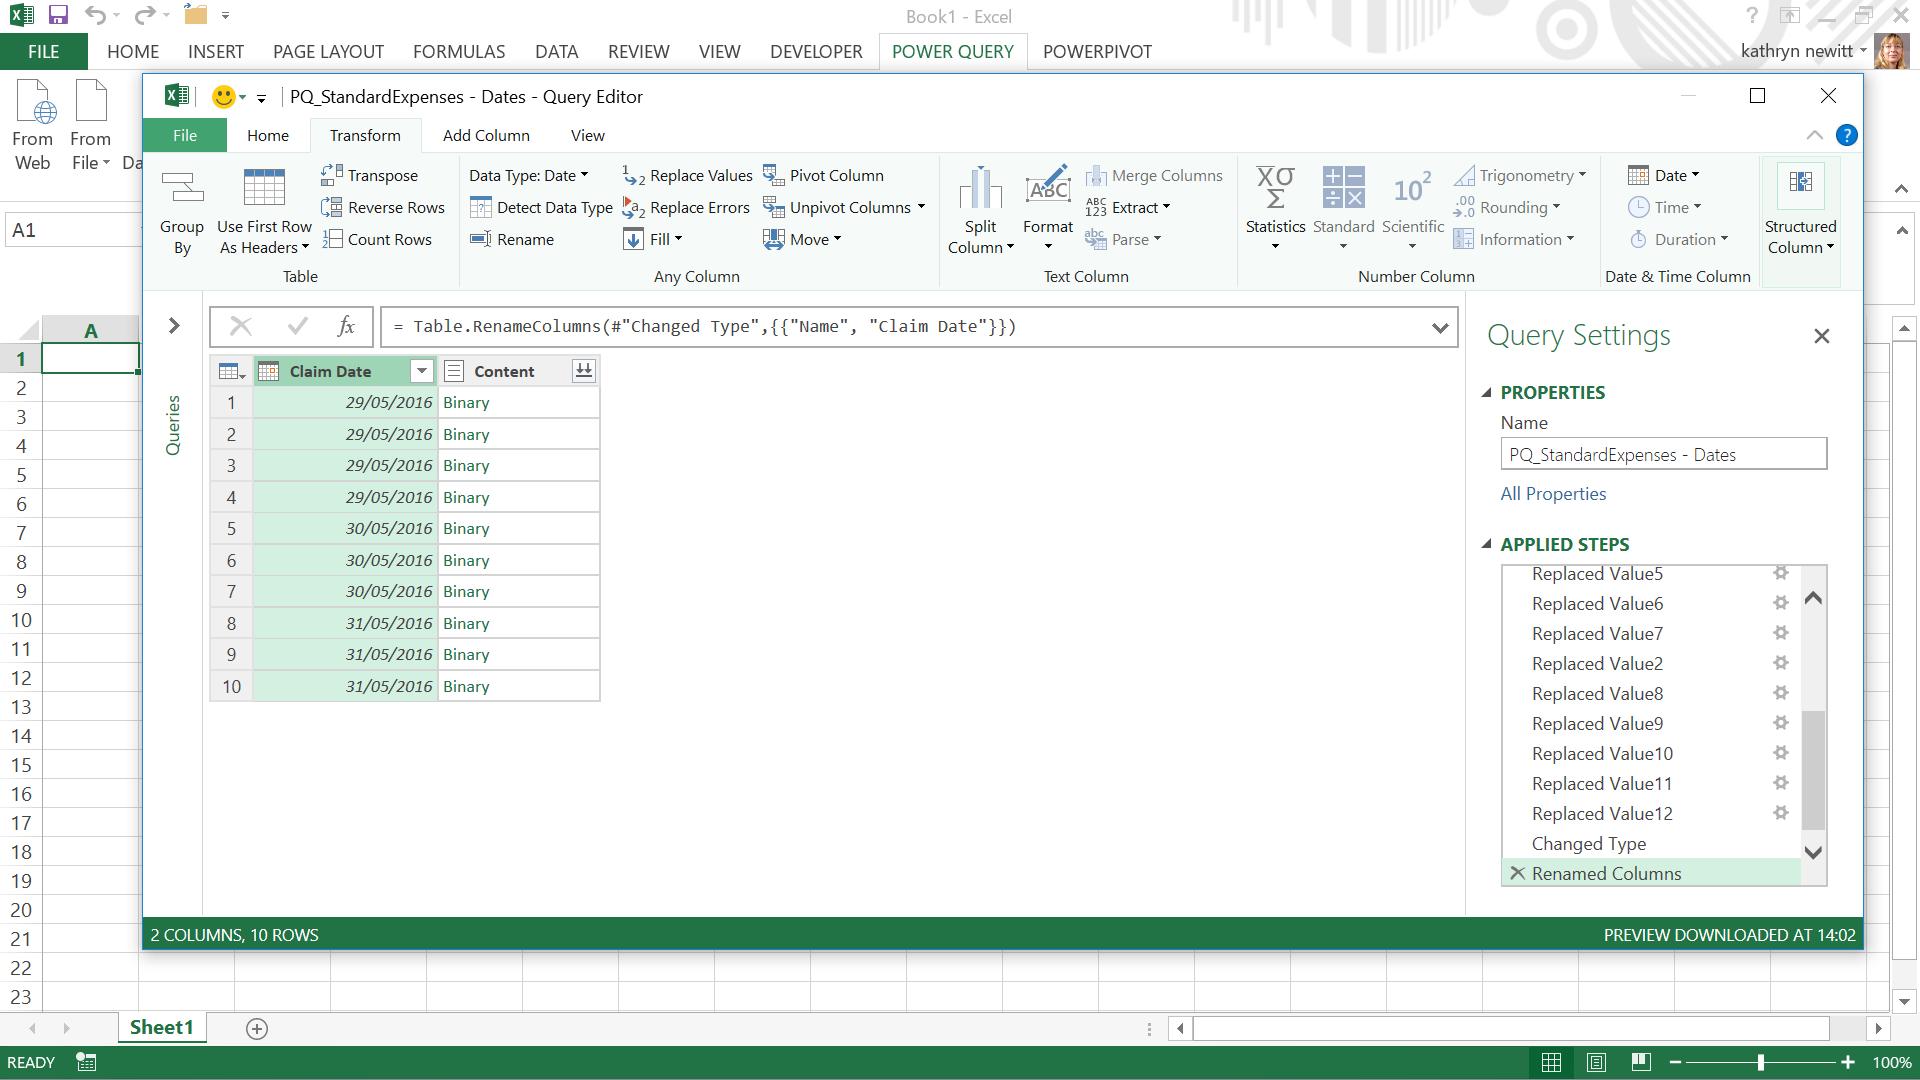
It might be tempting to use the ‘Combine Binaries’ button from here, however, this button will not preserve the ‘Claim Date’ column that was just created. The remaining data needs to be extracted from the ‘Content’ column first. To do this, I will create a custom column. On the ‘Add Column’ tab, there is an option to add a custom column, where the following formula must be entered:
=Csv.Document([Content])
(The letter casing must be exact.)
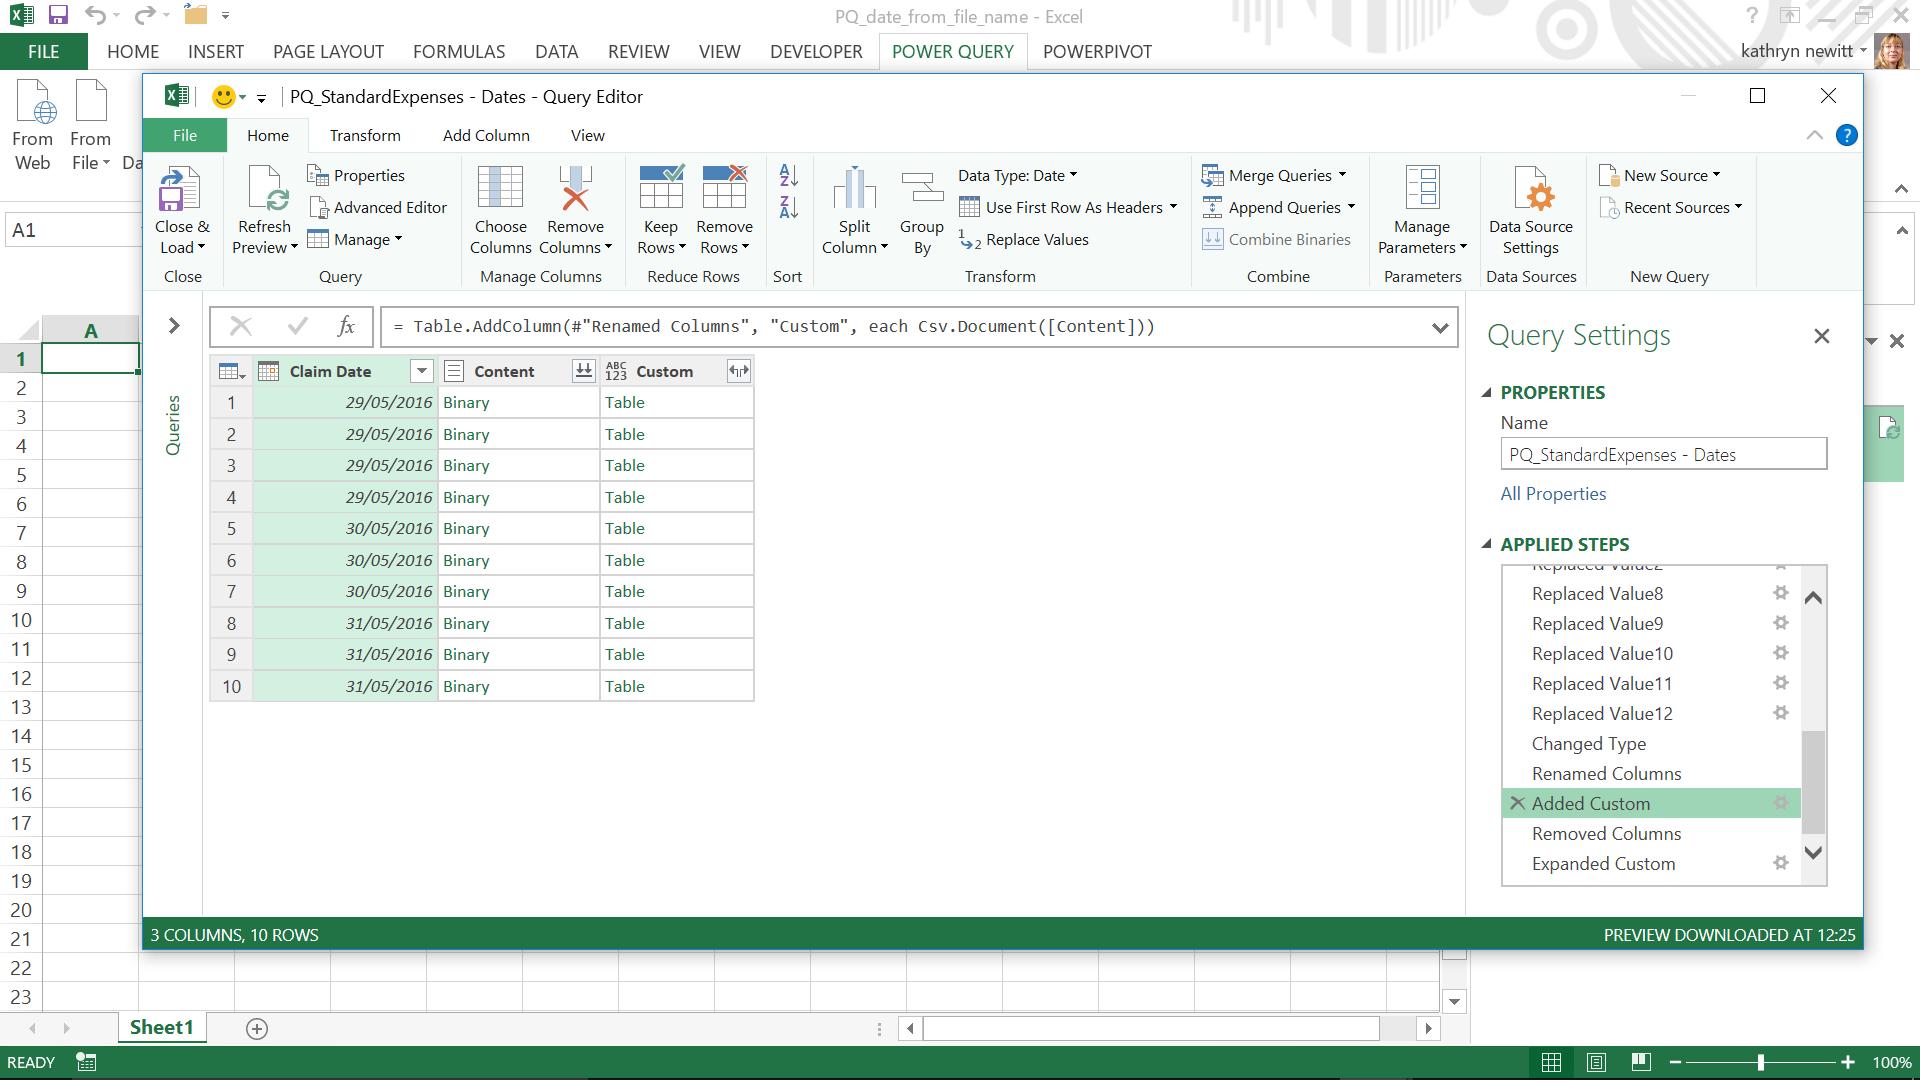
As the screenshot above shows, I now get a new column called ‘Custom’ which contains the tables – clicking on the word ‘Table’ will drill into the table, clicking on the white space next to it will show table contents. Before expanding the custom (table) column, I can remove the content column by selecting and right clicking the ‘Content’ column and choosing to ‘Remove’.
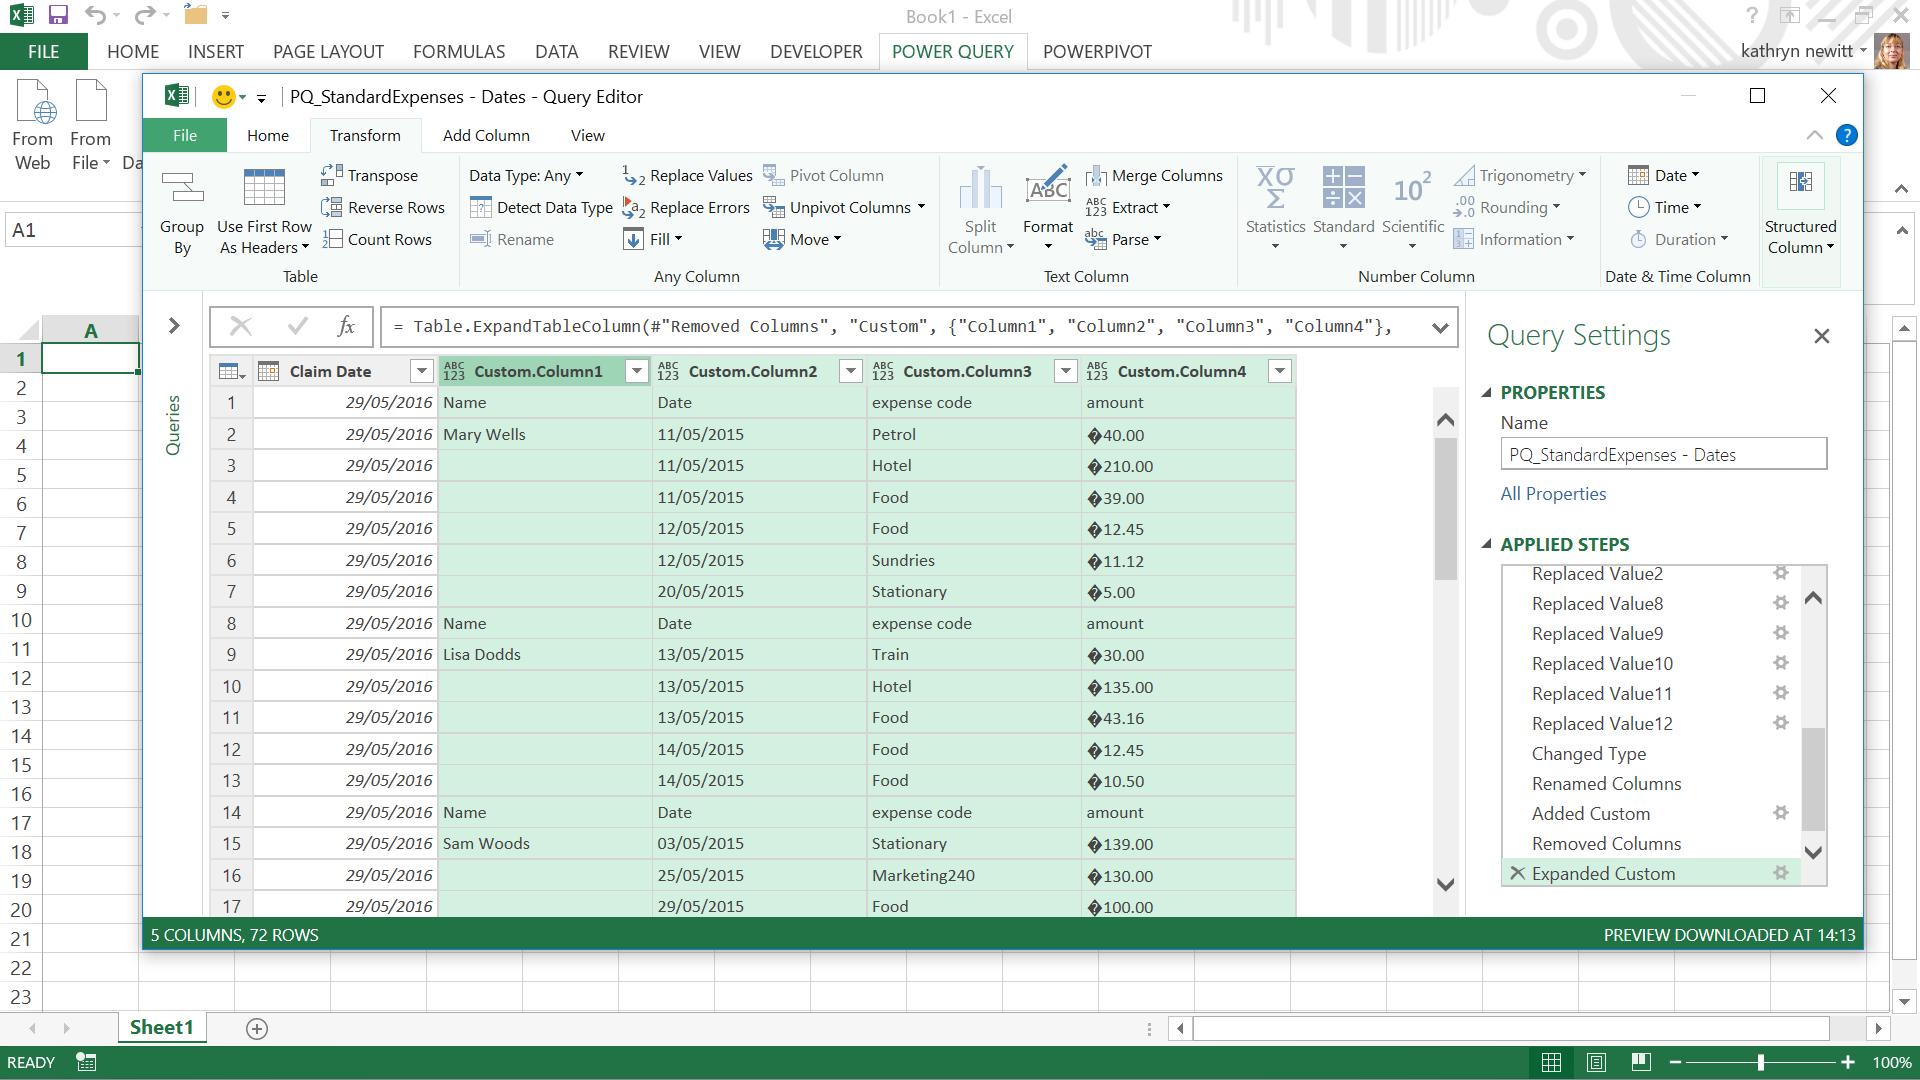
Note that on the ‘Custom’ column is an icon with two splitting arrows: this will extract the columns, and clicking it allows me to filter which columns I want. Clicking ‘OK’ will bring in all of the columns selected from the csv files. The data needs to be manually cleaned up before closing and loading; this clean up process is similar to the steps taken in Power Query - One Folder One Query, but I have now created a table where the claim date has been extracted from the file name and appended to the other expense data.
Practice makes perfect!
Want to read more about Power Query? A complete list of all our Power Query blogs can be found here. Come back next time for more ways to use Power Query!

