Power Query: Project Population – Part 1
19 April 2023
Welcome to our Power Query blog. This week, we transform selected data from a public source.
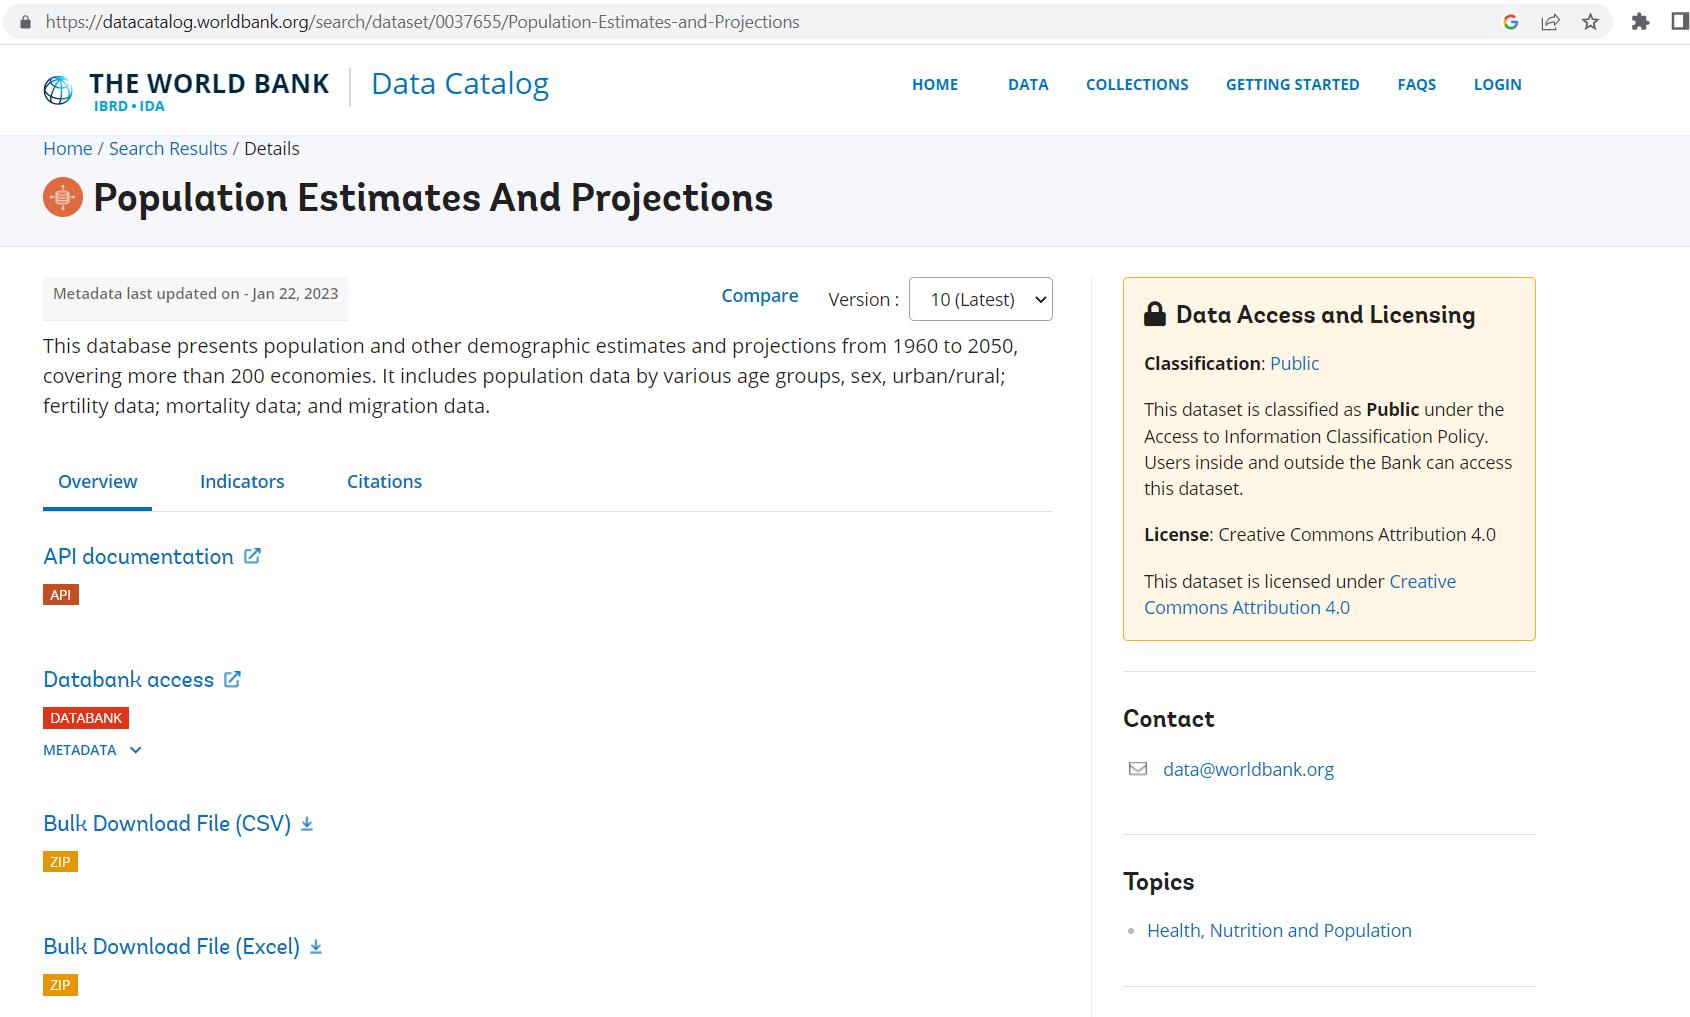
I have found some information on population growth provided by The World Bank, which I am going to use as an example of how to transform real-life data.
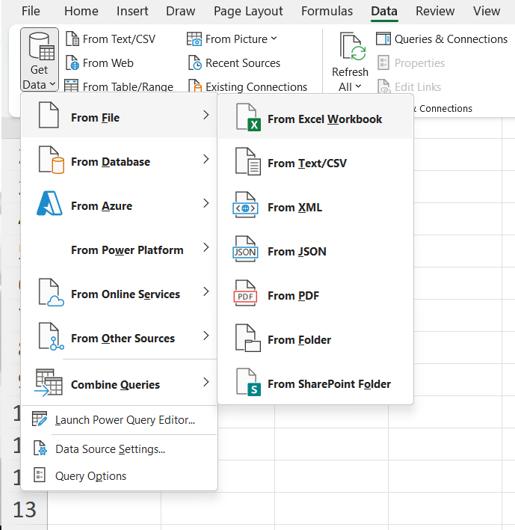
I have downloaded the Excel file, and I am ready to analyse the data. In a new Excel file, I use ‘Get Data’ in the ‘Get & Transform Data’ section of the Data tab to navigate to ‘From Excel Workbook’:
I select the workbook I want to use, and in the Navigator dialog I can choose which sheets I want to upload. I check the ‘Select multiple items’ box, which will allow me to create several queries at once:
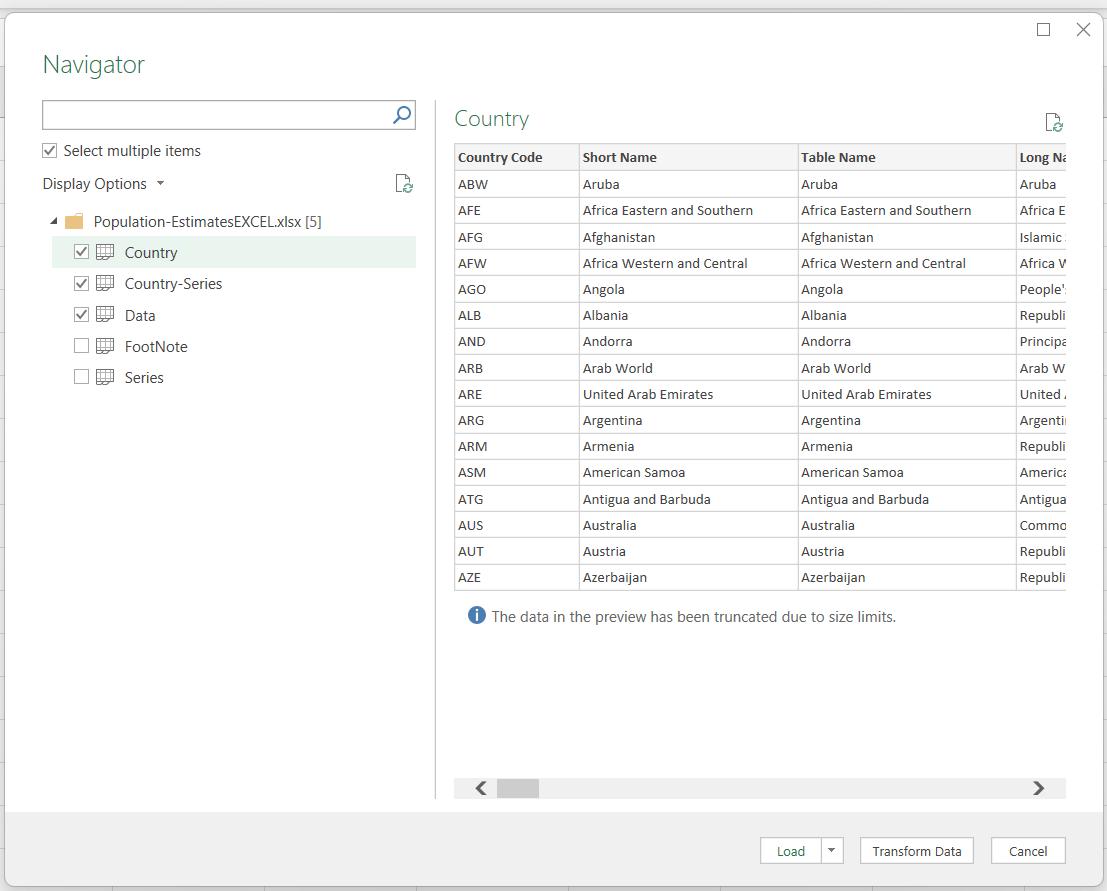
I choose to ‘Transform Data’:

Not only has Power Query created three [3] queries, but for Country, four [4] steps have been created automatically. The ‘Source’ step points at the Excel file, Navigation chooses the correct sheet, ‘Promoted Headers’ makes the first row the headings, and ‘Changed Type’ has decided the type based on the data in the first 200 rows. The information at the bottom-left of the screen tells me how much data I have:

I currently have 30 columns and 265 rows. The ‘Column profiling’ is the line underneath the headings:

The amount of grey indicates the proportion of null values in the column. This can help me decide whether to keep a column. Alternative conversion factor and PPP survey year are entirely populated by null values. This is further indicated by the ‘Any’ data type. It is important to reduce the size of the data set by removing unnecessary columns as early as possible in the query so that the remaining steps are applied to less data. Since I have 30 columns to choose from, I will use the ‘Choose Columns’ option on the Home tab.

I need to keep any data I want to see, and data that will help me link to other tables, such as the Country Code and the Currency Unit:
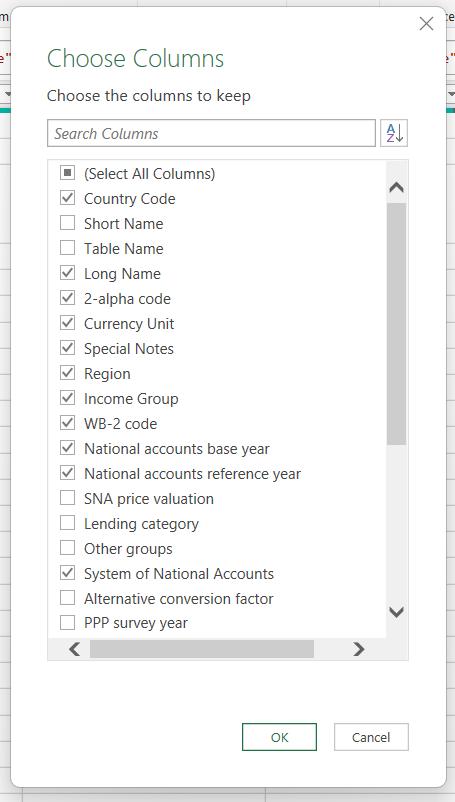
I click OK to see the columns I have kept:
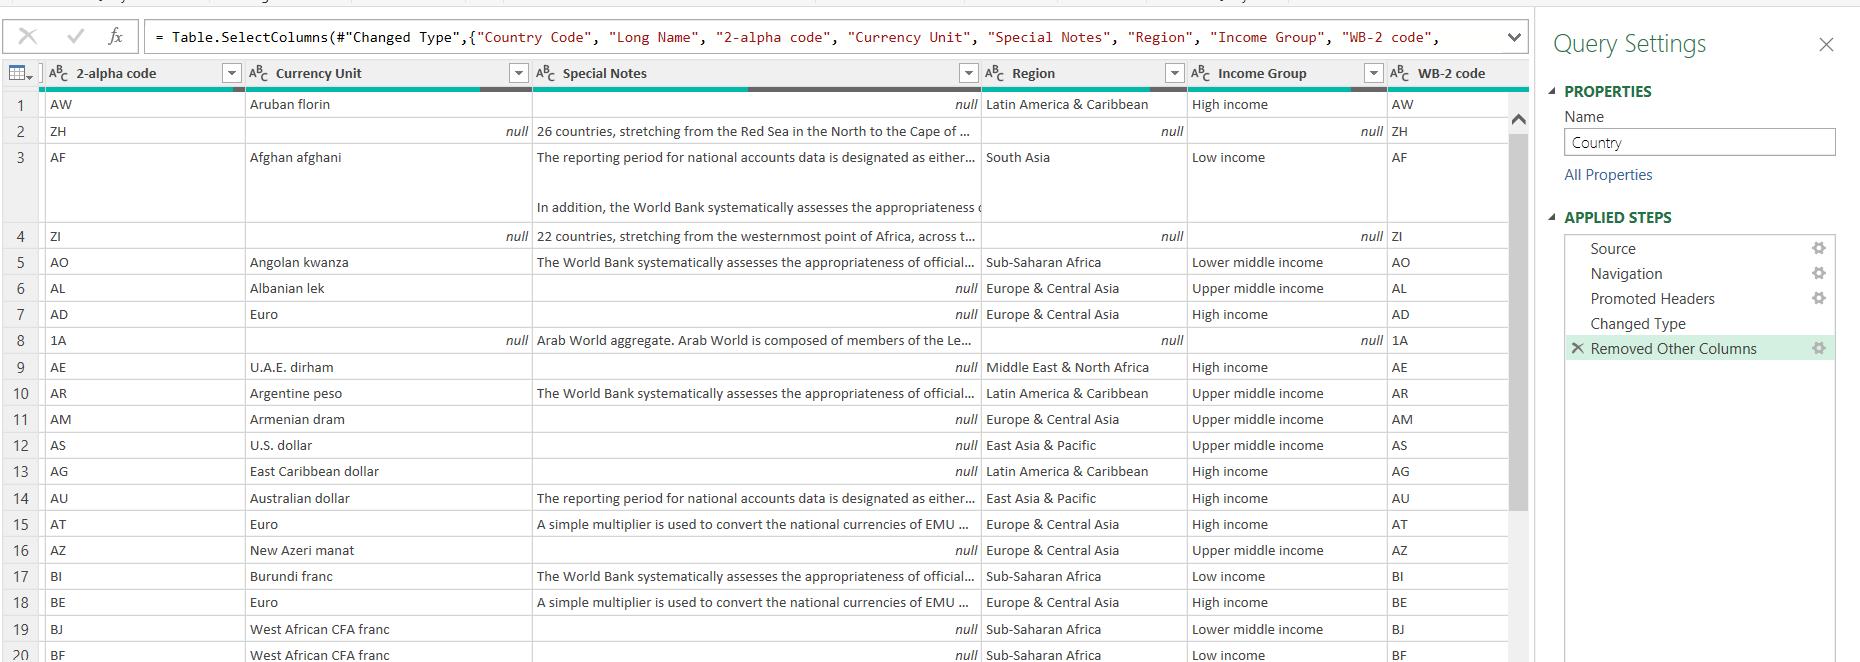
Power Query creates a ‘Removed Other Columns’ step. There is an important distinction between this step and the ‘Removed Columns’ step that is generated if I choose to remove a column. If more columns were to be added to the data source, then it could interfere with later steps in my query. By choosing which columns to keep, I will not pick up any additional columns.
I notice that 2-alpha code and WB-2 code have the same data, so I want to delete the latter. If I delete WB-2 code by selecting it and pressing the delete key, Power Query will create a ‘Removed Columns’ step.

This step is not necessary. Instead, I delete this step and click on the cog icon next to ‘Removed Other Columns’:
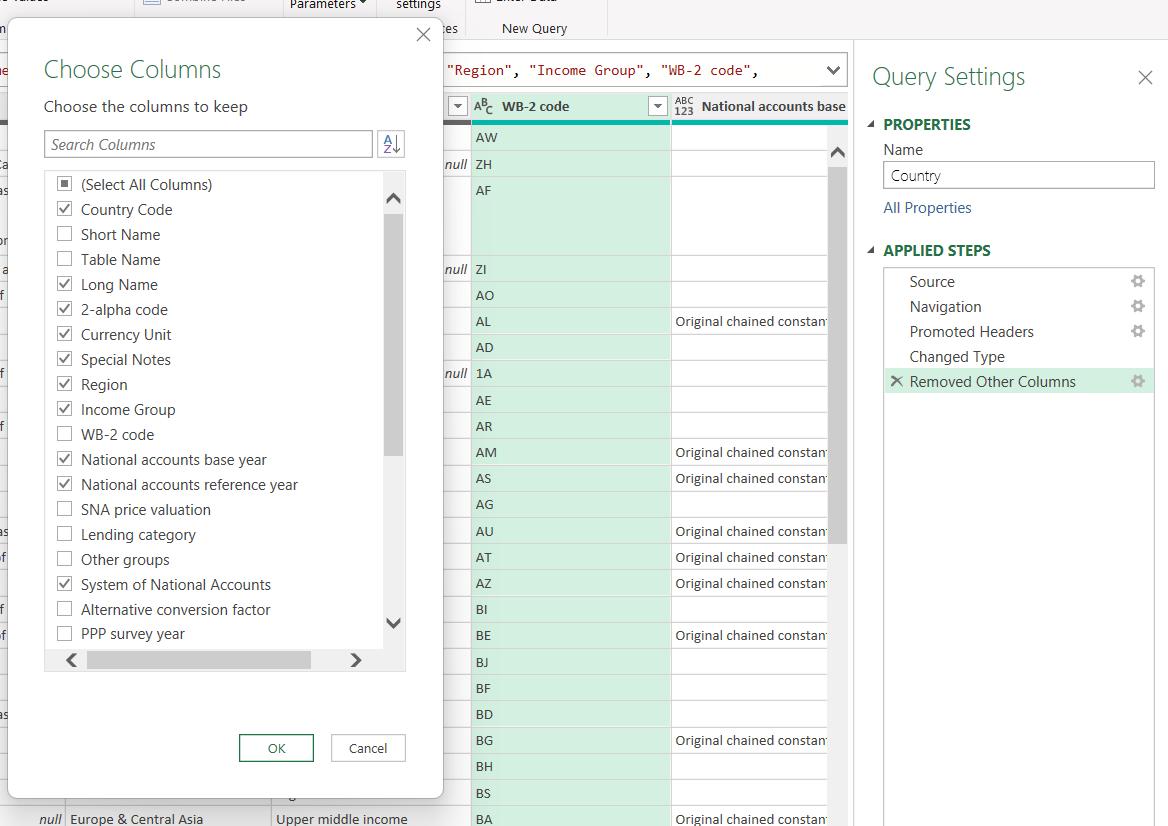
I can uncheck the box for WB-2 code and
click OK, and I have amended the step.

Next time, I will identify and remove any unnecessary rows and continue to transform the data.
Come back next time for more ways to use Power Query!

