Power Query: Split Folder Part 1
2 April 2025
Welcome to our Power Query blog. This week, I look at how to perform transformations in a folder containing different types of files.
I have covered the topic of getting files from a folder in several blogs; the latest series was Excel Files from a Folder Fiddle. In this series, I will look at how I may extract files from a folder, where some of the files require different transformations to others. The folder shown below contains expense data for May 2024, but not all formats are the same:

My task is to include all the data in the same output Table. The XLSM files have the following format:
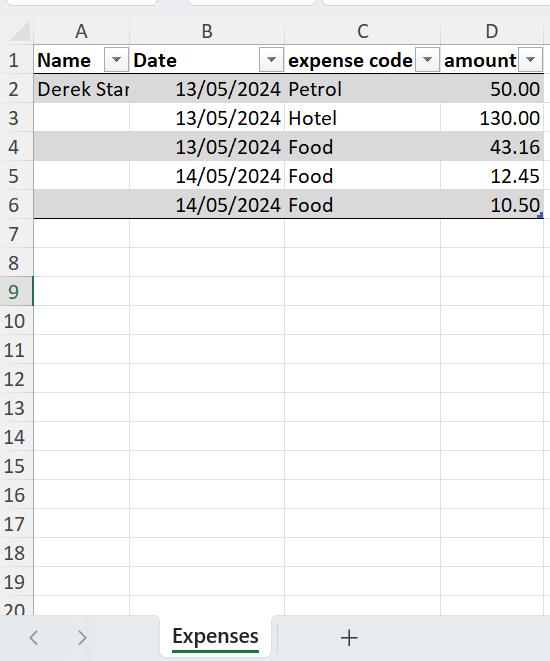
Note that in this example the sheet name is the same for all XLSM files. If it varies, I would need to use the method I described in the Excel Files from a Folder Fiddle series.
The TXT files have a different format:
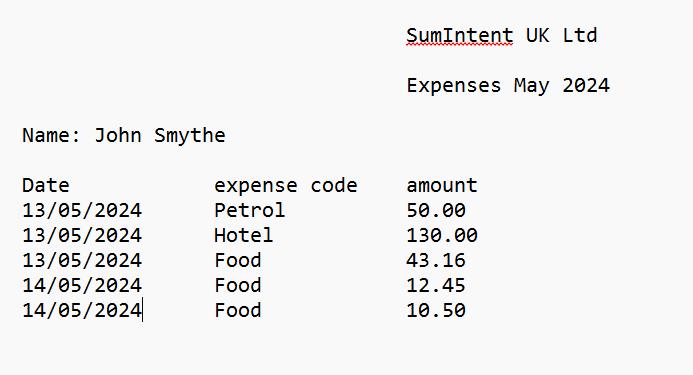
Finally, I have included a CSV file from Newbie:

I will begin with the standard approach. In a new workbook I navigate to the Data tab, and use the ‘Get Data’ dropdown to use the ‘From Folder’ connector:
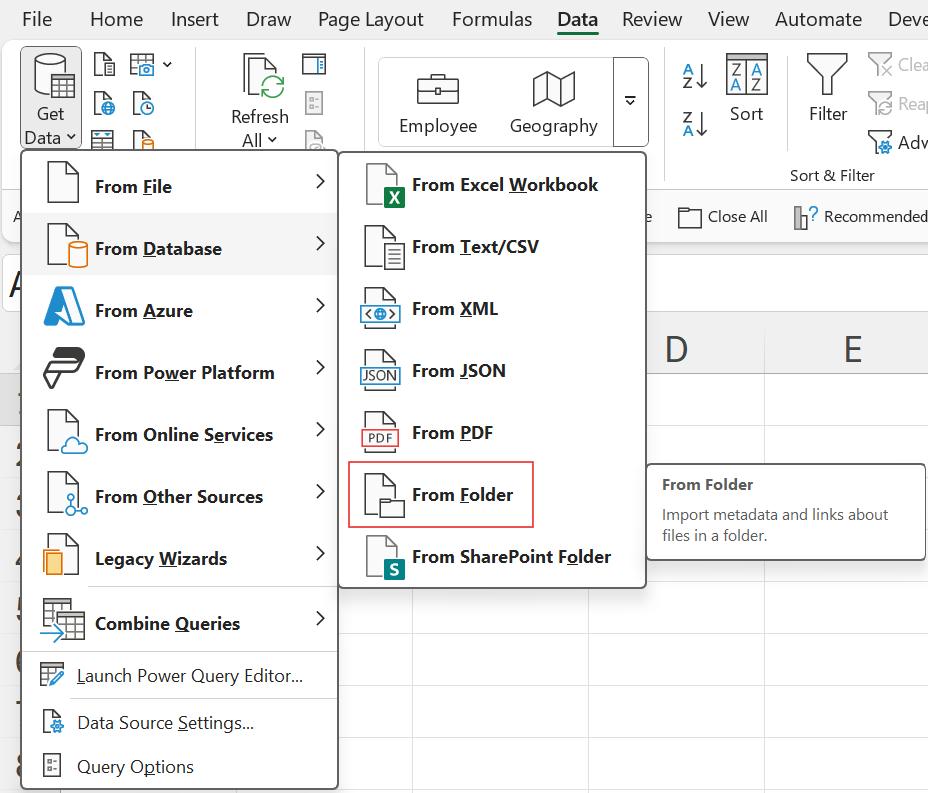
I navigate to the folder containing the expenses, select it and view the Navigator:

The valiant offer to Combine files is tempting, but I know that the data varies for the file types too much for this to be feasible. The process would use the first file (or the file I specify) to determine how to access the data and would encounter errors trying to use the wrong method to pick up data files with a different extension.
I need to do some filtering before I may combine data, therefore I choose to ‘Transform Data’:

The first step is to prepare a base file with my data before I filter. There is no point in using the connector three [3] times. I will perform the transformations I need to do before I split the data into file types.
I usually begin by transforming the Extension column, making all the data UPPERCASE, however I also need to make sure I only keep those files contain expense data in case files are incorrectly added to my folder; this means I will be looking at the Name column too. Therefore, I will transform both columns to UPPERCASE by selecting them and using the option on the Transform tab:

Next, I use the filter dropdown on Name to access the ‘Text Filters’:
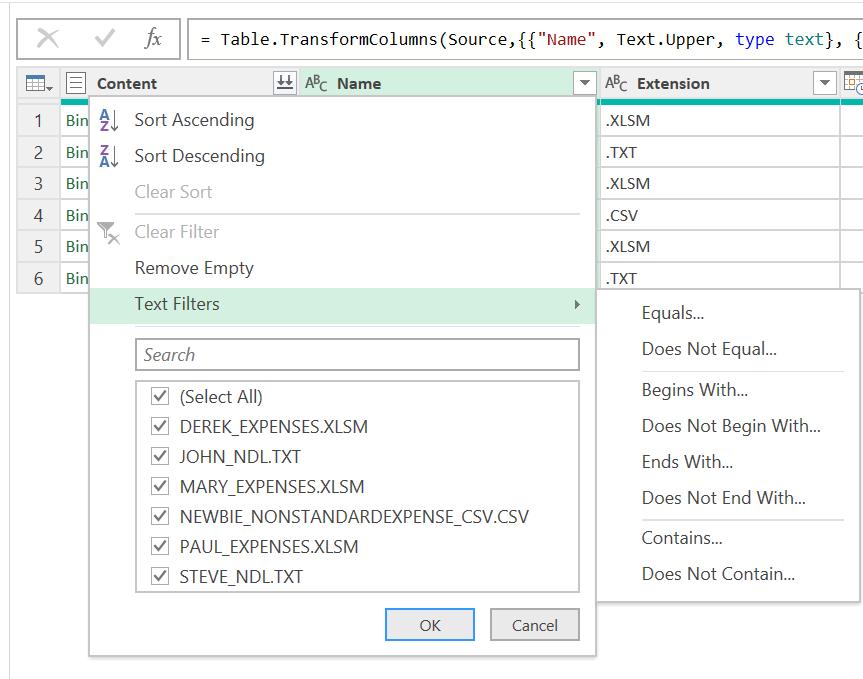
I decide it is reasonable to extract those files with the string ‘EXPENSE’ or ‘_NDL’ in the text. Later in the series, I will show how to achieve this by allowing the user to set parameters, but I shall begin simply.
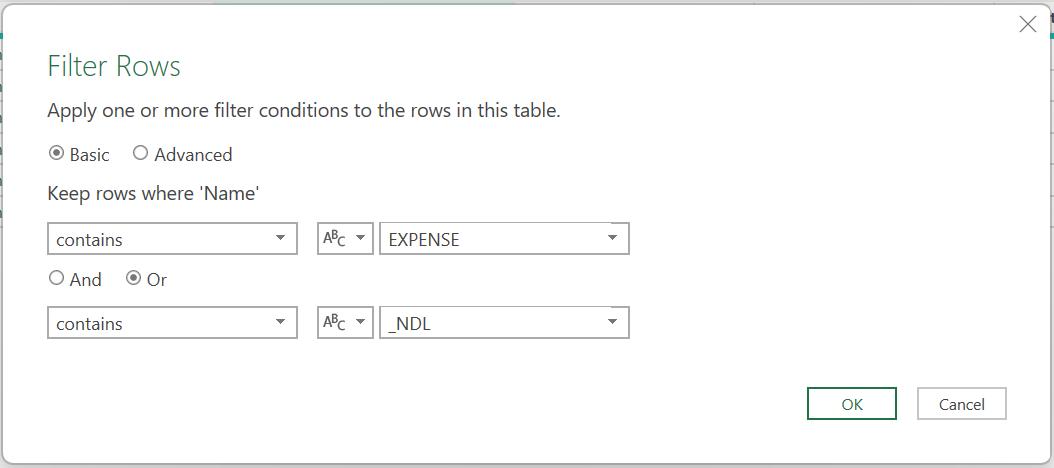
Now this filter has been applied, I will use this query as my base. I rename it Folder Filtered.

I take three [3] reference copies of Folder Filtered:
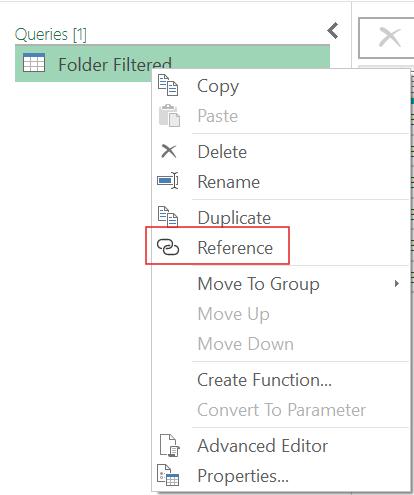
I name them XLSM Files, TXT Files and CSV Files:
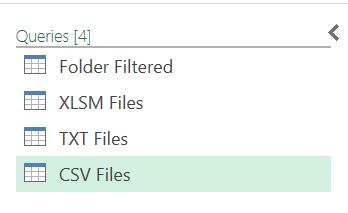
Next time, I will transform the data in these new queries.
Come back next time for more ways to use Power Query!

